Introduction
Welcome to Akigi Dev Journal!
This is where I journal about my experience building my game Akigi.
The multiplayer online world of Akigi.
I'm building Akigi alone using a game engine that I'm writing from scratch, which has me very excited but also comes with its fair share of challenges.
I write in my dev journal every week. Feel free to tag along for the ride.
Format
I write about my progress and struggles on both the game and business side of Akigi.
I post a journal entry every Sunday evening EST.
I include a transparent business and financial update on the first post of every month.
On any given week I might share words, images, videos, charts, or anything else that best communicates the progress and struggles.
Writing Approach
I keep little bullet point notes throughout the week so that I don't forget about things that I want to write more about.
Then at the end of the week I'll write the journal entry and then publish it.
I give it two or three editing passes before publishing.
Don't expect world-class editing or cohesion. It's very much a lightly polished raw dump of implementation details or problems or progress that I found interesting that week.
Code
The core Akigi repository is closed source.
Some of the libraries that power different aspects of Akigi are open source and can be found on my github. I'll eventually make a list of these libraries somewhere.
Akigi's servers, clients, website and tooling are written in Rust.
Comments and Questions
Shoot me an email!
frankie.nwafili@gmail.com
Cheers!
120 - Texture Asset Compilation
May 23, 2021
This week I added some tests for creating and update textures at different mipmap levels and
got them passing in the MetalRenderer. I will need to circle back and get them passing in the
WebGpuRenderer as well.
Now that the new runtime texture atlas allocation process is working, I need to update the asset compilation process to produce textures that can be used by the new system.
The old texture asset compilation code generated textures atlases, but I now instead need to generate individual texture files.
Also, the old process was a binary that had code for compiling many different kinds of assets, whereas ever since 088 new asset compilation is introduced through a plugin system where each plugin is focused on a particular kind of asset.
So I'm creating new asset compilation plugins to handle all of the game's texture asset compilation needs.
After that, I should be able to run the game and have it working with the new runtime texture allocation.
Other Notes / Progress
- Still moving a bit slowly, but working on a plan to better manage my time.
Next Journal Entry
By the next journal entry I want to finish porting all of the old texture asset compilation code over to the new plugin system.
Well Wishes,
- CFN
119 - Better Time Management
May 16, 2021
Last week I decided to abandon WebGL in favor of WebGPU and I feel like I have a new lease on life.
I'm already noticing that while working on rendering abstractions I am now more concerned with and thoughtful about the future, as opposed to being too weighed down by trying to design for WebGL and not having mental space to think about much else.
I refactored a bit of my renderer-test test suite to make it easier to test the contents of specific
textures after running a RenderGraph.
I now need to build on top of this new foundation to add some tests for modifying and copying between GPU textures at different mip map levels.
After that I need to update the old test asset compilation process to generate artifacts that are compatible with the new runtime texture allocation system.
From there I will kept some remaining test cases passing and then finally get runtime texture allocation merged.
Other Notes / Progress
- I've been working on releasing some unrelated software that I'm licensing to another company, and I have been finding it difficult to balance working on Akigi with getting that other software done. This week I will be setting aside time to think through how to better manage my time between these two projects.
Next Journal Entry
I'm a broken record at this point. I need to finish this runtime texture allocation, but honestly my main priority this week is to make a plan for how to better balance my time so that I get back to making consistent progress on Akigi and the engine daily.
Well Wishes,
- CFN
118 - Goodbye WebGL
May 09, 2021
This week I continued working on the runtime texture allocator.
I made more progress on the handling of texture groups problems that I mentioned in 117.
I've begun working on a couple of new renderer conformance tests to ensure that renderer
implementations such as the MetalRenderer and the WebGpuRenderer can properly copy
bytes between textures.
I also made the decision to drop support for WebGL and only support WebGPU for the web.
Moving Away from WebGL
Ever since I first heard of WebGPU a couple of years ago I became excited about the potential to one day stop using WebGL. My code base and this dev journal are littered with dozens of comments to the tune of "we have to do things in this unfortunate way because of WebGL".
I've had to just roll with that since there is no other graphics API for the web that is supported in the major browsers, and it seems like WebGPU won't be well supported until 2022 or 2023.
The straw that broke the camel's back was not being able to read directly from a texture or copy between textures in WebGL. I found out that you need to use framebuffers as intermediaries for reading and copying.
Granted, this pales in comparison to what I had to do to support tiling textures in 072, but for me this was the final straw.
Going forwards I will no longer support WebGL as a backend for the game's rendering.
Instead, I will use WebGPU on the web and just display a modal for now for users that don't have it enabled letting them know how they can enable it.
Over the next year or two that means that way fewer people will end up trying the game, but that's fine because in reality I have a year or two of work before the game is worth trying in the first place.
I'm excited about taking this step. There are a number of graphics features such as texture arrays that I haven't been using since they don't work in WebGL that I can now start to make use of.
I think that the engine has a bright future, and this decision will bring me closer to that future. I just need to make due with the lack of WebGPU support in modern browsers in the near term.
Other Notes / Progress
- While working on this I pulled our some of my conformance testing code into a new crate called conformer.
Next Journal Entry
My first priority is implementing a couple bits of the render graph that the runtime texture allocation needs to make use of. Namely copying subtexture regions between textures.
After that I will switch the game from using the WebGlRenderer on the web to using the
WebGpuRenderer.
This switch in and of itself should be fairly straightforwards since the game is designed to
work with anything that implements my Renderer trait.
Still, there will be a good bit of work to do to see the game running on top of WebGPU since
my WebGpuRenderer currently only passes a small fraction of my renderer test suite.
I'm looking forwards to getting passed this hurdle since the modern graphics APIs like Metal and WebGPU are significantly better to work with than older APIs like WebGL.
There will be some pain over the next year or so while browsers don't yet support WebGPU, but once the major browsers support it I will be in a spectacular position.
I just need to ride it out until then and be okay with way fewer people trying out the game in the meantime, since virtually no one will have WebGPU enabled and very few will elect to enable it.
It's fine though. WebGL was really holding me back from diving in to some more advanced features that I want to implement but would have been either a pain or impossible with WebGL.
Well Wishes,
- CFN
117 - Runtime Texture Groups
May 2, 2021
The runtime texture atlas allocator saga continues.
Towards the beginning of the week I added a method to rectangle-pack to allow the freeing of placed rectangles.
This gives me the ability to de-allocate textures by removing their corresponding rectangle
within the engine's RectanglePackAllocator.
Over time I plan to add more allocators to support different kinds of allocation strategies, such as allocating an atlas that I know will contain subtextures that are all the exact same size.
For now, however, the RectanglePackAllocator is the only implemented allocator.
After this I started working one of the more complex parts of the runtime texture allocation process, handling grouped textures.
Handling Texture Groups
Certain textures need to always be placed in the same texture atlas as other textures. For example, a base color texture for a physically-based texture needs to always be in the same atlas as the corresponding normal map.
To achieve this, I'm tracking the atlas that the first member of a group gets placed in.
When subsequent members of a texture group are being placed, they all get placed into that same atlas.
If we try to place a group member and it can't fit, we move all of the members of the group to a different atlas and then place the new texture into that atlas.
In this way, we ensure that textures in the same group are always in the same atlas regardless of whether or not we download and buffer them at the same time and regardless of the order that we buffer them.
Monthly Finances
The finances for April 2021 were:
| item | cost / earning |
|---|---|
| revenue | + $4.99 |
| Stripe fees | - $0.44 |
| aws | - $218.22 |
| adobe substance | - $19.90 |
| GitHub | - $9.00 |
| adobe photoshop | - $10.65 |
| --- | --- |
| total | - $253.22 |
Other Notes / Progress
- Started working on a method in rectangle-pack to coalesce freed rectangles.
Next Journal Entry
I'm going to continue working on the runtime texture allocation. Things are moving a little slowly since I've been busy writing other software in order to bring in more money in the near term, but day by day I am getting better at balancing all of my efforts.
Well Wishes,
- CFN
116 - Texture Atlas Overhaul
April 25, 2021
After a few weeks in a row of barely getting any Akigi work done while trying to tie off other unrelated loose ends, I got back on task and started to get warmed up this week.
What started off in 112 as a work stream to gradually introduce a runtime texture atlas allocation strategy in order to replace the current process of creating atlases in an offline asset compilation step has now evolved into just ripping off the bandaid all at once and moving all of my texture atlas usage to use run time allocated textures.
This will involve refactoring the texture related parts of my asset compilation process now that I no longer need to generate texture atlases at asset compile time.
One of the main reasons for moving to run time allocation is that it is much more space efficient. It isn't possible to know when at asset compile time which textures will be needed at any given time since it all depends on where a player is in the world and what other players are around.
So, by dynamically downloading only the textures that we need and placing them into atlases at run time we are able to ensure that we're only downloading and buffering textures that are actually using.
In the future I'll implement a deallocation strategy to free up space for textures that have not been used in a while. I'll also at some point think through de-fragmentation strategies.
The reason that I'm migrating everything now instead of slowly over time like I originally planned to is that doing it all at once will mean that I won't have to maintain and deal with the old code.
Implementation
On the CPU side I'm using lightweight representations of texture atlases in order to keep track of which textures are placed in which atlases.
#![allow(unused_variables)]
fn main() {
/// Keeps track of textures allocated on the GPU during runtime, along with the used and free space
/// within each texture atlas.
/// This allows us to use a few textures on the GPU to store many different textures.
///
/// The VirtualTextureAtlasesResource serves as a 2d focused allocator.
#[derive(Debug)]
pub struct VirtualTextureAtlasesResource {
    next_atlas_id: VirtualTextureAtlasId,
    virtual_atlases: HashMap<VirtualTextureAtlasId, VirtualTextureAtlas>,
    // TODO: Perhaps HashMap<SubtextureId, (VirtualTextureAtlasId, SubtextureLocation)
    //  to avoid the extra indirection when looking up subtextures.
    // TODO: Yeah, this will need other information such as the GroupId of the texture so that
    //  we can place it with other group mates in the future.
    subtexture_to_atlas: HashMap<SubTextureId, VirtualTextureAtlasId>,
}
}
No actual texture data is stored in the VirtualTextureAtlasesResource, just the sizes of the atlases and
placed subtextures.
A VirtualTextureAtlas looks like this:
#![allow(unused_variables)]
fn main() {
#[allow(missing_docs)]
pub type BoxedVirtualTextureAtlasAllocator = Box<dyn VirtualTextureAtlasAllocator + Send + Sync>;

/// Corresponds to a texture on the GPU.
#[derive(Debug)]
pub struct VirtualTextureAtlas {
    size: u32,
    allocator: BoxedVirtualTextureAtlasAllocator,
    mipmapped: bool,
}
}
Different texture atlases are able to use different allocation strategies by using a different VirtualTextureAtlasAllocator
under the hood.
For example, if an atlas is meant to hold textures that will always be the same size you might use a much simpler allocator than if you need to be able to allocate and deallocate textures of unpredictable sizes.
Let Go Engine will ship with a few commonly useful allocators, but anyone can implement the VirtualTextureAtlasAllocator trait
themselves for more custom approaches.
There are a number of complex cases that need to be handled by the runtime texture allocation logic.
For example, some textures need to be in the same atlas as other textures. One example of this is with physically-based rendering textures, where you'll typically want your base color, roughness, metallic and normal textures all in the same atlas.
Well, a more modern approach is to just use texture arrays for PBR textures and not use an atlas at all, but I am currently supporting WebGL until WebGPU is supported in Chrome by default so I need to deal with a bit more complexity until then.
Mipmaps
As part of the work on how textures are handled, I'm also moving towards generating all mip levels myself at asset compile time and then downloading all of them at runtime.
WebGL allows you to automatically generate mipmaps, but modern graphics APIs do not. So while I'm in the mode of improving how textures are handled I decided to take care of generating my own mipmaps. This is actually fairly simple, I just need to resize the texture a bunch of times to half the previous size.
In this first implementation I will just serialize all of the PNGs for a texture's mip levels into one file that gets downloaded at runtime, but in the future I will need a smarter approach since depending on a users settings they might not need the most detailed mip levels possible.
I'll worry about that later though, handling that shouldn't have much of an on the overall design.
Other Notes / Progress
-
Learning some Swift in order to build the iOS portion of an application that I'm licensing to another company. I'm expecting that picking up a new modern language will end up making me a better Rust programmer since I will be exposed to even more programming ideas and approaches.
-
Getting started on adding support for coalescing freed bins to rectangle-pack. This will power runtime deallocation within Akigi.
Next Journal Entry
By the next journal entry I plan to finish implementing runtime texture allocation and deallocation, and be a good way through removing my existing compile time texture atlas code in favor of instead preparing the textures to be runtime allocated.
Well Wishes,
- CFN
115 - Slow, Again
April 18, 2021
Short week again this week as I work on closing on a software licensing deal for a separate piece of software that I am working on.
I'm still working on the runtime texture allocator. I honestly haven't made very much progress on Akigi over the last two months, otherwise this should have been done by now.
Now that I've sent out the contract for the software licensing deal I can turn my focus back to making progress here.
In general I need to figure out how to better balance Akigi progress with other forms of work that pay the bills at the moment. I'll keep trying new things and improving on this front.
Other Notes / Progress
- I released dipa this week and it looks like other people found it useful as well.
Next Journal Entry
Yet again, finish the runtime texture allocator.
Well Wishes,
- CFN
114 - Dipa Released
April 11, 2021
This week I'm releasing dipa, a framework for efficiently delta encoding large Rust data structures.
I've been working on the library for the last few weeks. I plan to make use of it in Akigi so I consider it to be work for the game, but it isn't the most interesting thing to write in a game development focused journal.
Now that it's released I'm going back to what I was working on before I decided to get it finished.
Namely, I'll be finishing the new runtime texture allocator and then making use of it in order to start rendering icons for game items.
Other Notes / Progress
- dipa took my procedural macro writing skills to the next level. I'm excited to keep learning more about writing macros in the years to come.
Next Journal Entry
Runtime texture allocator. And hopefully I'll have some screenshots of the game to share since it's been a while.
Well Wishes,
- CFN
113 - Delta Encoding
April 4, 2021
For the last couple of weeks I've been working on a library that I plan to use for delta encoding state changes in Akigi.
I should have it done in the next week or week and a half, and when it's ready I will be open sourcing it.
I'm excited to announce and share it. It'll be cool if other people find use out of it, but we'll see.
I'll talk more about it and share a link to it once its ready.
Then we can get back to finishing the run time texture allocator and then get back to working on the crafting interface.
Other Notes / Progress
- Excited to finish and share the library.
Monthly Finances
The finances for March 2021 were:
| item | cost / earning |
|---|---|
| revenue | + $4.99 |
| Stripe fees | - $0.44 |
| aws | - $199.46 |
| adobe substance | - $19.90 |
| GitHub | - $9.00 |
| adobe photoshop | - $10.65 |
| --- | --- |
| total | - $234.46 |
Next Journal Entry
I'll be finishing up the delta encoding library. Then after that I can get back to Akigi gameplay work.
I will be back next week. Goodbye for now.
- CFN
112 - Texture Allocator Progress
March 28, 2021
I started off this week working on building out the runtime texture allocator.
I made great progress on this front and have a basic allocator working. I'm in the middle of refactoring parts of Akigi to start making use of the new allocator.
During the last half of the week I took a break from working on the allocator and spent time working on a library that I'm planning to open source soon.
I think that the library will be a game changer for applications that deal with synchronizing state between clients and servers, so I'm very excited to get it working and released. More details to come.
Other Notes / Progress
- I've been in procedural macro land for a few days while working on this new library. I'm much more comfortable with writing proc macros than I was back in 2018 or so when I wrote Percy.
Next Journal Entry
I'm going to spend a bit more time working on that open source library that I plan to publish in the coming weeks.
I'll also be spending more time getting the texture allocator working in the game so that I can move on to working on game play again.
We'll get there,
- CFN
111 - Focus
March 21, 2021
I have an interview on the 22nd that I've been preparing for.
I haven't touched Akigi since my last journal entry.
I'm going to need to reflect on what led to that. Akigi and the engine are such a large part of my life that it's weird to go a week without them.
Oh, I have a name for the engine now. It came to me during the week. A few months ago I thought I had a name, but it didn't end up sticking with me so I ditched it.
From now on I will be referring to the engine and editor by their new name:
Let Go.
Other Notes / Progress
I can't remember the last time that I didn't touch Akigi for a week so I feel a bit off on that front.
A minor set back for a major come back I suppose.
Next Journal Entry
The main thing to have in place by the next journal entry is a loose schedule for what I'm planning to deliver.
Any features that I build after that are a bonus. I'll be diving back into working on the run-time texture allocator.
I will be back next week. Goodbye for now.
- CFN
110 - Five Year Anniversary
March 14, 2021
Another anniversary. March 8th, 2021 marked five years since the first commit to the Akigi repository.
One of my main goals when starting Akigi was to work on a project that I was very enthusiastic about.
I wanted a project that was a never ending source of challenging technical problems.
So far, Akigi and the projects that it has spawned have lived up to that initial goal, and I don't see that slowing down over the next five years.
Another goal that I had was to have the game released and profitable. I haven't released Akigi yet, and so it certainly isn't profitable. I'm working to buck that trend, but it's a bit of a challenge to say the least. I'm working to get the game fun and live sooner rather than later.
Since Last Year
I built a lot over the last year and it was fun the entire way. A few things that stick out to me:
I introduced the game editor in 075. I remember going on runs last year excitedly working through thoughts on how to implement a terrain sculpting tool. Now it's alive and incrementally improving.
I implemented goal-oriented action planning in 061. That was a fun one since it was fairly complex and the end result of having NPCs making real time decisions felt cool and powerful.
Implementing additive animation blending in 098 was another fun one. I remember writing my first skeletal animation system back in 2016. Comparing that to the much more powerful system that I have today reminds me of how much I've learned.
Five Years from Now
I'm not sure where the project will be in five years, but there are a few things on my mind that would be cool to see.
I want the renderer to be industry grade. All of the modern graphics effects should be possible in the engine.
I've also been thinking about licensing the engine out to other web-focused companies.
Right now the game editor is still fledgling. I want it to continue to mature over the next five years.
I also want to have a great cross platform story, including iOS and android.
Mainly, I think that a Rust-based industry-grade game engine with an excellent web story would bring something new to the table. The next five years should move me closer to that dream.
Other Notes / Progress
I've been swamped with various other responsibilities lately and my Akigi work has taken a temporary hit.
I should be back in gear at the beginning of April. In the meantime progress will be a bit slower than usual.
Next Journal Entry
If I can get the runtime texture allocator live by the next journal entry I'll call that a win.
I will be back next week. Goodbye for now.
- CFN
109 - Editor Undo Redo
March 7, 2021
This week I got undo and redo working in the editor.
This was important to get in place sooner rather than later so that I didn't build up a large number of edit operations that I would later have to implement undo operations for after the fact.
I'm happy with how the undo redo architecture turned out and continue to remain excited for the long term potential of the editor.
Runtime Texture Allocator
The ak dist game-asset CLI command prepares all of the game's assets. This includes work such as exporting meshes from Blender
or rendering icons for items.
Part of this asset preparation process assembles the game's textures into one of several texture atlases that the game later downloads at run time.
This is a flawed approach since in order to get access to one texture you have to download an entire atlas that might contain textures that you don't currently need. Texture memory is a finite resource, so this waste can show itself quickly, especially on mobile devices.
I'm moving towards a different approach where individual textures are downloaded as needed at run-time and inserted into GPU textures in a location determined by a CPU side runtime texture allocator.
For now this allocator is just wrapping rectangle-pack, but in the future I can imagine having an enum of a few different allocators that I can choose from based on the different trade-offs.
This is a work in progress. I don't plan to implement de-allocation until some future time, so I should be able to slot rectangle-pack
in as it exists today. In the future, though, I'll need to give rectangle-pack support for re-introducing free space back into a bin so
that it can be used to handle de-allocations.
Other Notes / Progress
Switched to using a g4ad 4x large on demand EC2 instance to power the linux portion of my GitHub Actions CI.
This is because the asset compilation process now uses wgpu-rs in CI when generating icons for textures, which means that I needed the CI instance to have a GPU.
wgpu-rs is using Vulkan under the hood on Linux, so I had to fiddle a bit with installing Vulkan drivers.
I also needed to ditch Docker in CI since I couldn't find a way to interface with the host machine's AMD GPU from within a Docker instance.
I keep the instance shutdown when I am not using it since it costs over $300/month to leave online at all times.
Since it's almost always off I should only end up paying around $5/mo or less for it.
Monthly Finances
The finances for February 2021 were:
| item | cost / earning |
|---|---|
| revenue | + $4.99 |
| Stripe fees | - $0.44 |
| aws | - $234.66 |
| adobe substance | - $19.90 |
| GitHub | - $9.00 |
| adobe photoshop | - $10.65 |
| adobe illustrator cancellation fee | - $44.76 |
| Datadog Inc | - $7.87 |
| --- | --- |
| total | - $322.29 |
Next Journal Entry
March 8th if the five year anniversary of the first commit to the Akigi codebase.
I'll be reflecting on that in next week's journal entry.
I will be back next week. Goodbye for now.
- CFN
108 - In Need of a Deadline
February 28, 2021
I did not get a ton of work done this week, so not much to report on.
I abstracted out the code for rendering meshes and have started leveraging it in the item icon generation plugin.
Right now I am not rendering any meshes and am instead just rendering a clear canvas. This week I will work on rendering real meshes in order to generate the item's icon.
Other Notes / Progress
- Moved away from
typetagand for now I will be maintaining an enum for serializing and de-serializing asset variants.
Next Journal Entry
The first thing to get done this week is to start rendering real meshes in the item icon generator.
I also need to get back to finishing up the undo/redo feature in the editor.
Most importantly, I will be taking time to break down what I need to do to have a playable game live.
I need to figure out a deadline for a release. After which I can continue to improve and add new features.
I will be back next week. Goodbye for now.
- CFN
107 - Item Icon Plugin
February 21, 2021
This passed week I worked on an asset compilation plugin that iterates over all of the
items in the items.yml definition file and generates icons for them.
A big part of this workstream is refactoring out code from the game-app crate into a more general
purpose crate so that the item-icon-plugin, as well as other future plugins, can easily render
things.
Along the way I began to port the game-app crate to the new approach to loading and storing assets.
In short, most of the work here is to refactor and move existing logic until it is easily re-usable from anywhere.
Other Notes / Progress
- The new asset loading process relies on typetag, but
typetagdoes not work when targeting WebAssembly. So I will need to move away from it.
Next Journal Entry
I hope to finish the item icon generation asset compilation plugin by the next journal entry.
After that I will make some changes to how textures are loaded and buffered at run-time in order to set a foundation for being able to load and unload individual textures on the fly.
Currently all textures are packed into assets during asset compilation. This means that you have to download a bunch of textures that you are not using.
After my changes texture atlases will be created at run-time with only the textures that you need.
I will be back next week. Goodbye for now.
- CFN
106 - Crafting UI Early Peek
February 14, 2021
Since the last journal entry I continued to make progress on the crafting interface.
I also started working on supporting undo and redo in the editor.
Crafting UI
Because the crafting UI is the first complex interface in the game, building it is requiring me to lay a good bit of UI foundation.
This passed week continued along that trend.
I introduced a UiComponent trait as well as a UiButton to make it easier to make buttons.
/// A component that can be converted into UIElement's to be pushed to a UserInterfaceResource.
pub trait UiComponent<UiId: Hash, N, I: KeyboardInputNormalizer<N>, TextAreaId> {
    /// Create UIElement's from this component and push them to the UserInterfaceResource.
    fn push_ui_elements(
        self,
        user_interface: &mut UserInterfaceResource<UiId, N, I, TextAreaId>,
        viewport_id: ViewportId,
    );
}
Over time I will continue to add more components.
I also made improvements to the GridLayout type to make certain layouts easier, such as laying out
items in a row.
The crafting interface still needs textures as well as some positioning cleanup and functionality such as dragging and dropping ingredients in between ingredient slots. So there is more work to be done.
Item Icon Generation
I started working on an asset compilation plugin that can generate icons for every item in the game.
I mentioned a need for this around a month and a half ago in 099.
Once this works every item in the game will have an icon.
This will make it much easier to know what ingredients you are attempting to use while crafting.
Editor Undo Redo
I spent some time early in the week thinking through the design of the editor's undo/redo system.
One interesting case that I needed to design for was undoing a brush stroke.
If a user is in terrain sculpting mode and clicks and drags their mouse, multiple edits are applied.
If they press undo they should go back to the moment before they first pressed down the mouse.
This meant that undo could not simply undo the last edit. It needed to be possible to go back to some state from multiple edits ago.
I ended up landing on a design where when we are pushing a new UndoDescriptor to the undo stack I use a
match statement to determine whether or not to simply combine the new descriptor with the one at the top of the
stack.
This allows me to have one big UndoDescriptor to be able to undo multiple terrain sculpting edits.
impl UndoRedo {
    /// Push an undo descriptor onto the undo stack.
    ///
    /// If the stack is full the item at the bottom of the stack will be removed.
    pub fn push_undo_desc(&mut self, undo_desc: UndoDesc) {
        if self.undo_stack.len() == UNDO_STACK_MAX_SIZE {
            self.undo_stack.remove(0);
        }

        if let Some(stack_top) = self.undo_stack.last_mut() {
            match (stack_top, undo_desc) {
                (
                    UndoDesc::TerrainDisplacement(stack_top),
                    UndoDesc::TerrainDisplacement(incoming),
                ) if stack_top.stroke_id() == incoming.stroke_id() => {
                    stack_top.combine_with(incoming);
                }
                (_, undo_desc) => {
                    self.undo_stack.push(undo_desc);
                }
            };
        } else {
            self.undo_stack.push(undo_desc);
        }
    }
}
I still need to create UndoDescriptor's for all of the existing edit operations that were created before I introduced'
undo/redo. I plan to take care of that this week.
Other Notes / Progress
-
Canceled my Adobe Illustrator subscription since I have not touched it in months. Had to pay a $41 cancellation fee.
-
Planning to start using a
g3 4x largeEC2 instance for CI jobs since once I have the item icon generation working I will need access to a GPU when compiling assets. At over $1/hr ag3 4x largeis too expensive for me to leave running at all times, so I will start it up whenever I need to run CI and set up a CloudWatch alarm to have it shutdown whenever it has been idle for 15 minutes.
Next Journal Entry
My focus this week will be getting the item icon generation asset compilation plugin working.
After that I will set up a self hosted GitHub actions runner on an EC2 instance that has a GPU. I'm expecting to fiddle a bit with installing Vulkan drivers.
If I get all of that working this week I will get started on implementing drag and dropping items into crafting ingredient slots.
I will be back next week. Goodbye for now.
- CFN
105 - Slow Week
February 7, 2021
This week I worked on the crafting user interface. The buttons are technically working, but the interface is just quickly thrown in and needs to be cleaned up.
I should have had it all cleaned by this journal entry, but I did not get as much work done last week as usual.
I made a dating app account and spent quite a bit of time on it, which took away from time that is usually spent focusing on Akigi.
Thankfully I think that I've re-gained control and don't feel as much of an impulsive urge to check and use the app.
So I should be getting a normal amount of work done by the next journal entry.
Other Notes / Progress
- Some ergonomic improvements to the engine's user interface crate. Quite a ways away from having something that feels seamless, but I'll get there over time.
January Finances
The finances for January 2021 were:
| item | cost / earning |
|---|---|
| revenue | + $4.99 |
| Stripe fees | - $0.44 |
| aws | - $225.79 |
| adobe substance | - $19.90 |
| GitHub | - $9.00 |
| adobe photoshop | - $10.65 |
| adobe illustrator | - $22.38 |
| Datadog Pro | - $8.12 |
| MacBook Pro | - $3,899 |
| --- | --- |
| total | - $4190.29 |
Next Journal Entry
For the next journal entry I will be focused on getting the crafting interface cleaned up.
I'll also continue to work on the game editor.
Some of the upcoming features are undo/redo, some enhancements to terrain editing, and introducing the ability to edit tiles so that I can control which tiles can be walked on.
I will be back next week. Goodbye for now.
- CFN
104 - More Crafting Progress
January 31, 2021
This week I finished implementing the code for being able to craft all of the intermediary items that go into crafting bows.
It is now very easy to add new items and crafting recipes into the game.
Next I need to create the models and textures for all of the new items, as well as the user interface for crafting.
There is a fair chunk of UI work to do, but as usual most of it is foundation work that will make future UI work easier.
Editor Improvements
I added the ability to delete scenery from within the editor by pressing x followed by Return.
Other Notes / Progress
Slowly but surely it is getting easier to add in new game play.
The inflection point is near.
Next Journal Entry
The top priority for this week is to work on adding the crafting interface into the game.
I will also be implementing Undo/Redo in the editor.
I will be back next week. Goodbye for now.
- CFN
103 - Editor Placement Previews
January 24, 2021
I got back into routine this week after spending the end of last week and the first couple days of this week at my sister's house.
No big milestone this week, just steady progress on the important fronts.
Crafting Improvements
I'm making strides in the crafting system. All of the progress is still on the data structures, functions, unit and integration tests side of things so there isn't anything visual for me to share yet.
My approach to adding a new feature such as the crafting system is to first create an integration test for it where I simulate one or more players engaging with the gameplay.
I then bounce between adding an assertion to the integration test to implementing and unit testing all of the required new functionality to power that line.
This approach has been instrumental for me in a number of ways.
One example is that it gives me clear direction on exactly what needs to be built to support real game play.
Without a gameplay oriented integration test it can be difficult to know what functionality to focus on now as opposed to functionality that I can circle back to later.
For example, there are multiple unimplemented match expression branches within the function that checks to see if you meet the criteria for a recipe
because I know that none of the things that you are currently able to craft touch those code paths.
When those code paths get hit by real crafting recipes, I will implement them.
Here's a snippet of the integration test for crafting a bow thus far:
// ... snippet ...

 #[test]
fn bowcraft_craft_bow() -> TestResult {
    let game_thread = GameThread::new_with_game_server_config_modifier(
        client_comps_source_new_player_at_pos(PLAYER_ID_1, PLAYER_POS),
        |config| {
            config.initial_entities = Some(InitialEntitiesConfig::new(initial_spawns()));
        },
    );
    let player = game_thread.connect_player_tick_until_in_world(PLAYER_ID_1)?;

    make_sharp_stone(&player, &game_thread)?;
    make_twisted_sinew(&player, &game_thread)?;
    make_sticky(&player, &game_thread)?;

	todo!();

    game_thread.shutdown()
}

// ... snippet ...

 fn make_sticky(player: &ConnectedPlayer, game_thread: &GameThread) -> TestResult {
    make_clay_bowl(player, game_thread)?;
    harvest_acacia_tree_sap(player, game_thread)?;

    player.pickup_entity(EntLookup::DisplayNameOne("Clay"));
    player.tick_until_has_item_with_quantity(ItemId::Clay, 1, &game_thread, 10);
    make_wet_clay(player, game_thread)?;

    let sticky_request = CraftingRequest::new(
        CraftingAction::Mix,
        &[ItemId::BowlOfAcaciaTreeSap, ItemId::WetClay],
    );
    player.send_crafting_request_wait_for_ack(sticky_request)?;

    player.tick_until_has_item_with_quantity(ItemId::BowlOfSticky, 1, &game_thread, 10);
    player.assert_has_item_with_id_and_quantity(ItemId::BowlOfAcaciaTreeSap, 0);

    Ok(())
}

// ... snippet ...
This week I added support for stations. An entity can have a StationComponent that allows it to be used as a station during crafting.
For example, when you want to harden a clay bowl you need a station with a Fire {hotness: Tier} component with a hotness of at least Tier::Two.
One way to satisfy the requirement is by using a Fire Pit entity as a station, but any hot enough entity will do just fine.
Editor Improvements
Last week I simplified the editor's game pane by culling it down to two main modes, Play Mode and Edit Mode.
Within the Edit Mode there are the sub-modes of Object and Terrain, each geared to different editing activities.
While in GamePane -> Edit Mode -> Object Mode you are able to edit and place scenery and entities within the game world.
Towards the end of the week I added the ability to see a preview of what you are placing.
Renderables that the editor injects into the game's render descriptor can not be textured currently, so the previews are rendered as all red for now.
Networking Improvements
While I was at my sister's I took a break from my usual work and worked on different operations related tasks.
The last of these was making the rate that client updates were sent out more consistent, which ended up running over into a couple of days after I came back from my sister's house.
Previously the amount of time between updates could vary based on how long a game tick took to run.
Before this change, if the game ticks were 600ms each and one tick took 5ms to complete then the next tick took 305ms to complete client updates would be sent 900ms apart.
After this change all updates would be sent 600ms apart, regardless of how long the tick took to run.
The advantage of this change is that it will make latency compensation easier on the client side.
As long as the variance in your ping isn't above some very forgiving threshold, the client can dynamically adjust different interpolation speeds so that you don't notice variations in latency.
I have not started on latency compensation on the client side. I will need to implement that at some point.
Other Notes / Progress
- Bought a new laptop that will arrive in a couple of weeks. Going to use my current laptop for consulting work and my new laptop for working on Akigi. This was mainly motivated by the fact that I need to send my current laptop in to get the keyboard repaired and I don't want to go five days without a laptop. But, I don't plan to return the new one since I'm very interested in exploring how having multiple machines for different purposes can help to boost my focus. When I some day end consulting I may dedicate the older machine to art or sound or something else.
Next Journal Entry
By the next journal entry I plan to have finished implementing the ability to craft a bow on the code and data side of things.
From there I will need to add in the user interface for crafting as well as new models for all of the new resources and raw materials that I have added, which I will start working on but will not be finished by the next journal entry.
I will also continue making progress on the editor. I plan to add the ability to move and delete scenery.
I also plan to fix an issue with terrain editing where painting terrain is not working at the edges of terrain chunks.
I will be back next week. Goodbye for now.
- CFN
102 - Brief Deviation
January 17, 2021
I was rocking and rolling during the first few days of the week, but on Thursday I went to visit my sister and I will not be back home until Tuesday.
During this travel time I decided to do performance and operations work since I find it easy to stay focused on that even when I am not in my normal routine.
When I am back home I will go back to working on game play features.
Crafting
I am still working on being able to harvest and craft all of the intermediary resources and items that go into making a bow.
As I go I am introducing the various data structures and logic that powers crafting, which is time consuming this first time around.
Adding new items to craft will be much easier once all of this foundation is in place.
Editor Improvements
I made it so that if you are in a game pane you can press tab to switch between playing and editing mode.
When you are in edit mode you can switch between sub modes such as terrain editing or object editing mode using the spacebar followed by a letter.
So Space -> T for terrain edit mode or Space -> O object edit mode.
Performance Fix
I performance profiled pathfinding while on the plane to my sister's state.
I fixed the performance regression that I introduced in 101.
 The average time to complete a game server tick. Lower is better.
Other Notes / Progress
- Moved from Datadog to an ELK stack running inside of my Kubernetes cluster. At some point I will look into Prometheus. I'm new to dev ops so I'm not sure when and how to use all of these tools. I'm learning as I go.
Next Journal Entry
I will be back to my regular routine on Wednesday at which point I will get back to working on the bow crafting system.
In the meantime I am working on a tweaking the way that players get updated with new game state.
Previously the time that updates were sent could vary based on how long the game tick took to run.
After this change they will always get sent at the same interval regardless of how long the tick took to run.
I will be back next week. Goodbye for now.
- CFN
101 - Deliberate
January 10, 2021
Every now and again I read a book that has an unworldly impact on how I think about my experiences in this life.
The latest to join this short list is Walden, by Thoreau. I am about half way through his book.
My mind has not stopped churning since the first page.
I am sure that the book has drawn a fair share of criticism. As most extreme choices and actions do. I can only imagine what would turn up if I entered "Walden critique" into the searching device.
For me though, the idea of living deliberately, as Henry did in the woods for a two year stretch, is inspiring.
Does having a drawer full of clothes add to, or take away from my life? Are my thoughts and writing wholly owned by me, or are the social norms of this era living rent free in my mind?
These are not rhetorical questions. I have a lot of thinking to do this year. What is my version of a deliberate life?
Making Akigi Slow
Earlier in the week I was struggling to focus. So I took a break from working on gameplay to work on a performance optimization.
I profiled. I benchmarked. I thought that I approached things well.
Oh no. That so called optimization that looked like a 20x speedup in my benchmark made the game server's roughly ten times slower in production.
 Made the game server 10x slower. Oh my.
This is the danger of micro-benchmarking. Next time around I will add a macro-benchmark or two, and see if I can diagnose what happened.
Crafting System
I spent quite a bit of time planning Akigi's crafting system and eventually landed on something that I liked.
Implementing it on the backend turned out to be easier than anticipated. I have not thought through the user interface for it yet.
Right now I am working on the ability to craft a bow. This is serving as a good test bed for implementing the underlying functionality that is needed for Akigi's crafting system.
Once this all works adding new things to craft will be as simple as adding new data to a YAML file.
Here's an example entry in that YAML file. My engine's crafting and criteria systems are generic across a few different aspects, making it easy to come up with and evolve a data format to power crafting.
- requirements:
    action: Twist
    ingredients:
      Batch:
        batch:
          - Passes:
              OnlyOne:
                GteqQuantity: [StagSinew, 1]
          - Passes:
              IngredientCountExactly: 1
        pass_requirement: All
  consumed_items:
    - item_id: StagSinew
      quantity: 1
  received_items:
    - item_id: TwistedSinew
      quantity: 1
As most Rust developers would expect, serde powers the de-serialization.
Other Notes / Progress
The crafting system is coming together really nicely. At least implementation wise.
When I finish implementing what I need and adding in more crafting recipe definitions I will need to create the user interface for crafting.
Then I can play with it to see how fun it feels.
I'm feeling very excited because when the crafting system is in place players can make things to their hearts content.
I feel so close to the inflection point where I have a real, playable game and can start to iterate on taking it from from okay to good to great to amazing.
Feelings can be wrong. That I know. But the feeling is there. And it makes me feel good.
Next Journal Entry
I'm going to keep pushing forwards on the crafting system. At some point this month I should be able to show you some visual progress. For now I'm deep in the land of data structures and writing test cases.
I will be back next week. Goodbye for now.
- CFN
100 - Motivated
January 03, 2021
Hello, and welcome to the start of another year.
At the beginning of last year I had high hopes. I thought that I would have a fun alpha version of Akigi ready in April 2020.
These dreams ended up being far from reality.
It was not until the end of October that I even started to work on player facing functionality consistently.
And even still today most of my time is spent setting the underlying engine foundation for whatever gameplay I am working on at the time.
This is what I signed up for by choosing to make my own engine for Akigi.
Fortunately, I don't at all regret taking this long route to the destination. I'm very happy with the trajectory of my engine and I know that there will be an inflection point where I begin to move with top pace.
When will that be? I'm not entirely sure.
I made a list in 099 of the things that I thought were left before I could move at the pace that I want to.
But because I have never released a game before, there are bound to be additional major speed blockers that I notice between now and when that list of tooling is completed.
So, all I am doing for now is sticking to my script. Focus on putting out more game play, and let everything else fall into place around that.
I'd like for 2021 to go differently. I think that it will, but I am admittedly hesitant to say that since I have said it before and I was wrong.
I feel like I am close to the inflection point. I feel like I am nearing the moment where I can start to add in fun game play every week. With larger new updates every month. I feel close, but I am scared to say it because I have said it before and been wrong.
I think that Akigi will be a special game. Not to all, but to some. I have so many gameplay ideas that I want to implement. Some will strike a chord, others might flop.
I'm still motivated. I'm still hungry. I still have the utmost faith in my codebase to help me push Akigi to where it needs to be. I still know that with continued practice my art will be unique to me and enjoyed by some.
I will just keep pushing, and when the light at the end of the tunnel becomes unmistakable I will announce the first official version of Akigi.
It will all work out in the end. That I am sure of.
Creating Bows and Arrows
As mentioned in the last journal entry, I've begun work on being able to create bows and arrows.
I spent a solid amount of time planning out how crafting in Akigi will work.
I'm very happy with how I approached this.
I did not just sit down and try to come up with functionality out of thin air. Instead, I started from the feelings and emotions and thoughts that I wanted the crafting system to create, and then from there I landed on how it should work.
Now, whether I will successfully deliver on my goals here is another story, but I'm happy with the plan that I have in place.
Because this is the first real introduction of crafting into the game, there will be some time that I need to spend adding in various foundational implementations for crafting.
As such, I'm expecting to spend January on the crafting of bows and arrows.
After that, however, it should be much easier to add in new crafting experiences.
This journal entry is getting a bit long, so I'll write about what my plans are for crafting in Akigi in the next journal entry.
Auto Generating Item Data Structures
Crafting bows and arrows in Akigi involves a collecting and creating a number of intermediary items before you assemble your final product.
Before this week anytime I needed to add a new item to the game I needed to adjust a number of data structures and methods.
For example, there's a c-like ItemId enum with different methods such as .equipment_id() -> Option<EquipmentId> which returns the corresponding equipment id
for an item, or None if it is not equippable.
Needing to update a dozen or so different parts of the codebase every time I added an item made me not want to add in new items.
This week I added an items.yml file where I can define items, and then wrote a build script that automatically generates all of the data structures and methods
that I need.
# Example item definitions

BeastCage:
  id: 26
  display_name: "Beast Cage"
  ground_renderable_id: BeastCageNotBent

ButchersKnife:
  id: 28
  display_name: "Butcher's Knife"
  ground_renderable_id: ButchersKnife
  equippable:
    renderable_id: ButchersKnife
    slot: MainHand
WebGPU Renderer
Last week I mentioned that one of the key missing tools that I need is the ability to auto generate icons for items.
The idea would be to iterate over all of the item's in the game and use the engine's Renderer trait to render the item and
save the rendering to a PNG file.
Both my linux and mac CI servers run the full asset compilation process.
As it stands now I have two implementations of the Renderer trait, the MetalRenderer and the WebGlRenderer.
Neither can be used to power linux CI.
The WebGlRenderer runs in the browser so getting PNGs out of there would be a hassle. The MetalRenderer only works on macOS, so that is also ruled out.
For this reason I started working on a third Renderer implementation, the WebGpuRenderer.
I do plan to have a VulkanRenderer in the future that I will use on Linux and Windows, but for now the WebGpuRenderer is higher priority since I can use it in the browser to
replace the WebGlRenderer whenever the major browsers support WebGPU.
My linux CI server is an EC2 instance. I will need a linux server that has a GPU whenever I make the asset compilation process auto generating icon.
So, I'll be buying a refurbished cheap machine and loading linux on it as a replacement for the EC2 instance.
This should cut $40/month or so off of my AWS bill.
Other Notes / Progress
-
Fixed logic issue where attacks did not cool down while you were out of combat.
-
Fixed the lower body walk animation stuttering if you were walking while attacking.
December's Finances
The finances for December 2020 were:
| item | cost / earning |
|---|---|
| revenue | + $4.99 |
| Stripe fees | - $0.44 |
| aws | - $240.26 |
| adobe substance | - $19.90 |
| GitHub | - $9.00 |
| adobe photoshop | - $10.65 |
| adobe illustrator | - $22.38 |
| Datadog | - $8.12 |
| --- | --- |
| total | - $305.76 |
Next Journal Entry
I'm going to continue working on being able to craft bows and arrows.
The amount of art that I do per week has started to slow down, so I'm going to think about why that is and make some adjustments to my process.
Cya next time!
- CFN
099 - More Gameplay, More Quickly
December 27, 2020
This week I fixed a long standing issue with how skeletal animation worked within my engine.
Previously, my script that exports bone data from Blender would export the transforms in world space and did not export the bone hierarchy.
This was fine if you only ever played one animation on a character at a time, and if you didn't modify any bones at runtime.
But if, for example, the lower body was crouching and the upper body was punching, the upper body would not move downwards along with the lower body since none of the bones were parented to each other.
Similarly, an additive animation that bent the torso wouldn't transform any of its descendants in the bone hierarchy.
I now export bones keyframes from Blender in their local spaces, along with a bone hierarchy that points to the parent of each bone.
The engine's skeletal animation system uses the local space transforms and bone relationships in order to calculate each bone's world transformation at runtime.
This fixes issues such as separate upper and lower body animations creating strange deformations.
 The upper body playing a fire bow animation while the lower body plays a walk animation.
Aiming
This week I introduced the ability to aim at a different area depending on the enemy.
Here's an example of aiming at a snail on the ground vs. a flying swarm of moquitos.
This boiled down to re-using the existing engine support for defining points on renderables, and then adding some support for being able to aim at one of these defined points.
Human Rig
If you look carefully in the video above, you'll notice the arms moving weirdly at around the 8 second mark as the player is moving while firing a bow.
This is due to the fact that the Rigify rig that I am using for the human does not have proper bone relationships set up between the deformation bones.
I've started working on my own rig in order to address some of these issues. I've even made my first IK-FK switch using Blender drivers.
I'm having fun with this.
When it's done I plan to at some point write a Blender addon to automate IK-FK snapping in a way that makes it re-usable for any armature.
So far I've only experimented with writing a basic Blender addon in Rust just to see if it was possible.
I'm expecting this to be my first serious Blender addon that I write in Rust.
Adding More Gameplay More Quickly
My mindset right now is to stay patient from week to week as I add in new functionality.
My mindset is that I am carefully setting a foundation now for being able to release gameplay features at break neck speed later.
Over the last two months of journal entries, almost everything that I wrote about while working on making the Bowman experience better were
general purpose engine features that I needed to write. in order to power new gameplay
That is a big cost, but it will pay for itself as I add more game play and re-use these systems that took so much up front work.
With features such as separate animations for different bone groups, aiming via additive animation and attaching equipment and other objects to characters, the functionality around skeletons is at a place where I can easily do quite a bit.
There is still more skeletal animation related functionality that I will want over time, and a few broken aspects of animation that I need to patch, but by and large I am in a good position when it comes to things related to skeletons.
There are a few other key areas that I think need to fall into place before I can truly prototype and release fun game play at a pace that I am happy with.
-
Editor - Easy place and move and edit entities and scenery.
-
Editor - Easy to shape and texture terrain in the editor.
-
Editor - Easy to edit the ways that one or many game tiles can be traversed within in the editor.
- This has not been started.
-
Asset Compilation - Automatically generating icons for all game items by rendering them to PNG files during asset compilation.
- This has not been started.
-
Gameplay Systems - A general purpose crafting implementation that I can then leverage in different ways in order to power different skills under the hood.
- I have an existing simple crafting system, but this will likely need to be built from the ground up based on what I have in mind functionality wise.
-
Gameplay Systems - Implementing dialogue and cut scenes support more robustly using things that I learned while implementing the coordinated sequence system in 092.
- This will take elbow grease, but it should be more of a re-organization of existing concepts as opposed to a complete re-write.
I do not plan to work on all of these at once. I don't even plan to make any of them a main focus.
I am committed to having my focus from week to week be on improving the Akigi game play experience. Adding more and more fun things to do.
Any engine or tooling improvements that I work on from week to week need to tie back to the specific gameplay feature that I am working on at the time.
So, for example, when I'm looking to add in the models for the first village in the game I will in turn spend time improving the editor user experience for placing scenery.
By focusing on gameplay instead of tooling I will avoid the pitfall of getting blinded by my addiction of building tools and thereby delaying the day that I look forward to where I can release Akigi to excited players and see it become a sustainable project that I can focus on improving for them full time.
Other Notes / Progress
I continue to get more comfortable in the art realm as I practice daily. It will be nice to look back in a year or two or three as my skills grow.
Next Journal Entry
If you're attacking while moving your lower body walk animation stutters. I know the fix for that and it should take a couple of hours.
I also need to move the pose marker that controls when the bow recoils when you fire it, because it currently recoils too early.
Earlier in the month I mentioned having some ideas around a Voodoo skill. They are still on my mind, but I'm going to hold off on prototyping them.
I want to continue improving the experience around Bowman until it becomes an aspect of the game that feels fun and worth playing on its own.
Note that making the Bowman experience better will naturally lead me to introducing and improving other aspects of the game and its engine.
For example, this week I want to start working on ways for players to make a bow and arrow in Akigi. This will lead to the introduction of a couple of new skills.
Those skills will lead to the introduction of new systems and engine features that will make it easier to make and improve Akigi.
When this approach of focusing on trying to improve Bowman begins to give diminishing returns,
I will turn my attention towards another aspect of the game.
Over time this approach should lead to more and more aspects of Akigi feeling fun enough to engage with on their own.
And by having everything that I work on tie back to some driving focus, it should help to make sure that different aspects of the game feel consistent and connected.
I will also be working on a new human mesh and armature now that I am ditching Rigify.
Technically making new meshes isn't necessary as I only need a new rig, but I want to benchmark myself artistically and this feels like a fun way for me to practice.
Last time I made the human model I followed along with a tutorial. This time I am planning to just keep a few reference images open but work in a more self directed fashion.
Cya next time!
- CFN
099 - More Gameplay, More Quickly
December 27, 2020
This week I fixed a long standing issue with how skeletal animation worked within my engine.
Previously, my script that exports bone data from Blender would export the transforms in world space and did not export the bone hierarchy.
This was fine if you only ever played one animation on a character at a time, and if you didn't modify any bones at runtime.
But if, for example, the lower body was crouching and the upper body was punching, the upper body would not move downwards along with the lower body since none of the bones were parented to each other.
Similarly, an additive animation that bent the torso wouldn't transform any of its descendants in the bone hierarchy.
I now export bones keyframes from Blender in their local spaces, along with a bone hierarchy that points to the parent of each bone.
The engine's skeletal animation system uses the local space transforms and bone relationships in order to calculate each bone's world transformation at runtime.
This fixes issues such as separate upper and lower body animations creating strange deformations.
The upper body playing a fire bow animation while the lower body plays a walk animation.
Aiming
This week I introduced the ability to aim at a different area depending on the enemy.
Here's an example of aiming at a snail on the ground vs. a flying swarm of moquitos.
This boiled down to re-using the existing engine support for defining points on renderables, and then adding some support for being able to aim at one of these defined points.
Human Rig
If you look carefully in the video above, you'll notice the arms moving weirdly at around the 8 second mark as the player is moving while firing a bow.
This is due to the fact that the Rigify rig that I am using for the human does not have proper bone relationships set up between the deformation bones.
I've started working on my own rig in order to address some of these issues. I've even made my first IK-FK switch using Blender drivers.
I'm having fun with this.
When it's done I plan to at some point write a Blender addon to automate IK-FK snapping in a way that makes it re-usable for any armature.
So far I've only experimented with writing a basic Blender addon in Rust just to see if it was possible.
I'm expecting this to be my first serious Blender addon that I write in Rust.
Adding More Gameplay More Quickly
My mindset right now is to stay patient from week to week as I add in new functionality.
My mindset is that I am carefully setting a foundation now for being able to release gameplay features at break neck speed later.
Over the last two months of journal entries, almost everything that I wrote about while working on making the Bowman experience better were
general purpose engine features that I needed to write. in order to power new gameplay
That is a big cost, but it will pay for itself as I add more game play and re-use these systems that took so much up front work.
With features such as separate animations for different bone groups, aiming via additive animation and attaching equipment and other objects to characters, the functionality around skeletons is at a place where I can easily do quite a bit.
There is still more skeletal animation related functionality that I will want over time, and a few broken aspects of animation that I need to patch, but by and large I am in a good position when it comes to things related to skeletons.
There are a few other key areas that I think need to fall into place before I can truly prototype and release fun game play at a pace that I am happy with.
-
Editor - Easy place and move and edit entities and scenery.
-
Editor - Easy to shape and texture terrain in the editor.
-
Editor - Easy to edit the ways that one or many game tiles can be traversed within in the editor.
- This has not been started.
-
Asset Compilation - Automatically generating icons for all game items by rendering them to PNG files during asset compilation.
- This has not been started.
-
Gameplay Systems - A general purpose crafting implementation that I can then leverage in different ways in order to power different skills under the hood.
- I have an existing simple crafting system, but this will likely need to be built from the ground up based on what I have in mind functionality wise.
-
Gameplay Systems - Implementing dialogue and cut scenes support more robustly using things that I learned while implementing the coordinated sequence system in 092.
- This will take elbow grease, but it should be more of a re-organization of existing concepts as opposed to a complete re-write.
I do not plan to work on all of these at once. I don't even plan to make any of them a main focus.
I am committed to having my focus from week to week be on improving the Akigi game play experience. Adding more and more fun things to do.
Any engine or tooling improvements that I work on from week to week need to tie back to the specific gameplay feature that I am working on at the time.
So, for example, when I'm looking to add in the models for the first village in the game I will in turn spend time improving the editor user experience for placing scenery.
By focusing on gameplay instead of tooling I will avoid the pitfall of getting blinded by my addiction of building tools and thereby delaying the day that I look forward to where I can release Akigi to excited players and see it become a sustainable project that I can focus on improving for them full time.
Other Notes / Progress
I continue to get more comfortable in the art realm as I practice daily. It will be nice to look back in a year or two or three as my skills grow.
Next Journal Entry
If you're attacking while moving your lower body walk animation stutters. I know the fix for that and it should take a couple of hours.
I also need to move the pose marker that controls when the bow recoils when you fire it, because it currently recoils too early.
Earlier in the month I mentioned having some ideas around a Voodoo skill. They are still on my mind, but I'm going to hold off on prototyping them.
I want to continue improving the experience around Bowman until it becomes an aspect of the game that feels fun and worth playing on its own.
Note that making the Bowman experience better will naturally lead me to introducing and improving other aspects of the game and its engine.
For example, this week I want to start working on ways for players to make a bow and arrow in Akigi. This will lead to the introduction of a couple of new skills.
Those skills will lead to the introduction of new systems and engine features that will make it easier to make and improve Akigi.
When this approach of focusing on trying to improve Bowman begins to give diminishing returns,
I will turn my attention towards another aspect of the game.
Over time this approach should lead to more and more aspects of Akigi feeling fun enough to engage with on their own.
And by having everything that I work on tie back to some driving focus, it should help to make sure that different aspects of the game feel consistent and connected.
I will also be working on a new human mesh and armature now that I am ditching Rigify.
Technically making new meshes isn't necessary as I only need a new rig, but I want to benchmark myself artistically and this feels like a fun way for me to practice.
Last time I made the human model I followed along with a tutorial. This time I am planning to just keep a few reference images open but work in a more self directed fashion.
Cya next time!
- CFN
098 - Additive Animation Blending
December 20, 2020
Since the last journal entry I've introduced additive blending support in the engine.
The first use case for this is in bow combat. It is now possible to adjust the bow firing animation based on where the enemy is.
Some polish is needed, but in general the system works.
Authoring Additive Animation
If an animation's name begins with [Static Additive], the engine will expect it to have a keyframe that is
labeled "Base".
All other keyframes in the animation must be labeled as well.
Each of the other keyframed poses will be differed against the base pose, then an additive animation will be generated using the name of the keyframed pose.
 Defining additive animations in Blender. Each additive pose will be differed against the base pose.
The engine is not coupled to Blender, so animations could just as well be defined in a different tool.
Defining additive animations in Blender. Each additive pose will be differed against the base pose.
The engine is not coupled to Blender, so animations could just as well be defined in a different tool.
Other Notes / Progress
-
Fixed lower body walk animation not playing
-
Added dual quaternion support to nalgebra (Link to PR) #810
-
Cleaned up the animation keyframe interpolation code within landon
-
Experimenting with writing Blender addons in Rust. It works and I will open source the implementation.
Next Journal Entry
There are a few animation issues that stem from the same problem.
Right now when I export bones from Blender I am only exporting world transformations.
This makes it impossible to properly do things such as additive blending, or to properly play separate animations on different bones such as when a player is walking while firing.
I plan to fix that this week.
I will also be leaving Rigify in favor of my own rigs. Rigify's deform bones are parented in ways that don't gel well with exporting for games.
While I could invest time in trying to fix this, I'd rather invest in my ability to make good rigs myself so that I don't run into more problems like this in the future.
After all of this animation work is done I will continue to iterate on the Bowman skill until it feels great.
Cya next time!
- CFN
097 - Skill Progress Meter
December 13, 2020
Since the last journal entry I worked on presenting a visual indication that experienced was gained.
Now, when a player gains experience a circular meter appears showing how close they are to the next level, and some temporary text appears indicating the amount of XP gained.
There is supposed to also be an icon of the skill that experience was gained in, but I still need to make the icons for the different skills in the game.
An Art Lesson Learned
In the last journal entry I showed an icon that I made for the Bowman skill.
It turns out that I need to toss it and make a new one.
I now know that small details that show up when at 1000x1000 resolution don't show up at 100x100 resolution.
A valuable lesson learned.
Circles
Most of this past week was spent working on the engine's rendering code in order to be able to render arbitrarily shaped UI elements.
Previously I could only render UI quads, but now I can add any arrangement of vertices to a buffer and then reference that buffer during a UI rendering pass.
As an aside, I can't wait to never work with WebGL ever, ever again after WebGPU is supported in all major browsers. I will not miss the arcane errors.
I'm using this new UI rendering capability in order to draw the disks that are used when rendering the skill progress meter in the video above.
I ended up learning that my approach leads to some fairly noticeable aliasing, so in the future I will move to using a specialized simple shader for drawing circles and disks instead of my current setup.
Other Notes / Progress
- I started thinking about a Voodoo skill, where you could temporarily take full control of another creature in the world and make it do whatever you pleased in order to further your own interests. I'd like to prototype it later this month.
Next Journal Entry
I'm going to focus on the skeletal animation system this week.
First off, I'm going to update the skeletal animation system to be able to apply different animations the different bones in an armature.
I already had this in place before the recent refactor, so it shouldn't be hard to fit this into the new and improved system.
Supporting this again will allow the lower body to be walking while the upper body is firing a bow.
After that I plan to work on adding support for additive animation blending so that the bow animation can be adjusted in order to aim the bow based on the trajectory that it is being fired at.
I also plan to work on the user interface a bit, starting with making some skill icons.
Cya next time!
- CFN
096 - Art Does Not Scare Me Anymore
December 06, 2020
This week I continued working on trying to make attacking enemies with a bow and arrow feel good.
The player now holds bows properly, as opposed to last week where players held bows at a weird angle.
The arrow now fires straight instead of sideways, although there is still room for more cleanup since the arrow does not yet point towards its velocity vector as one would expect. Also, the arrow currently launches before the bow string recoils. For that I just need to move the pose marker in the bow's Blender file, since that is what the sequence is based on.
I also made it so that entities stick around for a few of seconds after they die so that I can start to add in death animations.
Also, the client was not showing the damage that dealt the final blow, and it wasn't showing the empty hitpoints bar when an entity died. So I fixed that.
All in all I would say that Bowman feels better than it did a week ago, but there is still more work to be done.
Art Does Not Scare Me Anymore
About a month ago I spent time thinking about how I could set myself on a path towards becoming a good artist.
To get good at something, you need to spend a lot of time doing it.
In order to spend a lot of time doing something voluntarily, it needs to interest you.
So, I set out to design a system for myself that would involve consistently working on visual art that I found interesting.
I got inspiration for designing my art learning system by looking at other skills and activities that I've honed over time.
Namely coding and exercise.
Prior to 2018, if you asked me what my number one hobby was I would tell you that I loved to code.
I've come to realize that that answer would have been misleading.
If you tasked me with writing an operating system in Visual Basic, my frustration to fun ratio would have me seeking out a new project fairly quickly.
No, it isn't just about coding for me. The tools that I get to use matter. What I am building matters.
My answer today would be that I love the feeling of using well-designed programming languages and tools to make progress on large, challenging software projects that I find interesting.
When I'm working on Akigi I'm having the time of my life. I absolutely (completely, utterly, ..., n - 1, superbly) love writing Rust.
I love learning and applying new techniques to graphics programming. I get a thrill from going from research to breakthrough to implementation and then back again.
I don't think that I would feel the same way working on VB OS™.
My takeaway from thinking about why I continue to progress as a coder after many years was that being excited about what you are doing and how you are doing it is important when building a skill.
To maximize my chances of becoming a good artist over time I would need to point myself towards work that I felt naturally excited by and tools that gave me joy to use.
Unlike working on software, exercise isn't something that I was immediately obsessive about.
I initially started exercising because it's important for my health and wellness, not because I had some strong impulse that compelled me to spend enormous amounts of time doing it like I do with code.
It took me almost a decade to finally become un-breakably consistent with exercise.
What I came to realize is that committing to doing something six days a week is much easier than doing it 4 days a week.
When I was exercising four days a week I used to skip a day if it was raining hard. Or skip a day if I was deep in the zone with code. Or skip days if I was traveling.
Every now and again I would get completely off the rocker for one reason or another and miss a full week. Or two.
With 4 days a week, you have wiggle room to skip a day and pick it up the next day when something comes up.
Once you start learning that it's okay to de-prioritize exercise, you become more likely to end up folding when the pressure is on. You might just take that week off when you're visiting family overseas.
A few months ago I started exercising six days a week. Monday, Wednesday and Friday are for running. Tuesday, Thursday and Saturday are for lifting. Sunday is for rest.
Since I started this cadence I have not missed a single day of exercise. This is a milestone for me, as someone who in the past might have skipped a day if I looked outside and there was a light drizzle.
More important than the streak though is that my mindset has crystallized into a place where the idea of missing a day is as unimaginable as going a day without brushing my teeth.
What also helps is the rhythm that comes from alternating between run, lift, run, lift, run, lift. I haven't thought too deeply into it, but something about that cadence has resonated with me. I'd benefit from sitting down and thinking more about this some day.
I see art as similar to exercise in my activity taxonomy.
There aren't any natural forces that push me towards art. I'm really only learning art so that I can use it while building large software projects.
But, I expect that over time I will come to enjoy art in its own way, much like I came to truly enjoy exercise after originally viewing it in a purely utilitarian light.
So, my driver in learning code was being very interested in what I was working on.
My driver in exercise was leaving almost no room for decision making. I know exactly what I am going to do everyday. There is no "I'm tired, but it's fine I can just do this tomorrow."
I wanted to bring these pillars into my art world.
I first thought about what would inspire me artistically. I've taken to African history, culture and mythology over the last year or so, so that seemed like a good starting place to explore.
From there I wanted to apply the 6 day a week a,b,a,b,a,b formula.
What I landed on was that Monday's, Wednesday's and Friday's I would work on going through a course. This would help me understand how to think as an artist and to build good habits and technique.
On Tuesday's, Thursday's and Saturday's I would do self-directed work on some aspect of Akigi. Just me and my canvas. This would give me the space to discover what types of tools and projects inspire me the most. So far I'm enjoying taking inspiration from different African references in these sessions.
I'm about a month into my new art regiment.
Right now I'm going through the Learn Professional 2D Game Asset Graphic Design in Photoshop course on Udemy. I'm learning quite a bit and it's making me more and more confident as an aspiring artist.
I know that I will get good. I'm no longer worried about that, at all.
As I write this I'm thinking back to Christmas day in 2016 when I wrote about my art struggles. What a stark contrast of emotions, then and now.
Man, it feels great to feel confident. The future will be bright.
We move!
Here's my latest self-directed work. It's an icon for the Bowman skill. I found a few references and worked on it all by myself!
The Udemy course has helped me tremendously in understanding how to approach 2d art. I'm having fun!
I know that it will take months and years of this 6-day ababab system for me to start doing truly impressive work. I recognize that right now I'm producing beginner quality work.
Nevertheless, I'm feeling stoked about the level of control and comfort that I felt as I worked on this first icon. It will only get better from here.
![]() Check me out! I made something on my own! Woooo! Excited to keep learning and improving!
Check me out! I made something on my own! Woooo! Excited to keep learning and improving!
De-coupling the Editor from the Game
I first started working on my engine's game editor in back in July.
The editor depended on both Akigi's client and server applications so that I could quickly get the game running in the editor, knowing that in the future I would want to de-couple them so that the editor could be used for other titles in the distant future.
As of this week the editor is now fully de-coupled from Akigi!
From the editor's eyes Akigi is just a folder that follows a directory structure and points to a couple of compiled dynamic libraries.
Here's a small snippet of code showing how the editor uses dynamic libraries in order to be able to run
any game client or server that implements trait EditableApp or trait EditableServer, respectively.
// A small snippet showing the editor making use of dynamic libraries to
// in order to be able to run any game client or server that implements
// `trait EditableApp` or `trait EditableServer` respectively.

use libloading::{Library, Symbol};

pub type BoxEditableApp = Box<dyn EditableApp + Send + Sync + 'static>;
pub type BoxEditableServer = Box<dyn EditableServer + Send + Sync + 'static>;

type EditableAppCreate =
    unsafe fn(config: EditableAppConfig) -> *mut (dyn EditableApp + Send + Sync);

type EditableServerCreate =
    unsafe fn(config: EditableServerConfig) -> *mut (dyn EditableServer + Send + Sync);

/// Information about the project that is currently being edited.
#[derive(Debug)]
pub struct ActiveProject {
    project_dir: PathBuf,
    game_app_dylib: Option<Library>,
    game_server_dylib: Option<Library>,
}

#[allow(missing_docs)]
impl ActiveProject {
    pub fn create_editable_app(&self, config: EditableAppConfig) -> BoxEditableApp {
        let lib = self.game_app_dylib.as_ref().unwrap();

        unsafe {
            let constructor: Symbol<EditableAppCreate> = lib.get(b"new_editable_app").unwrap();

            Box::from_raw(constructor(config))
        }
    }

    pub fn create_editable_server(&self, config: EditableServerConfig) -> BoxEditableServer {
        let lib = self.game_server_dylib.as_ref().unwrap();

        unsafe {
            let constructor: Symbol<EditableServerCreate> =
                lib.get(b"new_editable_server").unwrap();

            Box::from_raw(constructor(config))
        }
    }
}
Other Notes / Progress
- Read over Unreal's [
Aim Offset] documentation as inspiration for my engine's additive blending support that I plan to work on this coming week.
November's Finances
The finances for November 2020 were:
| item | cost / earning |
|---|---|
| revenue | + $4.99 |
| Stripe fees | - $0.44 |
| aws | - $270.62 |
| adobe substance | - $19.90 |
| GitHub | - $9.00 |
| adobe photoshop | - $10.65 |
| adobe illustrator | - $22.38 |
| Datadog | - $8.12 |
| Udemy Art Courses | - $91.65 |
| Domain Name Renewal | - $14.90 |
| --- | --- |
| total | - $442.67 |
After talking with Forest from the Veloren team he helped me realize that I was burning a little over $40/mo on container insights that I was not using.
I shut those off mid-month, so the AWS bill should go down next month by around 40 bucks.
There are a few other places that I can save more on the AWS bill. When will I get to that? Who knows.
Next Journal Entry
I'm going to stick with the theme of working on making Bowman feel really good.
I'm going to work on adding support for additive animation blending to the engine and then use that to have the character aim the bow higher or lower depending on the distance from the enemy and the height of the enemy.
I'm also going to add an XP gain indicator that shows briefly whenever you gain experience.
One of my design goals with Akigi is to minimize the amount of things on screen. So, I will try to have the indicator keep a low profile.
I also need to make a possum and add a few animations to it. I'll work on that during my self-directed art sessions this week.
Cya next time!
- CFN
095 - Firing a Bow (Part 4/4)
November 29, 2020
The goal of this past week was to make firing a bow at an enemy feel good.
I fell short of that goal, and ended up spending all week working on the ability to fire a bow at all, without much time for polish.
Fortunately, I did manage to finish implementing the ability to fire a bow, albeit a bit wonky and janky at the moment.
A little bit of target practice. It lacks polish and proper alignment of the hand, the bow and the arrow, but I'm happy with the direction and remain optimistic about the direction of the engine. Fun!
When I first got started on working on being able to fire a bow a few weeks ago, I knew that there would be a fair amount of work, but I did not expect there to be so many pieces that needed to come together in order to get to where I am now.
I'm happy about the fact that everything was built to be re-usable and extensible.
I would guess that 90 something percent of my time these last few weeks has gone to underlying code that is not specific to a bow and arrow sequence.
So the work spent laying this foundation should pay dividends over time as I re-use it for more and more coordinated sequences.
Other Notes / Progress
-
Fixed and simplified who I calculate whether two entities are within
DistanceRangeof each other after discovering that it did not work for non uniform ranges such as the bow attack'sDistanceRange { close: 1, far: 6 }. -
The client waits a moment before removing a dead entity from the World state so that a death animation can be played.
Next Journal Entry
The experience around using bows is not yet polished. Rather than moving on to adding in more game play, I am going to continue working on making firing a bow feel good.
I listed out potential improvements, and all of the most time consuming ones involve underlying engine work. Which I like to think of as long term ROI work.
That's been the story these last few weeks. So nothing new there.
I'm going all in on making the Bowman skill look and feel interesting.
I want something that I feel happy with.
After that I will share it with others and see what they think about it.
I'm hoping to spend less than two weeks on all of this polish work.
Let's keep pushing.
 Pew pew
Cya next time!
- CFN
095 - Firing a Bow (Part 4/4)
November 29, 2020
The goal of this past week was to make firing a bow at an enemy feel good.
I fell short of that goal, and ended up spending all week working on the ability to fire a bow at all, without much time for polish.
Fortunately, I did manage to finish implementing the ability to fire a bow, albeit a bit wonky and janky at the moment.
A little bit of target practice. It lacks polish and proper alignment of the hand, the bow and the arrow, but I'm happy with the direction and remain optimistic about the direction of the engine. Fun!
When I first got started on working on being able to fire a bow a few weeks ago, I knew that there would be a fair amount of work, but I did not expect there to be so many pieces that needed to come together in order to get to where I am now.
I'm happy about the fact that everything was built to be re-usable and extensible.
I would guess that 90 something percent of my time these last few weeks has gone to underlying code that is not specific to a bow and arrow sequence.
So the work spent laying this foundation should pay dividends over time as I re-use it for more and more coordinated sequences.
Other Notes / Progress
-
Fixed and simplified who I calculate whether two entities are within
DistanceRangeof each other after discovering that it did not work for non uniform ranges such as the bow attack'sDistanceRange { close: 1, far: 6 }. -
The client waits a moment before removing a dead entity from the World state so that a death animation can be played.
Next Journal Entry
The experience around using bows is not yet polished. Rather than moving on to adding in more game play, I am going to continue working on making firing a bow feel good.
I listed out potential improvements, and all of the most time consuming ones involve underlying engine work. Which I like to think of as long term ROI work.
That's been the story these last few weeks. So nothing new there.
I'm going all in on making the Bowman skill look and feel interesting.
I want something that I feel happy with.
After that I will share it with others and see what they think about it.
I'm hoping to spend less than two weeks on all of this polish work.
Let's keep pushing.
Pew pew
Cya next time!
- CFN
094 - Firing a Bow (Part 3/4)
November 22, 2020
The bulk of this week was spent on continuing to implement the CoordinatedSequence so that you can see a bow being fired in the game.
The CoordinatedSequence for the bow involves playing an animation for the player to fire a bow, spawning an arrow
at the right time, animating the bow's string at the right time and then firing the arrow towards the enemy at the right time.
In the future new sequences should be quick and easy to add, but because this is the first one I have to first lay down all of the groundwork for sequences.
By next week the CoordinatedSequenceSystem will have enough implemented for me to show a bow firing.
For now, here's a video of me attacking an enemy without any animations.
Firing a bow while maintaining distance. We aren't yet playing any animations or the spawning an arrow to fly towards the enemy. That will come next week.
CoordinatedSequence - Fire Bow
A CoordinatedSequence can have one or more tracks that advance in parallel.
Each track can have one or more steps.
Every game tick the CoordinatedSequenceSystem runs the current step of each track, and advances if the step is completed.
Here's how the steps for firing a bow currently look. After using this abstraction in a few more scenarios I may consider defining sequences in data files instead of code.
pub(super) fn fire_bow_sequence(
    server_eid: EID,
    sys: &GameServerReceivedMessagesSystemData,
    attacked_target: AttackedTargetTrigger,
) -> CoordinatedSequence {
    let now = sys.game_clock.most_recent_tick_start();

    let mut steps = Vec::with_capacity(6);
    let mut sequence = CoordinatedSequence::new(now, Duration::from_secs_f32(TIMEOUT_SECONDS));

    steps.push(step_start_character_animation_to_lift_and_fire_bow(
        server_eid,
        attacked_target,
    ));
    steps.push(step_wait_for_grab_arrow(server_eid));
    steps.push(step_spawn_arrow_in_hand(server_eid));
    steps.push(step_wait_for_pull_bow_string(server_eid));
    steps.push(step_play_firing_animation_on_bow_equipment(server_eid));
    steps.push(step_launch_arrow_projectile(attacked_target));

    sequence.push_track(CoordinatedSequenceTrack::new(steps));
    sequence
}

fn step_start_character_animation_to_lift_and_fire_bow(
    server_eid: EID,
    attacked_target: AttackedTargetTrigger,
) -> CoordinatedSequenceStep {
    CoordinatedSequenceStep::StartAnimation(CseqStepStartAnimation::new(
        server_eid,
        AnimationTrigger::AttackedTarget(attacked_target),
    ))
}

fn step_wait_for_grab_arrow(server_eid: EID) -> CoordinatedSequenceStep {
    CoordinatedSequenceStep::WaitForPoseMarker(CseqStepWaitForPoseMarker::new(
        server_eid,
        EntityArmatureLookup::EntityRenderable,
        POSE_MARKER_GRAB_ARROW,
    ))
}
Other Notes / Progress
-
Added the
DamageQueueComponentandDamageQueueSystemfor handling dealing damage to entities. -
Added the ammunition equipment slot so that we can equip arrows.
-
Stopped using postgres enums and I instead now use reference tables. A bit easier to manage migrations for and more portable to other databases.
-
Automatically running
upmigrations on the production database in CI.
Next Journal Entry
My focus this week is on making firing a bow at an enemy feel good.
I will start by making it so that when you fire a bow the CoordinatedSequence that is created gets handled properly by the CoordinatedSequenceSystem.
After that I will incrementally polish and improve the feeling of firing the bow until it feels good enough for now.
I'll also be adding in models for an arrow, a quiver, a possum to attack, and doing some other art polish.
By the next journal entry the Bowman skill should be looking and feeling pretty decent!
Made an animation in Blender for the bow. Not amazing, but I'm definitely getting better week by week.
Cya next time!
- CFN
093 - Firing a Bow (Part 2/4)
November 15, 2020
This week I fell short of what I set out to do.
I wanted to finish prototyping bow and arrow combat, but I did not even implement it let alone spend time iterating on it.
I spent almost all of this week re-architecting the engine's SkeletalAnimationSystem.
At first I was only going to add engine support for knowing when a specific part of an animation plays so that I could sequence a few aspects of the bow firing process properly, but this evolved into an all out refactor of a fair bit of our skeletal animation logic since it was glaringly clear to me that the foundation was poor in a number of ways.
While the clean up was not strictly necessary right now, I felt inspired and decided to go for it.
On the bright side, the new code will be much more extensible for the future when we explore things such as additive blending and inverse kinematics.
But, from a rapidly prototyping gameplay perspective it might have been better to have saved the re-architecting for another day.
Alas.
I'm not sure that there are any more systems that need to be re-imagined from the ground up. So this won't be a common occurrence.
Other Notes / Progress
- Refactored the bone interpolation API in the
blender-armaturecrate.
Made a rig for the bow. I've been taking my new art learning regiment seriously and am excited to continue progressing.
Next Journal Entry
I'm taking the next two weeks to go all out in prototyping as much of bow and arrow combat as I can.
I'll be thrilled if two weeks from now I have something that "feels good".
What does "feels good" mean?
I'm not sure. I hope to figure that out along the way.
By next week I want to have some early screenshots and videos for my journal entry.
Then two weeks from now, something that "feels good".
I'm excited. I can do it.
I will need to be judicious about avoiding working on things that I can save for later.
Cya next time!
- CFN
092 - Firing a Bow (Part 1/4)
November 8, 2020
This week I worked on the Bowman skill that allows players to use a bow and arrow for ranged attacks.
I mentioned in 091 that I was not expecting to finish the Bowman prototype this week because I knew that
there are some larger one-off implementations that were needed.
So this week I'll talk about some of the work that has gone into setting that foundation, and then next week I'll have a video of a player firing a bow.
Rendering Equipment
It is now possible to see equipment that is being held, such as a bow in a players hand.
As part of my work on the Bowman skill I implemented being able to see equipped items.
This is powered by a new addition to the engine that I am calling Named Points.
A Named Point is a point in model space that can optionally be influenced by an armature's bones.
A renderable can have any number of Named Points. Right now the RenderableId::Human's corresponding render descriptor contains
two Named Points, MainHand and OffHand.
When rendering equipped weapons the RenderSystem looks up the appropriate Named Point along with the corresponding dual quaternions for
the bones that influence that point and uses them to calculate the transformation matrix to apply to the equipment.
After taking some time to figure out the data structures and a clean implementation I am now happy with how things are set up.
The system should work well for future mount points that I need for different scenarios such as describing where to display particle effects or for specifying inverse kinematic targets.
Coordinated Sequence System
This week I implemented the concept of a CoordinatedSequence.
A CoordinatedSequence is used to describe a series of things that should happen.
A CoordinatedSequence can have one or more tracks that are driven simultaneously, each containing one or more steps that describe what should happen.
Here's a list of the steps for the sequence triggered by firing a bow, with the ones that I implemented this week marked as (SUPPORTED) and
the work remaining for next week marked as (TODO).
-
(SUPPORTED) Receive indication that a bow was fired
-
(SUPPORTED) Trigger fire bow animation on human armature
-
(SUPPORTED) Wait for pose marker for reaching towards back (quiver)
-
(SUPPORTED) Spawn an arrow in the main hand
-
(SUPPORTED) Wait until pose marker for touching bow
-
(TODO) Trigger animation for bow's string pulling back and recoiling forwards
-
(SUPPORTED) Wait for pose marker for releasing bow
-
(TODO) Start spawned arrow mesh on a trajectory towards the target
-
(TODO) Update the arrow's position every frame as we interpolate the trajectory
-
(TODO) End sequence when arrow hits target
So there are a few more things to implement to be able to see a player fire a bow. I'll have them working by the next journal entry.
All of this is being implemented in a re-usable way so that future sequences will be easier to add in.
Other Notes / Progress
-
Continued familiarizing myself with WebGPU.
-
Broke out an enum
ItemIdfrom variants inside ofIconName. Icons and items were previously stuffed into one enum. One of a handful of poor decisions that I made when I was first learning Rust back in 2018. -
Created a
crates/recipesin the engine to generically power crafting systems. The recipes system still needs a fair bit of work to begin to crystallize, but I'm making progress. -
Came up with a 6 day per week training regiment for improving my art skills. Let's see how it goes.
Next Journal Entry
By the next journal entry I will have a prototype of the Bowman skill live.
If I get that in place early I will continue to work on the recipes system since it in an important foundation that will power several skills in the game.
Cya next time!
- CFN
091 - Prototyping Butcher
November 1, 2020
This past week was my second week of trying to prototype as much as I can of a new gameplay feature every week.
This time I worked on prototyping the Butcher skill.
I managed to implement the basics of the Butcher skill. I have started planning out a process to automatically generate icons for items,
so I did not bother making any icons for these inventory items. This video reminds me that the skeletal animation logic needs work.
A good bit of the logic for the skill as it stands now already existed.
The main thing that I needed to add was support for potentially not getting back one of the receivables from a formula, since its possible for a
Butchers to make a mistake.
For this I re-used the existing RollFormula enum.
/// Used for the rate at which something can happen
#[derive(Debug, Serialize, Deserialize, Copy, Clone)]
pub enum RollFormula {
    /// There is a constant rate of success, regardless of the situation.
    Constant(f32),
    // TODO: More formula inputs that allow for situational rates such as a linear interpolation
    //  between some min and max percentage based on skill level
}
# A YAML file containing all of Akigi's crafting formulas

formulas:
  # ... snippet ...
  - received:
    - item: {id: RabbitEars, quantity: 1}
      roll: {roll: {formula: {Constant: 0.4}}, missed: ButcherRabbitEars}
    - item: {id: RabbitTail, quantity: 1}
      roll: {roll: {formula: {Constant: 0.85}}, missed: ButcherRabbitTail}
    consumed:
    - { id: CagedRabbit, quantity: 1 }
    combined_crit:
    - OnlyOne: [ { Has: { id: ButchersKnife } } ]
    - OnlyOne: [ { Has: { id: CagedRabbit } } ]
    xp_gains: {Butcher: 1}
I also added a way to give the player a message when they fail to receive a receivable item from a formula.
I expect the formula data structures to continue to evolve as I add more skills and have more ideas.
Butcher Skill Vision
The Butcher skill is meant to be fairly simple conceptually. Put nicely, you convert animals into raw materials.
These raw materials can then be used for other skills such as Worship or Juju.
For example, you might use a Rabbit's tail as part of a ritual, gaining some experience in Worship along the way.
As your Butcher level increases you become less likely to make a mistake while getting parts from a creature.
You can gain additional XP when you successfully extract the more difficult parts of a creature.
Placing a Butcher's Knife respawn point in the game editor. During this prototyping phase I will be throwing things into the world at arbitrary locations as I feel out different gameplay mechanics. The editor does not yet make it clear what editing mode you are in, but that will improve over time. Polishing the editor interface is not my current priority, as fun as it would be.
Art
A friend asked me if there was a portion of the game work that I could find someone to do in order to make progress more quickly.
My answer to this has been fairly consistent over the years. If I was to ever look for help, the first place that I would start with would be the game's art.
This was on my mind throughout the week, especially after I spent a couple of hours working on a fairly simple knife model.
My current stance is that as modern tools continue to make it easier to create software and art assets, being skilled at both writing code and creating visuals positions one person to be able to accomplish what might have taken five or ten a decade prior.
This matters to me because one of my personal goals is to build a profitable, complex project alone.
I believe that over time it will continue to get easier for an individual to write robust software and to produce compelling art.
For example, a few years ago one might have reached for Photoshop when texturing a mesh. Today you would reach for a tool along the likes of Substance Painter. This is a massive productivity boost in only a few years.
I don't expect to ever be in the top twenty percent of artists in the world, or to produce triple A graphics, but I do think that over time I will get good at a style and flavor that is unique to me.
This will just take more practice and more inspiration.
Over the last year or so I have become increasingly interested in African history and mythology, so we'll see if that helps to inspire my art style as I continue to read and learn.
Other Notes / Progress
-
Added support for rendering shadows in the
MetalRenderer, bringing it one step closer to theWebGlRenderer. -
Started going through the learn-wgpu tutorial. Now that I'm somewhat familiar with Metal I expect to be able to pick up WebGPU fairly quickly, since the modern graphics APIs all rely on similar concepts and abstractions. I'll eventually implement a
WebGpuRendererthat passes the engine'srenderer-testsuite so that can be used so that upcoming tools can be run in Linux CI. -
Added the hotkey
Ctrl+Sto save a project from within the editor. Before this, even though I've had the logic for saving implemented for a month or two, I could not save my edits in the editor since it does not have a save button right now. I was just editing the data files by hand.
October's Finances
The finances for October 2020 were:
| item | cost / earning |
|---|---|
| revenue | + $4.99 |
| Stripe fees | - $0.44 |
| aws | - $263.65 |
| adobe substance | - $19.90 |
| GitHub | - $9.00 |
| adobe photoshop | - $10.65 |
| adobe illustrator | - $22.38 |
| Datadog | - $8.12 |
| Planning Retreat Lodging | - $326.26 |
| Planning Retreat Food | - $106.51 |
| --- | --- |
| total | - $761.92 |
Spent a few hundred extra dollars this month on the planning retreat, but otherwise the costs are similar to the last few months.
Next Journal Entry
During this coming week I plan to work on bow and arrow combat.
This will rely on a number of pieces of functionality that I don't currently have in place, such as wielding items, firing projectiles and applying damage on a different tick than it was received, to name a few.
I'm expecting there to be more that I want to do here than can fit into a week at my current pace, so I will try to prioritize the development accordingly.
I will be also continue the recent trend of using the first two days of the week to work on the engine's tooling and rendering tech. This time I plan to start making progress on some of the ground work needed for an asset compilation plugin that automatically generating icons for items.
 See you next week.
Cya next time!
- CFN
090 - Prototyping Hunting
October 25, 2020
This week I kicked off a new routine where, for the next couple of months, I will be prototyping and deploying a new game play idea within the world of Akigi every week.
One benefit of this new weekly prototype cadence is that needing to deliver weekly will force me to focus on building the most important aspects of each feature, as opposed to spending time on less urgent improvements.
A second benefit is that having a deadline to aim for each week serves as a motivator that increases the amount of time per week that I can spend at peak focus, especially in the last few days of the week as the deadline begins to feel more pressing.
Third, by focusing my week on delivering game play there is less opportunity for me to over invest in my guilty pleasure of tooling and automation.
I hope that this new routine will lead to a few fun features and a few eager players that feel invested in Akigi and are excited for it to come to fruition.
For now, my plan is to throw all of the prototypes into one area of the world over the coming months as I iterate towards having a handful of fun game mechanics.
Once there is interesting game play in place and there are a few players looking forwards to Akigi's progress I will use a couple of months to better organize the world before releasing an official alpha version of Akigi.
This week I worked on prototyping the Hunting skill.
Hunting Prototype Vision
Akigi is a point and click game, and point and click games are not generally known for giving you a feeling of deep immersion in the activity that you are performing.
Despite this, I am aiming for the player to feel engaged with the skills that they are performing and training.
I started my approach with the Hunting prototype by thinking about how you hunt in the real world. You may go off into the woods, look for indications of a nearby animal
such as tracks and broken twigs, and then continue to follow the clues until you find your prey.
Or you may set up a trap in a frequented area and come back later.
You may catch some prey live, while others you might first finish off with a bow.
This week I wanted to capture the feeling of using your wits to track down your prey and then catch it.
When you are close to tracks you can see and inspect them. A good hunter is able to tell the direction that the tracks point in and how fresh they are, giving a sense of how nearby the animal might be.
By following the tracks you eventually find a rabbit burrow and can attempt to grab the rabbit. If you are quick enough, you'll catch it. Otherwise it will run away and you will have to track down another one.
Making this feel right will take iteration. This week way my first attempt.
Hunting Prototype Reality
I did not finish all of the functionality that I wanted to prototype this week. In fact, I barely even have anything visible to show.
Even still. I am happy with how this first week of prototyping went. It showed me that the engine has come far enough to be able to get game play into the game in a reasonable amount of time, albeit rudimentary this time around.
Most of the work that I did for this prototype was one time ground work that will be re-used for future features, so as the engine matures and more of the ground work is in place my prototyping speed will get faster and faster.
That's encouraging.
What I managed to get done for this weeks prototype. Not much, but I am looking forward to the second week of prototyping. I did not get to make new meshes, so I used placeholders. I also did not get to making a hunting animation. Better luck next week.
Other Notes / Progress
-
Added the ability to focus and edit a
TextAreain the user interface. This will be useful for different editor tools. -
The first couple of weeks of prototyping will be slower and have less to show for themselves than future weeks since I will be adjusting to this new cadence and putting engine features into place to support it. But I'm expecting that over the next few weeks I will begin to be able to deliver more robust prototypes each week.
Next Week
For the next journal entry I will be prototyping the Butcher skill.
This skill involves converting1 animals that have been caught into different raw materials.
The Butcher skill will feed into other skills.
For example, you may use certain animal parts for ceremonial rituals, or as ingredients in cooking recipes or for juju.
Cya next time!
- CFN
Put nicely.
089 - Placing Initial Entity Spawns
October 18, 2020
This week I continued working on the editor tool for placing initial entity spawns within the game world.
While there are still a few things left to tie together, I was able to make it to a point where there is visual progress to share.
Right now the you cannot see the objects that you are placing until you switch to a different mode within the editor. This does not make sense, so at some point I will combine these modes within the editor.
You can click to place an initial entity spawn, which currently gets rendered as a red bush but in the future will be rendered as a semi-transparent version of the entity that will be spawned.
There are a few things remaining to implement that I should wrap up over the next couple of days.
Most notable of these is a text area where I can see the EntityToSpawnDescriptor that encodes what gets spawned.
I am currently implementing the data structures and methods that will power text areas.
Editor Rendering Architecture High-Level Overview
When we implemented adding scenery in the editor in 082, all we needed to do in order to see the new scenery was to implement
a way to tell the game that it needed to update its scenery HashMaps.
The game already knew how to load and render scenery, even if it was defined at run time.
Initial entity spawn locations were different though. The game client does not have any notion of where entities should be spawned. It just renders entities that the server tells it about.
We want to be able to edit the game while playing it in the editor, so we needed some way to render initial entity spawns within the running game pane even though the game knows nothing about them.
Here's a high level view of the rendering architecture that solves for this problem.
Anambra1 engine has a Renderer trait that is used to implement different rendering backends such as the WebGlRenderer for the web and
MetalRenderer for MacOS devices.
The editor uses a native Renderer such as the MetalRenderer on MacOS, but when it creates instances of the game it gives them a fake Renderer implementation
that simply stores the RenderJobs that the game instances create in an Arc<Mutex<Vec<RenderJob>>> that the editor has access to.
pub struct EditorRendererResource {
    renderer: Box<dyn Renderer>,
    pending_render_jobs: Arc<Mutex<Vec<RenderJob>>>,
}
The editor's RenderSystem combines all of the rendered game instances along with the editor's user interface into a single RenderJob, and then
passes this merged RenderJob to the real Renderer implementation.
impl<'a> System<'a> for RenderSystem {
    type SystemData = RenderSystemData<'a>;

    fn run(&mut self, mut sys: Self::SystemData) {
        let render_job = create_editor_render_job(&mut sys);

        let mut jobs = vec![];

        for job in sys.renderer.pending_render_jobs().lock().unwrap().drain(..) {
            jobs.push(job);
        }

        jobs.push(render_job);

        let merged = merge_render_jobs(&jobs);
        sys.renderer.render(merged);
    }
}
Note that the editor has access to the RenderJob that each game created, before it gets rendered.
This allows the editor to modify the RenderJob for any game, enabling us to insert render descriptors for
rendering entity spawn locations into the job that describes the game's final presentation frame buffer.
Rendering to the same frame buffer that the game is being rendered to allows for proper depth testing of inserted objects to render.
Here is the code where we insert initial entities into a game's FramebufferRenderJob that describes how to render
to the game's final framebuffer2.
// FIXME: Use some sort of HashMap to look up the RenderJob and FBJob
//  instead of iterating over all jobs
'pane_jobs: for rjob in pending_render_jobs.iter_mut() {
    for fb_job in rjob.framebuffer_jobs_mut().iter_mut() {
        if fb_job.framebuffer_id() == game_pane.final_framebuffer_id() {
            let game_pane_fb_job = fb_job;

            match game_pane.mode() {
                GamePaneMode::Playing => {}
                GamePaneMode::PlaceObject(_) => {}
                GamePaneMode::EditTerrain(_) => {}
                GamePaneMode::Object(o) => {
                    sys.push_initial_entity_spawns(
                        &mut render_job,
                        game_pane_fb_job,
                        game_pane,
                        o,
                    );
                }
            };

            break 'pane_jobs;
        }
    }
}
This sits on top of work from 076 where I introduced the concept of prefix IDs for GPU resources, allowing multiple applications to share the same GPU device handle and resources without worrying about two different applications accidentally using the same ID for a GPU resource such as a texture or vertex buffer.
I always appreciate when old investments get re-used or built upon weeks, months or even years later.
Other Notes / Progress
- Made the game server's build script take all of the initial entities spawns that are defined on disk in YAML format and generate a binary encoded file that is included into the final game binary and used to spawn entities at the beginning of runtime.
Next Week
I am in the middle of implementing a re-usable text area UI component. The current use case is to display the YAML that describes an initial entity spawn in the editor's active object properties pane, but in the future there are sure to be more use cases for editable text areas.
I won't make it editable this time around. Just displaying text is enough for now, I can edit the files by hand for some time.
After this I am starting a new stretch where I will be prototyping new gameplay and deploying my progress weekly.
Stay tuned!
Cya next time!
- CFN
The engine has a name now!
Game instances that are running in the editor have their final framebuffer render to a color texture. The editor then displays that color texture in the viewport.
088 - Generic Asset Compilation
October 11, 2020
This last week saw me getting settled in and productive after dealing with moving out of my apartment at the end of September.
I had two main work streams over the last week.
One was continuing to work on the tool for placing initial entity spawn points within the game editor.
The other was spending a couple of days making a plan for finishing and releasing a first version of Akigi.
Placing Initial Entity Spawns
There are a few different ways to spawn entities in Akigi, each catering to a different use case.
The one that the editor leans on is an approach where I use an enum to describe how to spawn an entity.
This approach makes it easy to add multiple instances of some set of components without needing to repeatedly list out all of those components. When deciding how to spawn the entity a function matches on the enum variant and uses that to initialize the entity's components.
When we need more variety for how an entity can be spawned we can add fields to a descriptor variant, or just add a new variant.
Here is how the EntityToSpawnDescriptor looks for Akigi.
/// Describes how to spawn an entity
#[derive(Debug, Copy, Clone, PartialEq, Eq, Deserialize, Serialize)]
#[allow(missing_docs)]
pub enum EntityToSpawnDescriptor {
    // ...
    AnnattoJar { quantity: u32 },
    // ...
    Mosquitos { wander: TileBoxName },
    Rocks { quantity: u32 },
    Snail,
    SnailBody { quantity: u32 },
    SquashedMosquito { quantity: u32 },
    // ...
    ViciousCatClay,
    Capuchin,
}
The bulk of this week went to some of the work that surrounds placing entities in the editor. This work is not yet completed but should be completed by the next journal entry.
The editor displays entity spawns by rendering the entity that is being spawned.
In order to do this, the editor needs to be able to loading assets and buffer them onto the GPU.
This requirement led to me working on the some of the engine's asset management code to make it more generalized.
The asset management code was previously largely coupled to Akigi's expectations, but I've made it more general.
The typetag library came in handy for this workstream, allowing me to define an Asset trait and then serialize
and deserialize trait objects for different assets.
I also started moving towards a plugin system for asset compilation.
The asset compiler now reads a configuration file from the project that is being worked on in order to find the
locations of dynamic libraries that expose implementations of an AssetCompiler trait.
Now projects can support arbitrary assets.
Planning Retreat
In 087 I mentioned that I was going to do a bit of planning for Akigi.
I spent a couple of days at a hotel writing out my plans in a notebook.
I still need to type them up - but I have a much better sense of my path forwards now.
Other Notes / Progress
- Chatted with Forest Anderson from the Veloren team to get some advice on AWS. Was a fun chat.
Next Week
By the next journal entry I plan to finish up the tooling for adding initial entities into the world so that I can get started on the first skill in the game.
Cya next time!
- CFN
087 - Planning a Planning Retreat
October 04, 2020
It's been a few weeks since I started working on the plan for what is needed to launch a first version of Akigi.
I've made progress, but not as much as I need in order to start having a clear path forwards.
I will be renting a hotel room for two days this week, bringing not much more than a few notebooks.
No phone, no laptop, no technology.
While at the hotel I will finish the plan for making and launching an enjoyable version of Akigi.
I'll buy food so that I don't have to worry about cooking, and perhaps take a walking break here and there since the hotel is in a nice area.
I've slowed down my work on the editor tool for placing initial entity spawn points in order to focus on writing out the plan for Akigi's game play and remaining architecture.
My top priority is having a clear path towards an initial release so that I can begin to receive and iterate on feedback from real players.
Anything else is secondary right now.
Tooling Progress
In the last week I made more progress on the editor tool for placing entity spawn points.
I'd estimate that there are roughly three dozen hours of work left, mainly because I have been re-writing parts of the asset loading systems and other asset related logic along the way.
I have been lightly investing in generalizing different aspects of the engine so that they are not coupled to Akigi, since my longer term goal is for the editor to be applicable to other use cases.
Other Notes / Progress
-
Lightly researched plugin architectures in Rust so that in the future the asset compilation process can be easily extensible to any use case. Started doing some research plugin
-
Working on loading and rendering assets in the editor. A lot of the asset system is coupled to Akigi's needs, so removing this coupling so that the editor can be more general purpose.
Finances
Our finances for September 2020 were:
| item | cost / earning |
|---|---|
| revenue | + $4.99 |
| aws | - $270.30 |
| adobe substance | - $19.90 |
| GitHub | - $9.00 |
| adobe photoshop | - $10.65 |
| adobe illustrator | - $22.38 |
| Datadog | - $7.63 |
| --- | --- |
| total | - $334.87 |
Next Week
I would like to get back to being able to share images and videos of my progress in these journal entries.
Give me a couple of weeks or so to get the planning and tooling out of the way so that I can get back to working on the game.
Cya next time!
- CFN
086 - Looking Forwards
September 27, 2020
This passed week I was preparing to move and meeting up with different folks for dinner, so this way one of my least productive weeks every for Akigi.
I will spend this week working on the entity placement tool.
I will also be planning out everything that I need to add to the game and world in order to release something compelling.
I will have more of an update next week.
Cya next time!
- CFN
085 - Painting Terrain Materials
September 20, 2020
Another tool is now working!
I'm a bit tired as I type this, so I will keep it short.
Over this last week I added a third tool of the saga that I began in early August.
I can now paint materials onto the terrain in the editor.
Painting height and materials onto terrain. I need to add a smooth brush with exponential falloff from the center. Right now there is only a square brush with constant strength. In the future I may add support for procedural displacement map and blend map generation to compliment the hand painting process.
As with the first two tools, there is still much to be desired, but I can smooth off rough edges as I go. The vast majority of what I need for terrain material painting is in place.
Other Notes / Progress
-
Added the beginnings of an Active Object Properties panel, inspired by Blender.
-
Added a generic
TerrainMap<P: TerrainMapPixel>to power mapping values to terrain so that the displacement maps and blend maps could leverage the same underlying implementations.pub type BlendMap = TerrainMap<BlendMapPixel>; pub type DisplacementMap = TerrainMap<DisplacementMapPixel>;
Next Week
This week I will get started on the final tool of the tooling saga, one that will allow me to point and click to place interactive entities into the world.
This should end up being an extension of the scenery placement tool that I already wrote, so I'm expecting to have this working by the end of the week.
After that I will be making a list of remaining work to launch a game and then diving into getting Akigi ready for a player base.
I am expecting that these tools will drastically speed up the pace at which I can add to Akigi's world.
Cya next time!
- CFN
084 - Painting Terrain Height
September 13, 2020
This week I added the basics of a terrain sculpting into the editor, building on top of the architecture that I put into place in 083.
You can now click and drag in order to paint height onto the terrain within the game editor, and the running instance of the game will be hot updated with the new displacements.
Clicking and dragging the mouse in order to modify terrain displacement within the game editor. There is still much to be desired, but nevertheless I'm excited to see things coming together.
There are a number of rough edges within the implementation to smooth out, but I'll address them over time.
Other Notes / Progress
It continues to bring me joy seeing the engine and its tools come together.
Fun!
Next Week
The first two tools of the Tooling Saga were the scenery placement and terrain sculpting tools.
Both still need work, but they're at a place where I can add in more of what I need when I need it over time.
So I'm going to move on to working on the third tool, one that allows me to paint materials onto terrain.
This isn't all that different from painting displacements onto terrain, so I'd like to get this done before the next journal entry.
After that I will add a fourth tool for placing entities that should end up leveraging most of the same code that the scenery placement tool uses.
All in all I'm expecting to spend around two or three more weeks on tooling and then I will dive back into working on adding game play into the game, using all of these new tools to speed up my workflow.
Cya next time!
- CFN
083 - Editable Terrain Layers
September 06, 2020
This week I started working on creating a terrain displacement sculpting tool for the editor.
I started off by reading about how other engines have approached terrain sculpting, and in the process I came across the idea of having a layered terrain editing system.
In a layered editing system you can have any number of editable layers per terrain chunk, each having their own displacement map.
The final map for the chunk is generated by blending all of its layers.
This approach is an improvement over a non-layered editing system in a number of ways, the main advantage being that a layered editing system allows you to iterate on your terrain's details without ruining areas that you are already satisfied with.
You can create a new layer when you want to experiment with adding detail. If things don't work out you can delete the layer, all without needing to modify and potentially ruin the other layers that you are already happy with.
Even though the advantages were clear, having a layered terrain editor was not an immediate need of mine.
Despite this, I decided that the difference in the architecture of a layered system vs. a non-layered system would be significant enough that it would be much easier to add in from the beginning as opposed to in the future.
So I spent the bulk of this week re-factoring the editor's terrain data structures to cater to an editable-layer system.
Terrain Edit Layers
In 080 I implemented saving and loading chunked terrain data too and from disk.
These in memory and disk representations did not at all account for layers, so I re-worked them this week over the course of a few days.
I ended up encapsulating the concept of edit layers into a TerrainEditLayers struct, which in turn uses
other layer-friendly data structures.
pub struct TerrainEditLayers {
    child_to_parent: HashMap<TerrainEditLayerOrGroupId, TerrainEditLayerGroupId>,
    parent_to_children: HashMap<TerrainEditLayerGroupId, Vec<TerrainEditLayerOrGroupId>>,
    layers_meta: HashMap<TerrainEditLayerId, TerrainEditLayerMeta>,
    groups_meta: HashMap<TerrainEditLayerGroupId, TerrainEditLayerGroupMeta>,
    layer_chunks: HashMap<TerrainEditLayerChunkId, TerrainEditLayerChunk>,
    root_group_id: TerrainEditLayerGroupId,
}
I designed the disk representation that the in memory representation gets serialized into to be resistant to merge conflicts.
Data is split across files in such a way that if two different branches are working on two different areas of the terrain they won't have any merge conflicts.
This was not necessary for me at this time since I don't plan to work on terrain across branches anytime soon, but I still implemented it because it was much easier done now vs. later.
Other Notes / Progress
The work on the scenery placement tool and now the work-in-progress terrain sculpting tool has begun to set a technical foundation that future editor tooling will be able to build upon.
In a week or two I will start working on the terrain material painting tool, which I expect will lean heavily on the code that I'm currently putting into place for the terrain sculpting tool.
This tooling journey has been fun. I get excited about writing tools to simplify arduous processes.
I'll keep pushing and get these tools done. Then I can get back to working on adding game play into Akigi.
It's taken me four weeks to get one and a half of the tools that I want to add into place, so at this point I'm estimating another four weeks before I return to working on game play features.
There will be more work to do on these tools going forwards after I finish this first batch of three, but that can happen in smaller pieces over time on an as needed basis.
Finances
Our finances for August 2020 were:
| item | cost / earning |
|---|---|
| revenue | + $4.99 |
| aws | - $269.23 |
| adobe substance | - $19.90 |
| GitHub | - $9.00 |
| adobe photoshop | - $10.65 |
| adobe illustrator | - $22.38 |
| Datadog | - $8.12 |
| --- | --- |
| total | - $334.29 |
I need to look into what's going into the AWS bill and see if there's anything that I can remove. Would be nice to get it under $200 per month.
Next Week
Now that I can save and load terrain editable-layer data I'll be turning my attention towards implementing the front-end for terrain sculpting.
This will include things such as being able to change into a terrain sculpting mode, being able to click and drag to sculpt terrain, as well as a list of other supporting implementations.
In the next journal entry I'll be sharing a video of my progress on the sculpting tool.
Cya next time!
- CFN
082 - Placing Scenery in Editor
August 30, 2020
In 079 I kicked off The Tooling Saga, a multi-week stretch where I will write several different editor tools that will make it easier to add
gameplay to Akigi.
This journal entry marks three weeks into the saga, as well as, after quite a bit of implementation work, the first major milestone of this tooling journey.
I've implemented the basics of being able to add scenery into the world, enabling me to point and click in order to add new non-interactive objects into the game.
Here's a short video demonstrating the new scenery placement tool:
Note that the game editor uses the Metal 3d graphics API when running on MacOS. My
crates/renderer-metalis not yet passing thecrates/renderer-testtest suite yet, so a few things such as mip-mapping and shadows don't currently work in the editor. This means that the game in the editor looks a little bit different from the game in the browser. I'll fix that in the future.
The user interface for placing scenery is still rough and tumble. I've made some strides towards making it easier to add new interfaces, but there is still work to be done.
In the video I'm pressing Tab to switch between play and edit mode and then Shift + A to open the list to select scenery to place.
Mouse Terrain Intersection
In order to place scenery in the world I need to know what part of the world is being clicked on.
This amounts to starting with the mouse's position in screen space, then converting from there to normalized device coordinates, then to eye space and finally to world space.
I've had code that handled this conversion inside of the game crate for a couple of years now since it's used for many different player interactions with the game world.
Now that we have the editor this code needed to live in a re-usable place, so I abstracted it out, along with the rest of the camera related code, to a crates/camera library in the engine's Cargo workspace.
The already editor had a winit event loop which gives it the coordinates of the mouse, but in order to place scenery while playing the game it also needed access to the game's camera.
I ended up creating an EditableApp trait which exposes this information. My longer term vision with this trait is that any future applications made using this engine can simply implement the
trait and will then be fully compatible with the editor.
Here's how the trait looks so far:
/// Allows an game to run in the editor.
///
/// Different methods give the editor the ability to do things such as:
///
/// - Query the running game application instance for information
///
/// - Hot-update assets in the running game to enable things such as hot-reloading/insertion of new
///   scenery
///
/// # Guidelines for Exposing Information from App -> Editor
///
/// We seek to minimize the amount of information that we expose in order to keep the editor
/// de-coupled from application specific details. The less there is going on, the easier it will
/// be to use the editor for other applications in the future.
///
/// So, we should be sure that there is no other way to get the information that we need before
/// exposing it to the editor from the app.
///
/// For example, instead of exposing the TerrainResource to the editor, we simply moved it to
/// another crate so that the editor can maintain its own instance directly.
///
/// This separation will prevent editor-focused functionality from leaking into application crates.
///
/// Methods in this module should contain explanations as to why exposing the information
/// from the app was the best approach.
pub trait EditableApp {
    /// Run a tick of the application's simulation.
    ///
    /// For a game this is commonly referred to as a "game tick".
    fn run_tick(&mut self);

    /// Exposed because it would be difficult for the editor to maintain it's own version of the
    /// game's camera since the camera simulation can be influenced by misc game state factors such
    /// as not being able to move the camera while in a cut scene.
    fn camera(&self) -> Camera;

    /// Push to the queue of unprocessed raw user input.
    /// A game will typically drain this queue once per frame.
    fn push_input_event(&mut self, input_event: InputEvent);

    /// Push a message from the game server -> game client.
    ///
    /// This might be from a real server that the editor is running, or a synthetic message that
    /// the editor created.
    fn push_server_to_client_message(&mut self, bytes: &[u8]);

    /// Insert scenery into a terrain chunk.
    fn insert_scenery(
        &mut self,
        terrain_chunk_id: TerrainChunkId,
        scenery_id: u16,
        scenery: SceneryPlacement,
    );

    /// Used for down-casting within unit/integration tests.
    fn as_any(&self) -> &dyn std::any::Any;
}
With both the camera and mouse coordinate information available to the editor, combined with the work over the passed couple of weeks refactoring the terrain implementation and giving the editor access to its own instance of the TerrainResource,
it was now possible for the editor to know the coordinates that the mouse intersected the terrain. A prerequisite for all of the upcoming editor tools.
Play Mode, Place Mode
My approach to building out the editor is to throw in what I need without worrying too much about the editor's user experience experience, knowing that my strict test-driven development practice will allow me to easily move and refactor things over time as I learn more about what a good editor experience should feel like.
I've also been reading the documentation of other editor's to get some insight into how others have handled things that I'm thinking about or working on.
I also learned a good bit from the excellent talk Creating a Tools Pipeline for Horizon: Zero Dawn.
Before I started working on The Tooling Saga it was already possible to play Akigi in the game editor.
So, since I already have a view into the game world in editor, I decided to start by making the new tools work while playing the game in editor.
This way I wouldn't need to spend any time thinking about how to render the world in a more editor friendly way just yet.
Plus, I know that I will always want to be able to edit the game while playing it since that let's me visualize the world in exactly the way that a player will while I am editing, increasing the likelihood that I design things just-right.
Right now I can press Tab to toggle between Play mode and Place Scenery mode in a game pane within the editor.
User Interfaces
I have a custom user-interface system for the engine.
One of my favorite features is the enum-based event system which makes adding event handlers to UI elements feel lightweight and re-usable.
I'll more deeply dive into the design of this system sometime, but here are a couple quick snippets.
Right now UI elements (quads or groups of text characters) use an EventHandlers struct for to register different events.
pub struct EventHandlers<N, I: KeyboardInputHandler<N>> {
    onclick_inside: Option<MouseInputHandler<N>>,
    onclick_outside: Option<MouseInputHandler<N>>,
    onmouseover: Option<MouseInputHandler<N>>,
    onmouseout: Option<MouseInputHandler<N>>,
    ontouchmove: Option<MouseInputHandler<N>>,
    on_char_or_key_received: Option<I>,
}

#[derive(Debug)]
pub struct MouseInputHandler<N> {
    event: N,
    captures: bool,
}
The generic N type is any type that the application wants to use to describe events that occur. This would typically be an enum.
The game and editor each have their own event enum which data structures specific to their own needs.
Here's the event enum for the editor. It's fairly small since the editor is still young.
/// When the user types or clicks or moves their mouse or enters any other sort of input we create
/// an `InputEvent`.
///
/// Every frame the `InputEventProcessorSystem` iterates through the input events and translates
/// them into into `NormalizedEvent`s.
///
/// TODO: NormalizedEvent does not feel like the right name
#[derive(Debug, PartialEq, Clone)]
pub enum NormalizedEvent {
    /// Indicates that nothing should occur.
    /// This is useful when you have a UIElement that you want to capture clicks but not do
    /// anything else.
    DoNothing,
    /// Forward an input event to the game's runtime
    PushInputEventToGame(InputEvent),
    /// Set the size of the framebuffer that backs the editor window
    SetFullWindowFramebufferSize(PhysicalSize),
    /// Resize the ViewportResource
    SetViewportResourceSize(LogicalSize),
    /// See [`PlaceScenery`] for documentation.
    PlaceScenery(PlaceScenery),
    /// Set the location of the screen pointer (mouse)
    SetScreenPointer(Option<LogicalCoord>),
    /// Set the mode for the game pane with the provided ID.
    SetGamePaneMode(SetGamePaneMode),
    /// Set the renderable ID selector for a game pane.
    SetRenderableIdSelector(TabAndPaneId, Option<RenderableIdSelectorUi>),
    /// Set the RenderableId used when placing scenery.
    SetPlaceSceneryRenderableId(TabAndPaneId, RenderableId),
    /// Push char input to the renderable ID selector
    PushKeyToRenderableIdSelector(TabAndPaneId, CharOrVkey),
}
I made some improvements to the user interface code this week.
This mainly came down to adding a new field to the EventHandlers struct shown above for handling keyboard input, as well as a new trait for converting that raw keyboard input into a NormalizedEvent.
/// A type that can be converted into a NormalizedEvent when given some keyboard input.
///
/// Useful for UI elements that handle key/character presses
pub trait KeyboardInputHandler<N> {
    /// Create a NormalizedEvent based on the inputted the key.
    fn to_normalized_event_with_key(&self, key: CharOrVkey) -> N;
}
I also added the beginnings of a GridLayout struct that powers UI layouts for lists and grids.
Here's an example call site:
let layout = GridLayout::new(
    |idx| {
        if idx == 0 {
            Some(RenderableSelectorUiIdKind::SearchFilterText)
        } else if idx < renderables.len() as u32 + 1 {
            Some(RenderableSelectorUiIdKind::RenderableName(idx as _))
        } else {
            None
        }
    },
    sel.coord(),
    FirstRowColumnOffset::new(5, 5),
    GridWidthHeight::new(
        GridSize::OffsetFromFurthestItemEdge(5),
        GridSize::OffsetFromFurthestItemEdge(5),
    ),
    RowColumnLimit::new(OneOrMore::new_unlimited(), OneOrMore::one()),
    // FIXME: Use RenderableListEntry::new().render() to get the size.
    //  This would properly factor in text size, instead of hard coding.
    (|_id| 100, |_id| 30),
    (|_id1, _id2| 0, |_id1, _id2| 5),
);

// ... snipped ...

for (idx, item) in layout.enumerate() {
    // ... snipped ...
}
I also made unique IDs for all user interface elements (quads and text sections) mandatory. Right now I am only using this to query for UI elements in my unit tests, but I can imagine that in the future being able to find a specific element could be useful at runtime.
The game-app and editor each have their own UserInterfaceResource and thus each have their own ID enum.
Here's the game's enum:
/// Uniquely identifies a UI element in the app
///
/// TODO: Deny unused variants
#[derive(Debug, Hash, Eq, PartialEq, Ord, PartialOrd, Copy, Clone)]
#[allow(missing_docs)]
pub enum AppUiId {
    OverheadHitpoints(OverheadHitpointsUiId),
    OverheadDammage(OverheadDamageUiId),
    OverheadText(OverheadTextUiId),
    SkillCard(SkillCardUiId),
    InventoryItem(InventoryItemUiId),
    SidePanelTopButton(SidePanelTopButtonUiId),
    SkillsPanelBackground,
    InventoryPanelBackground,
    LoadingText,
    InteractionMenuBackground,
    InteractionMenuEntry(usize),
    DialogueOverlayBackground,
    DialogueOverlaySpeakerText,
    DialogueOverlaySpeakerName,
    DialogueOverlayResponseText(usize),
    Compass,
    PendingChatMessageText,
    RecentMessagesPanelText(usize),
    BottomPanelBackground,
}
And the UserInterfaceResource that they both make separate use of.
pub struct UserInterfaceResource<N, I: KeyboardInputHandler<N>, Id: Hash> {
    latest_ui_batch: HashMap<ViewportId, HashMap<Id, UiElement<N, I>>>,
    pressed_keys: HashMap<VirtualKeyCode, PressedKey>,
}
Going Forwards
As you can see from the video above, this is a not-so-polished first pass implementation at placing scenery.
Over time I'll be using one or two hour stints here and there to add polish and convenience and better visual representations of things whenever I either run into an inconvenience or just have some inspiration to make things look and feel a bit nicer.
The game and the editor share the same underlying user interface implementation so anytime I make progress on the editor's interface I'm making progress what's possible in the game's interface and vice versa.
Other Notes / Progress
I'm excited about maintaining both the editor and the game this early in the project.
Having to make use of a fair bit of functionality in two different places is leading to much more informed and flexible implementations and code organization.
I'm feeling my usual excitement about how things will look one, five or ten years from now. I feel happy about the fact that over time it gets easier and easier to add to the code base.
A good maintainability score so far I would say! (I mostly give credit to the monstrous duo of Rust and test-driven development here.)
Next Week
Right now I can place scenery, but there isn't yet a user interface or backend implementation for moving the scenery around. I'm going to put the scenery editing implementation work on pause though and switch gears since I feel like to mix things up a bit.
This week I'll be working on sculpting terrain. I don't yet have a plan for the pull requests that I'll be submitting over the course of this implementation, so I'll start the week by jotting down a rough sequence of planned PR's and then dive right into implementation.
Cya next time!
- CFN
081 - Terrain Editor Progress
August 23, 2020
I made more progress working on the terrain editor and scenery placer this week.
I'm having a ton of fun.
I want to get this batch of tooling done so that I can get back to releasing gameplay.
Next week I should have some video/screenshots to show. For now I'm still in the back-end weeds.
Other Notes / Progress
- Finished refactoring the original terrain code. Looking good.
Next Week
Place objects into the world in the editor.
Cya next time!
- CFN
080 - Terrain Editor Groundwork
August 16, 2020
The first three tools that I plan to add to the game editor are placing objects, sculpting terrain and painting terrain.
All of those tools require to editor to be able to collision test against a representation of the terrain in CPU memory (there is separate data in GPU memory which is used for rendering the terrain), so this week I worked on giving the editor access to terrain data.
The game run time already had a CPU model of the terrain, but I intentionally did not take the quick route of just exposing those data structures to the editor. I instead split them out into a general purpose crate.
One of the architectural pillars of the relationship between the editor and the game run time is that they should share as little information as possible.
This approach has forced me to split code out of the game into more general purpose workspace crates such as user-interface and terrain.
This means that years from now it will be easier to re-purpose Akigi's game engine for other projects should I want to expand its footprint, since more and more of the engine code is being moved into re-usable libraries.
Saving and Loading Terrain
This week I started working on the EditorTerrain data structure that will help power terrain editing.
/// A data structure representing all of the terrain in the game world.
///
/// An editor can modify this data structure and undo/redo these modifications.
///
/// When the desired look is reached the terrain can be saved. This will write the relevant
/// texture maps and data files to disk.
pub struct EditorTerrain {
    chunks: HashMap<TerrainChunkId, EditorTerrainChunk>,
    materials: HashSet<String>,
}
The terrain is saved and loaded across many different files. Each chunk of terrain has a file for its displacement map, one for its blend map and another with meta data about the chunk.
The idea behind splitting this data across many files is that:
-
It's more scale-able. If you want a massive terrain you don't end up having a massive displacement map that you need to load into memory when editing terrain. Instead you can load and unload the data for a subset of the chunks making disk space, instead of memory, the cap on terrain size. The trade-off to this approach is that you need logic to keep track of which chunks are modified as well as a place on disk for these modified chunks so that when you save your edits terrain chunks that have been unloaded from memory still get saved to disk. But I can ignore that for now since my terrain is currently small enough to be able to keep all chunks in memory in the editor at all times. I also don't anticipate this being too difficult too implement. Maybe a day or two for a well-tested implementation.
-
Easier collaboration. I'm the only person working on Akigi but I like to approach the code as if it were going to be maintained by many others. Splitting data across files drastically reduces the chances of merge conflicts when editing terrain.
Here's the function for loading terrain data from disk so far:
impl EditorTerrain {
    /// Load the EditorTerrain from a directory that follows the expected conventions.
    pub fn load_from_dir(terrain_dir: &dyn AsRef<Path>) -> Result<EditorTerrain, LoadTerrainError> {
        validate_terrain_dir(terrain_dir)?;

        let terrain_dir = terrain_dir.as_ref().to_path_buf();
        let chunk_definitions = chunk_definitions_dir(&terrain_dir);
        let materials = materials_dir(&terrain_dir);

        let mut terrain = EditorTerrain::new();

        for chunk in std::fs::read_dir(chunk_definitions)? {
            let chunk_path = chunk?.path();
            maybe_insert_terrain_chunk(&mut terrain, chunk_path)?;
        }

        for material in std::fs::read_dir(materials)? {
            let mat_dir = material?.path();

            let material_name = mat_dir.file_name().unwrap().to_str().unwrap();
            let material_name = material_name.to_string();
            terrain
                .materials
                .insert(material_name.to_string(), TerrainMaterial {});
        }

        Ok(terrain)
    }
}
Refactoring Terrain
The core terrain code that allows for ray collision testing against the terrain was written when I was first learning Rust and is both bad and untested.
It's one of the few remaining areas of the code base that was written within my first year or so of Rust and has yet to be fully refactored.
When I'm working on an older part of the code base I'll refactor anything that I'm working with and leave the parts that I am not currently touching for a future day.
This approach allows me to bring these older parts of the code base up to new standards (which really just means written with test-driven development) without spending too much time trying to clean the whole house and garage in one sitting.
I refactored a good bit of the terrain code a few months ago, and this time around it's time to finish the job.
I'm simplifying the data structures and functions that power the terrain's collision testing, with the nice side-benefit that they'll now work for arbitrary sized terrain at arbitrary levels of detail.
After that the terrain code will be up to today's standards within the code base, and any future work will be adding new functionality.
Other Notes / Progress
I'm very excited to see the editor tooling come together. I can't wait to throw a user interface in front of some of these core editor functions and start to see and feel the power of these tools.
Next Week
I'll start the week by finishing the terrain refactor.
After that I'm going to add the functions and interface for placing objects within the world.
Implementing that should take the better part of the week, but if there is time left I'll get started on either sculpting or painting terrain.
Cya next time!
- CFN
079 - The Tooling Saga
August 9, 2020
I spent much of the last couple of weeks trying to figure out my path forwards with Akigi.
I was making progress, but not quickly enough.
What I came to was that I needed to have a vision for the game in order to gain the direction needed to start landing larger game play additions.
A sentence to guide me while determining what to work on. One that I could refer back to when figuring out whether or not something fit into the game.
After ironing that out a bit, I spent time thinking through how to proceed.
What I landed on was that my current pace of game play development was far too slow.
Anything short of one large new game play addition per week would mean that I could not release the game anytime soon.
I needed to increase my pace by an order of magnitude or more.
My solution to this is to use August to invest heavily in my tooling.
Beef up the game editor to make it easier to add new game play and world entities. Beef up our asset pipeline to enable hot re-loading.
Things of that nature.
I'm diving in.
Other Notes / Progress
-
Fixed the holes between terrain chunks when rendering terrain in the Metal 3D API.
-
Added the ability to render solid colored UI quads. I could previously only render textured quads. I plan to use the solid quads in the game editor.
-
Split out more user interface related functionality into the
user-interfaceworkspace crate. -
Fixed text rendering in the game editor and slightly optimized it by cutting the texture memory used down by a factor of 4.
Next Week
The goal for this week is to add the ability to place scenery within the game editor.
Cya next time!
- CFN
078 - Game Design
August 2, 2020
Short update this week.
I am laser focused on one goal.
Right now Akigi is little more than a glorified tech demo.
I need to go from that to a fun game, ideally in the very near term.
I want real people to start having real fun with Akigi.
So I will be doing one thing.
Experiment with core game play ideas until I land on a handful of core game mechanics that are remarkably interesting.
This could take two weeks. This could take eight. I don't know, and I won't rush the process.
I'm missing a strong, principled design direction.
My number one focus is to fix that. I've paused working on any code or art until we have real direction.
Having a real direction should open up the ability for me to start producing step function improvements in the game's fun-ness every week, because I will finally have something to aim at.
My plan is to play test the mechanics ideas with a friend every Monday.
Once I land on something satisfying I'll start sharing the game with real players and hopefully start to get feedback from a small but active player base.
I'm making progress on ironing out the game's mechanics on pen and paper before transitioning over to code.
I'll report back when I have a foundation in place.
Finances
Our finances for July 2020 were:
| item | cost / earning |
|---|---|
| revenue | + $4.99 |
| aws | - $235.42 |
| adobe substance | - $19.90 |
| GitHub | - $9.00 |
| adobe photoshop | - $10.65 |
| adobe illustrator | - $22.38 |
| Datadog | - $6.22 |
| --- | --- |
| total | - $298.58 |
I don't remember what all is going into the AWS bill, so I'm expecting to take a look at that in the next month or two.
Next Week
Continue working on core game design until something sticks.
Cya next time!
- CFN
077 - Time For More Direction
July 26, 2020
I've been doing well with deploying something to the game everyday and haven't missed a day since we started a little over a month ago in 073.
Not all is rosy though.
I'm still struggling with making good progress on larger gameplay items.
I've been focused on the next thing from day to day, without having a concrete plan or direction guiding my work from week to week or month to month.
This makes it difficult to land big step function improvements on the gameplay experience.
My current approach to solving problem is to work on higher level plan and direction for the game.
I'll be refining that throughout the week so that by the end of the week I'll have a good sense of direction that can guide my development of larger features from week to week.
Customizing Renderables Foundation
This week I laid a foundation for being able to easily and flexibly customize aspects of how something is rendered, such as the skin color.
In our game data files it's been possible to set what materials a mesh uses for months.
But, if you wanted to be able to render the same mesh with two different materials you'd need to create another entry in the data file that copied almost all of the data with only the material changed.
This approach would not have scaled for more complex renderables that could be comprised of multiple meshes each with multiple possible materials.
This week I made some changes to our renderable definitions to make it easy to customize how entities are rendered without being duplicative.
 The same meshes using different materials powered by the new renderable customization data structures.
To display an entity in the you need to give it a RenderableId.
Every RenderableId maps to a definition of what needs to be rendered into the 3d viewport.
Different entities can point to the same RenderableId, each transforming the final meshes using their own world position, rotation, scaling etc.
In the above screenshot, RenderableId::TutorOfNavigation is used to render the white character on the right.
I've introduced a RenderMeshCustomization struct and a few under data structures that we can use when defining the RenderableIdData for a RenderableId.
In the above screenshot we're using a MapSkinColor customization which maps a SkinColor:: enum variant to some material on
the mesh.
Here's a lightly annotated look at some of the data structures in my renderable_ids_to_data.yml file that defines data for every RenderableId.
# The data for `RenderableId::TutorOfNavigation`
TutorOfNavigation:
  Absolute:
    renderable_ids:
    - id: Torso
    # Right now the "RenderableId::Head" is the head, legs, feet and heads..
    # I'll split the mesh up next time I work on the human model.
    - id: Head
    customizations:
      skin_color: White

Torso:
  Absolute:
    meshes:
    - mesh_name: Torso
      material:
        MapSkinColor:
          dark: BlackSkin
          white: WhiteSkin
          default_skin: BlackSkin
    - mesh_name: Arms
      material:
        MapSkinColor:
          dark: BlackSkin
          white: WhiteSkin
          default_skin: BlackSkin
Here's the code where we're selecting a material for a mesh to render.
// All material names are parsed from Blender and stored as `String`s.
// I'll eventually change them to be either an enum or a `u16`
// to avoid the unnecessary allocations.
pub fn material_name(&self, customizations: Option<RenderMeshCustomizations>) -> &String {
    match &self.material {
        MaterialSelector::Constant(material_name) => material_name,
        MaterialSelector::MapSkinColor(msc) => customizations
            .and_then(|c| c.skin_color())
            .and_then(|s| match s {
                SkinColor::Dark => msc.dark(),
                SkinColor::White => msc.white(),
            })
            .unwrap_or(&msc.default_skin),
    }
}
A RenderMeshCustomization can be merged with another RenderMeshCustomization in such a way that is a customization is defined inside one it will overwrite the other.
This will be the foundation for letting players select customizations for their character and having that override the defaults for things such as their skin or hair.
Skills Interface Foundation
I added a few data structures for storing skill levels and XP on the server side as well as a new data structure for storing skill information on the client side.
There's now an interface that displays this information.
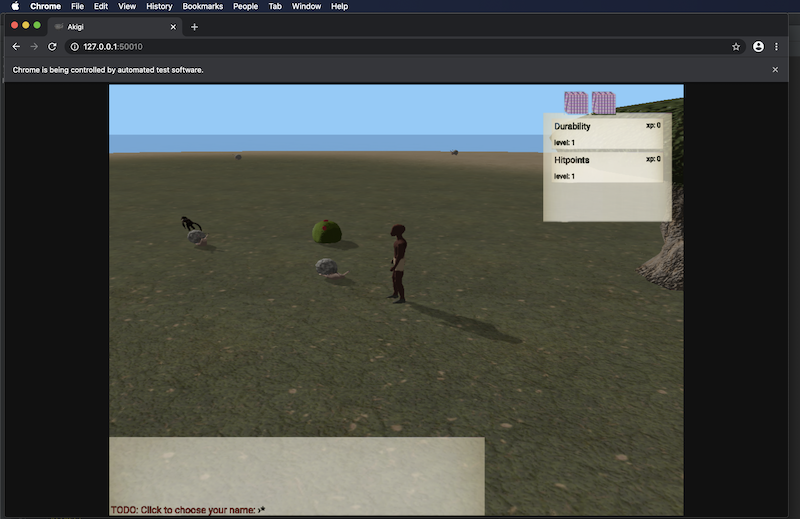 Will need polish, but the plumbing for display skills is in place.
Approach to Writing Quests
I Landed on a new system for quest writing.
Write the quest and the integration tests using placeholder dialogue that describes the gist of what is being said, then when everything fits together nicely I can replace the placeholders with real words.
Likely obvious to an experienced writer, but it sure wasn't to me.
Game Editor Progress
Made more progress on the Metal 3d API renderer, which is powers rendering for the work in progress cross-platform game editor on my MacOS machine.
I'd say that there is around 20 or so more hours of work to catch the MetalRenderer up to the WebGlRenderer, including time to refactor some of the
rendering assumptions that were geared towards the WebGlRenderer that don't translate well to modern graphics APIs such as Metal.
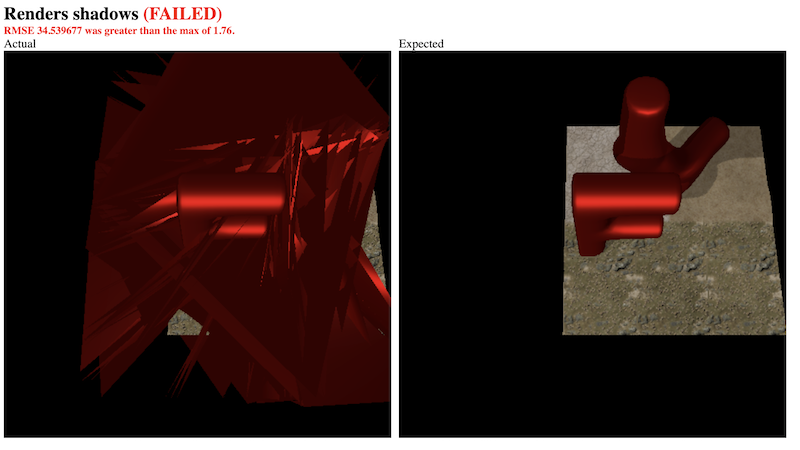 Next up I'll be getting the shadow render tests passing for the
 MetalRenderer.
I added a new shader to the MetalRenderer for vertex skinning of meshes.
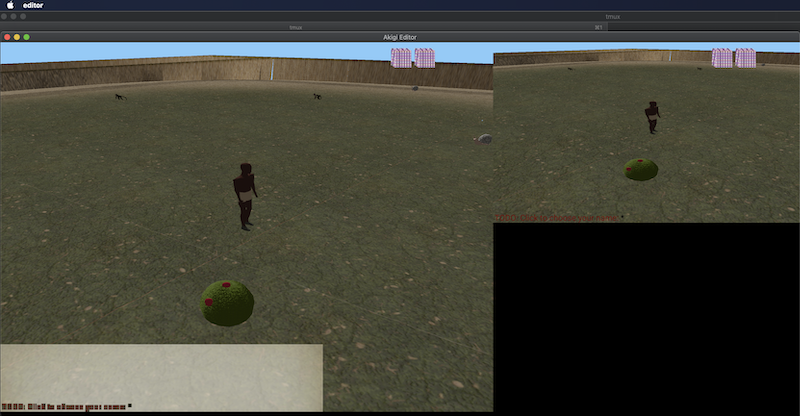 I added skinning to the Metal 3D API renderer, so no more T-poses in the editor.
Text and UI still don't render properly but I haven't looked into it yet.
I added skinning to the Metal 3D API renderer, so no more T-poses in the editor.
Text and UI still don't render properly but I haven't looked into it yet.
Along the way I split out some of my code for managing allocations of GPU buffers into a platform agnostic re-usable set of traits and data structures.
It's fairly simplistic for now but will continue to evolve over the years as I run into more issues.
For example, this week I added an ItemAlignment::{SizeOfType, Constant(u64)} enum to control the alignment of entries in a buffer of data (such as a shader uniform objects).
This was added because Metal expects offsets to be 256 bytes when using the constant address space to buffer objects.
Looking forward to learning more about GPU workload focused memory allocation over the coming years as I run into new problems and needs.
Other Notes / Progress
-
In 075 we moved from defining tiles as blocked to defining just the borders as blocked. This caused an issue where you could not interact with an entity that had all 4 sides of its tile blocked. So I've changed the system to allow marking both the tile as well as all four sides as blocked.
-
Fixed dual quaternion linear blending which fixed the gnarly artifacts when transitioning between two different animations.
-
In 071 I introduced the interactive sequence graph smoke tests. Added more of those this week.
Next Week
The most important thing to get done this week is my plan / design document for the direction of the game.
In the meantime I'll work on the TutorOfScience quest that I was supposed to write roughly 2 months ago. We live an we learn.
Cya next time!
- CFN
077 - Time For More Direction
July 26, 2020
I've been doing well with deploying something to the game everyday and haven't missed a day since we started a little over a month ago in 073.
Not all is rosy though.
I'm still struggling with making good progress on larger gameplay items.
I've been focused on the next thing from day to day, without having a concrete plan or direction guiding my work from week to week or month to month.
This makes it difficult to land big step function improvements on the gameplay experience.
My current approach to solving problem is to work on higher level plan and direction for the game.
I'll be refining that throughout the week so that by the end of the week I'll have a good sense of direction that can guide my development of larger features from week to week.
Customizing Renderables Foundation
This week I laid a foundation for being able to easily and flexibly customize aspects of how something is rendered, such as the skin color.
In our game data files it's been possible to set what materials a mesh uses for months.
But, if you wanted to be able to render the same mesh with two different materials you'd need to create another entry in the data file that copied almost all of the data with only the material changed.
This approach would not have scaled for more complex renderables that could be comprised of multiple meshes each with multiple possible materials.
This week I made some changes to our renderable definitions to make it easy to customize how entities are rendered without being duplicative.
The same meshes using different materials powered by the new renderable customization data structures.
To display an entity in the you need to give it a RenderableId.
Every RenderableId maps to a definition of what needs to be rendered into the 3d viewport.
Different entities can point to the same RenderableId, each transforming the final meshes using their own world position, rotation, scaling etc.
In the above screenshot, RenderableId::TutorOfNavigation is used to render the white character on the right.
I've introduced a RenderMeshCustomization struct and a few under data structures that we can use when defining the RenderableIdData for a RenderableId.
In the above screenshot we're using a MapSkinColor customization which maps a SkinColor:: enum variant to some material on
the mesh.
Here's a lightly annotated look at some of the data structures in my renderable_ids_to_data.yml file that defines data for every RenderableId.
# The data for `RenderableId::TutorOfNavigation`
TutorOfNavigation:
  Absolute:
    renderable_ids:
    - id: Torso
    # Right now the "RenderableId::Head" is the head, legs, feet and heads..
    # I'll split the mesh up next time I work on the human model.
    - id: Head
    customizations:
      skin_color: White

Torso:
  Absolute:
    meshes:
    - mesh_name: Torso
      material:
        MapSkinColor:
          dark: BlackSkin
          white: WhiteSkin
          default_skin: BlackSkin
    - mesh_name: Arms
      material:
        MapSkinColor:
          dark: BlackSkin
          white: WhiteSkin
          default_skin: BlackSkin
Here's the code where we're selecting a material for a mesh to render.
// All material names are parsed from Blender and stored as `String`s.
// I'll eventually change them to be either an enum or a `u16`
// to avoid the unnecessary allocations.
pub fn material_name(&self, customizations: Option<RenderMeshCustomizations>) -> &String {
    match &self.material {
        MaterialSelector::Constant(material_name) => material_name,
        MaterialSelector::MapSkinColor(msc) => customizations
            .and_then(|c| c.skin_color())
            .and_then(|s| match s {
                SkinColor::Dark => msc.dark(),
                SkinColor::White => msc.white(),
            })
            .unwrap_or(&msc.default_skin),
    }
}
A RenderMeshCustomization can be merged with another RenderMeshCustomization in such a way that is a customization is defined inside one it will overwrite the other.
This will be the foundation for letting players select customizations for their character and having that override the defaults for things such as their skin or hair.
Skills Interface Foundation
I added a few data structures for storing skill levels and XP on the server side as well as a new data structure for storing skill information on the client side.
There's now an interface that displays this information.
Will need polish, but the plumbing for display skills is in place.
Approach to Writing Quests
I Landed on a new system for quest writing.
Write the quest and the integration tests using placeholder dialogue that describes the gist of what is being said, then when everything fits together nicely I can replace the placeholders with real words.
Likely obvious to an experienced writer, but it sure wasn't to me.
Game Editor Progress
Made more progress on the Metal 3d API renderer, which is powers rendering for the work in progress cross-platform game editor on my MacOS machine.
I'd say that there is around 20 or so more hours of work to catch the MetalRenderer up to the WebGlRenderer, including time to refactor some of the
rendering assumptions that were geared towards the WebGlRenderer that don't translate well to modern graphics APIs such as Metal.
Next up I'll be getting the shadow render tests passing for the MetalRenderer.
I added a new shader to the MetalRenderer for vertex skinning of meshes.
I added skinning to the Metal 3D API renderer, so no more T-poses in the editor.
Text and UI still don't render properly but I haven't looked into it yet.
Along the way I split out some of my code for managing allocations of GPU buffers into a platform agnostic re-usable set of traits and data structures.
It's fairly simplistic for now but will continue to evolve over the years as I run into more issues.
For example, this week I added an ItemAlignment::{SizeOfType, Constant(u64)} enum to control the alignment of entries in a buffer of data (such as a shader uniform objects).
This was added because Metal expects offsets to be 256 bytes when using the constant address space to buffer objects.
Looking forward to learning more about GPU workload focused memory allocation over the coming years as I run into new problems and needs.
Other Notes / Progress
-
In 075 we moved from defining tiles as blocked to defining just the borders as blocked. This caused an issue where you could not interact with an entity that had all 4 sides of its tile blocked. So I've changed the system to allow marking both the tile as well as all four sides as blocked.
-
Fixed dual quaternion linear blending which fixed the gnarly artifacts when transitioning between two different animations.
-
In 071 I introduced the interactive sequence graph smoke tests. Added more of those this week.
Next Week
The most important thing to get done this week is my plan / design document for the direction of the game.
In the meantime I'll work on the TutorOfScience quest that I was supposed to write roughly 2 months ago. We live an we learn.
Cya next time!
- CFN
076 - Small Touches
July 19, 2020
Short journal entry this week as I spent Friday through Sunday hanging out with a friend and didn't get much work done during that time.
Displaying notices in the message panel
This week I introduced the PrivateNoticeComp, a component that powers letting the player know about different things that have happened.
Right now it helps to power showing information when you inspect something in the world, as well as when you attempt to do something that you do not yet know how to do.
Need to fix the new notice system to not repeatedly get pushed to the messages panel.
Going forwards this will be used in more and more situations where I need to give the player information about the world.
Game Editor Progress
I did some more foundational work on the game editor, this time around making it so that any number of running instances of the game, as well as the one running instance of the game editor, can share the same GPU device handle without having their resources collide.
This came down to giving each running application a unique ID that I named the GpuResourcePrefix and then massaging some types to make sure that prefix was enforced at the type level.
This will let me remove some synchronization code that I was previously using to let the game editor render the running application inside of the editor window.
Other Notes / Progress
- Added in some
Loading...text while the game is loading.
Next Week
Finish the Tutor of Science Quest...
Cya next time!
- CFN
075 - A Fledgling Game Editor
July 12, 2020
This week I released some smaller updates to various systems and aspects of the game, but no large new pieces of gameplay were deployed.
 A stroll through the world of Akigi.
I've been consistent with deploying at least one thing to the game everyday, but I still need to figure out how to maintain a cadence of releasing one larger piece of gameplay every week.
It's something on the top of my mind, but I don't have a solution just yet.
The Akigi Editor
In last week's journal entry I mentioned that I had begun laying some ground work for a game editor.
I made some good progress this week after fixing a number of issues and missing features within the renderer-metal crate in my Cargo workspace.
Now there is enough in place to be able to play the game from within the editor, even though it does render everything properly yet.
The game editor rendering the game twice. Once to a desktop size and again to a mobile screen-size.
Unlike the WebGL renderer, the Metal renderer does not support vertex skinning yet. So T-poses galore.
It also does not render text properly yet and leaves gaps between terrain chunks, among
other issues. The game interface does not get laid out properly at mobile screen sizes yet (top-right).
I'm running the editor as a desktop application since that allows me to easily access the filesystem in order to save and load various game data files.
The editor is being designed to be able to be easily ported to the browser as a WebAssembly binary should I ever want to run it there, but for now I'd like to avoid needing to set up the plumping that would be required to modify the file system from the browser.
Pathfinding ain't cheap
I made what I thought was a harmless change of adding a dozen or so entities to the world and much to my surprise one of my integration tests started to fail.
It turned out that it was timing out because adding these entities made the game ticks run roughly 300x slower on average.
My hunch was that it was due to inefficient pathfinding, and that turned out to be the case.
After doing some benchmarking and looking at a few flamegraphs I managed to make a few changes to the game's pathfinding that make things perform well-enough for now.
There are some future performance optimizations to be made such as pre-calculating the cost of going from one tile to all other tiles within some radius and then using those pre-calculated costs for nearly-free pathfinding, but I'll explore this in the future whenever optimizing performance becomes pressing again.
There are also some unnecessary allocations to remove and some small loops that I'm not sure are being unrolled by the compiler, but, these are not currently pressing issues to fix.
 After adding a handful of entities to the world the average game tick duration on the production 2-core server grew, while the maximum stayed roughly the same or even dropped a bit.
I haven't looked into what leads to these tick duration anomalies - not currently pressing.
After adding a handful of entities to the world the average game tick duration on the production 2-core server grew, while the maximum stayed roughly the same or even dropped a bit.
I haven't looked into what leads to these tick duration anomalies - not currently pressing.
Other Notes / Progress
-
Fixed an edge case where entities would end their walk animation one tile before reaching their destination.
-
More progress on the
Metal Graphics APIrenderer. -
A few new models.
-
Gzipping the WebAssembly binary, reducing the size from 1.1 MB to 350 KB. Still need to add gzip compression to other assets such as meshes, armatures and fonts.
-
Made the asset compiler deterministic so that we weren't getting different asset hashes and invalidating the cache everytime we deployed.
- Made rectangle-pack deterministic which meant that texture atlas creation became deterministic.
- Made serializing of meshes and armatures deterministic.
-
Added support to specify that certain textures need to always be placed together when generating texture atlases, which fixed an issue where the multi-textured terrain sometimes did not have all of its textures in the same atlas.
-
Going through Adobe Illustrator tutorials which will help me with creating icons for the game.
Next Week
I've been saying this for a few weeks now, but I need to write and finish the Tutor of Science quest.
I realized that a potential issue has been that I deviated from how I had approached the other quests.
With the other quests I was writing tests as I wrote the quest dialogue. So I always had a test that I needed to get passing which helped me stay in the zone.
This time around, since I now have a good bit of automated smoke-testing in place for all game dialogue, I tried to write the entire quest and then circle back at the end to add any specific tests that are not covered by the smoke tests.
This was too much writing for me to do at once without a feeling of progress, which has led to not spending enough time on it.
So this week I'll be doing back to writing quest-specific assertions as I write the quest dialogue, which should hopefully be a more comfortable way for me to work.
I'll also continue to make more progress on the game editor. I have my mind on adding the ability to place scenery into the game using the game editor.
Cya next time!
- CFN
074 - Pathfinding Improvements
July 05, 2020
At the end of 072 I started a new habit where I deploy at least one player facing thing to the game every day, even if it's a small tweak.
Needing to release something for the game everyday is flexing my iteration muscles and helping me to better prioritize working things that are player facing instead of biasing towards working on tooling.
I plan to continue with this habit for the foreseeble future.
One area of improvement is finding the right size for my daily deployment tasks. There have been days where I took on too much and it left me with almost no energy to make progress on larger gameplay features.
Practice will make perfect.
Pathfinding Improvements
Pathfinding around four blocked off tile sides.
Previously the pathfinding in Akigi only had a notion of an entire tile being accessible, or an entire tile being blocked.
This meant that you could not put a wall in between two tiles that still permitted you to stand on both of these tiles. You would have to make one of those tiles unreachable.
This week I changed how tile permissions are handled to be much more flexible.
The pathfinder now checks for the movement permissions of the borders between tiles. If that border is blocked, it does not explore the other tile as a potential next tile.
I'm using bitflags to encode information about tiles into boolean flags compactly.
Writing Struggles
I'm not doing a good job of dedicating time to writing game dialogue.
Fortunately, at this point I know how to solve problems like this.
Commit to doing it every day for at least two minutes per day until the activation energy required to start gets close enough to zero that it is no longer a task that I avoid.
After going through this with art, it should be easier this time around with writing.
I'm not going to commit to this just yet as I am still adjusting to my new daily deployments habit. But writing will be next on the list of daily habits to build.
Tutor of Science Quest
There are still a few hours of writing that I need to do for this. I'm going to get this done this week.
Game Editor
I've started laying some ground work on a game editor for Akigi.
 It's completely broken, but it will come together.
The first batch of things that I want are object placement, terrain height editing, terrain blendmap painting, and a view to work on dialogue.
Other Notes / Progress
-
Made the game's rendering more flexible. The game can now be configured to render to any number of final render targets. Will be used in the game editor to view the game on multiple device sizes at once.
-
Remade Acacia tree model. I don't like it, so I will eventually try again.
-
I love when a test that I wrote seven months ago fails and I go "Oh! Oops!" Had an old test to make sure that I didn't let the pathfinding go on indefinitely that started failing after I re-wrote parts of the pathfinding.
-
Went through a Substance Painter tutorial and have a much better understanding of how to use the tool than I did a week ago.
Financials
Our financials for June 2020 were:
| item | cost / earning |
|---|---|
| revenue | + $4.99 |
| aws | - $189.92 |
| adobe substance | - $19.90 |
| GitHub LFS data pack | - $5.00 |
| GitHub Pro | - $1.33 |
| photoshop | - $21.30 |
| CircleCI | - $30.00 |
| --- | --- |
| total | - $262.46 |
The CircleCI bill is a one off. I upgraded and then cancelled the same day and moved to self-hosted GitHub actions so that I did not need to download and upload caches during every job.
The Photoshop bill landed twice this month.
Next Week
The most important thing to get done this week is the Tutor of Science quest dialogue so that I can be on my way to finishing the Jaw Jaw Island quests and then moving on to building out a larger world. The main blocker here is that I just have not been sitting down and writing. I've been working on other things.
I also want to make a hefty bit of progress on the game editor. I'd like to be placing objects using the editor within the next two weeks.
Cya next time!
- CFN
073 - Daily Deploys
June 28, 2020
Last week I said that I'd wanted to start deploying something player facing to the game every day, no matter how big or small.
I got started on that and so far we're on a 7 day streak.
 Made a fishing dock that will be used to introduce fishing.
Overall I'm excited about this new habit. I'm already getting things done that I would not have gotten done otherwise.
One area of improvement will be to continue to figure out how to balance daily releasing with working on larger, more meaty features.
There were multiple days this week where I made less progress on the Tutor of Science quest than I would have liked.
I'm still experimenting with how to select daily deploy tasks that are the right size as well as how to structure my day in such a way that I'm able to dedicate full focus to both larger and smaller features that I'm pushing.
More practice will lead to more improvement.
Continuous Integration
In last week's journal entry I mentioned that I moved to GitHub Actions for my CI and wrote a bit about how CI is becoming more and more important as the codebase grows.
This past week I dusted off my old 2015 MacBook Pro and turned it into a CI job runner alongside the
AWS hosted t3-medium instance that I spun up last week.
The t3-medium was failing to run WebGL and I did not want to spend time investigating ways to fix that.
Instead, I'm running browser tests on my old MacBook Pro.
After some fiddling I got things working nicely and the MacOS machine is plugged in sitting on the couch long-polling for new CI jobs.
Game Editor
CI is not the only thing that I've been improving in response to deploying more frequently.
I'm also getting hungry for Akigi to have a game editor.
Let's just say that taking a half hour to position a bush and some berries is not ideal.
I've done some reading and watched some talks on game editor tooling.
I'm ready to start building.
But in general I have to be careful about any and all tooling work because without checking myself I will never work on the actual game since I enjoy working on tooling so much.
So game editor progress will happen in the evenings after I've finished my daily art work, my daily deploy and my daily progress on core gameplay.
Other Notes / Progress
-
Added the ability to rotate UI quads since I needed that for the compass.
-
Made progress on the Tutor of Science quest, but not as much as I would have liked since I was adjusting to the new daily deploying habit.
-
Added the
DurabilityCompwhich will be one of the components that controls how much damage you take. -
Added a bit more code generation around some of the quest and skill data structures.
-
Made a few new meshes and animations.
-
Using root mean square error for render tests instead of exact pixel comparison since the different browser WebGL implementations lead to slightly different renders.
Next Week
I'll be continuing to learn about how to best deploy daily while still making good progress on the larger gameplay features that take a week or more to implement.
I plan to finish the Tutor of Science quest this week, after which I'll be working on the final Tutor on Jaw Jaw Island, the Tutor of Eats.
I'll also start making progress on the game editor.
This will be a large investment but I expect it to have an outsized impact on the speed that I can produce new gameplay.
Cya next time!
- CFN
073 - Daily Deploys
June 28, 2020
Last week I said that I'd wanted to start deploying something player facing to the game every day, no matter how big or small.
I got started on that and so far we're on a 7 day streak.
Made a fishing dock that will be used to introduce fishing.
Overall I'm excited about this new habit. I'm already getting things done that I would not have gotten done otherwise.
One area of improvement will be to continue to figure out how to balance daily releasing with working on larger, more meaty features.
There were multiple days this week where I made less progress on the Tutor of Science quest than I would have liked.
I'm still experimenting with how to select daily deploy tasks that are the right size as well as how to structure my day in such a way that I'm able to dedicate full focus to both larger and smaller features that I'm pushing.
More practice will lead to more improvement.
Continuous Integration
In last week's journal entry I mentioned that I moved to GitHub Actions for my CI and wrote a bit about how CI is becoming more and more important as the codebase grows.
This past week I dusted off my old 2015 MacBook Pro and turned it into a CI job runner alongside the
AWS hosted t3-medium instance that I spun up last week.
The t3-medium was failing to run WebGL and I did not want to spend time investigating ways to fix that.
Instead, I'm running browser tests on my old MacBook Pro.
After some fiddling I got things working nicely and the MacOS machine is plugged in sitting on the couch long-polling for new CI jobs.
Game Editor
CI is not the only thing that I've been improving in response to deploying more frequently.
I'm also getting hungry for Akigi to have a game editor.
Let's just say that taking a half hour to position a bush and some berries is not ideal.
I've done some reading and watched some talks on game editor tooling.
I'm ready to start building.
But in general I have to be careful about any and all tooling work because without checking myself I will never work on the actual game since I enjoy working on tooling so much.
So game editor progress will happen in the evenings after I've finished my daily art work, my daily deploy and my daily progress on core gameplay.
Other Notes / Progress
-
Added the ability to rotate UI quads since I needed that for the compass.
-
Made progress on the Tutor of Science quest, but not as much as I would have liked since I was adjusting to the new daily deploying habit.
-
Added the
DurabilityCompwhich will be one of the components that controls how much damage you take. -
Added a bit more code generation around some of the quest and skill data structures.
-
Made a few new meshes and animations.
-
Using root mean square error for render tests instead of exact pixel comparison since the different browser WebGL implementations lead to slightly different renders.
Next Week
I'll be continuing to learn about how to best deploy daily while still making good progress on the larger gameplay features that take a week or more to implement.
I plan to finish the Tutor of Science quest this week, after which I'll be working on the final Tutor on Jaw Jaw Island, the Tutor of Eats.
I'll also start making progress on the game editor.
This will be a large investment but I expect it to have an outsized impact on the speed that I can produce new gameplay.
Cya next time!
- CFN
072 - Prettier Terrain
June 21, 2020
One of the more visible changes of this week was fixing the terrain seams that started appearing last month when I started mip-mapping the texture atlases.
 After enabling mip mapping for the terrain in May I started seeing these gnarly black lines (left).
This week I fixed that issue and now the terrain is looking much nicer (right).
After enabling mip mapping for the terrain in May I started seeing these gnarly black lines (left).
This week I fixed that issue and now the terrain is looking much nicer (right).
Fortunately I found a blog post on how to properly sample mip-mapped tiling textures, so it just came down to spending a few days adjusting my tooling and renderer around some of those concepts.
Working on Icons
I started learning Adobe Illustrator this week after getting some advice that it was good for creating icons.
My takeaways so far is that it's good for flat icons, but because I want the interface in the game to have depth I'll want to combine Illustrator and Photoshop.
I'm going to go through a couple more Illustrator and Photoshop tutorials this week and then start applying what I've learned to design Akigi's UI.
Running Outside the Browser
In 069 I mentioned that I've been lightly investing in passing our renderer test suite using Apple's Metal graphics API in order to power future tooling.
I made more progress on that this week. The Metal renderer can render meshes using the game's physically-based lighting model.
 The output from running the test suite against the Metel renderer.
Haven't added skinning to the Metal mesh shader yet.
I still need to tweak the image comparison to allow for a little leeway, the top test should not be failing.
The output from running the test suite against the Metel renderer.
Haven't added skinning to the Metal mesh shader yet.
I still need to tweak the image comparison to allow for a little leeway, the top test should not be failing.
I got excited by this and took a little time to get the game running in a desktop window using winit.
It worked like a charm. So, when I some day port the game to desktop it looks like I'll be in good shape.
I'll keep making little bits of progress on the Metal renderer over the coming weeks here and there when I feel like a break from working on gameplay.
After that I'll add a WebGPU renderer so that our tooling is platform agnostic and can be run easily in CI.
Major CI improvements
Akigi is approaching 100,000 lines of Rust code, and as such I'm starting to need to care about things that weren't as relevant before.
For example, I used to be able to get away with CI not working for a bit since if any integration test started failing it was pretty easy to figure out why even if it was a week later.
As the amount of source code increases it's means that there are more places that can be the reason that an integration test is failing.
Because of this increased surface area, it's now very noticibly easier to address an issue when I have full context than to address it a few days later when I've already switched to working on something else.
So I made moves to force CI to always be working and tests to always be passing.
I upgraded to GitHub Pro and enabled protected branches in a way that pull request branches must always be passing before they can be merged into master.
I also tried upgrading to CircleCI pro, but then I started needing to worry about staying under my build minutes limit so that I would not have to upgrade even further.
So I spent all of Sunday biting the bullet and moving to GitHub actions using a self-hosted runner.
Setting up the runner took minutes, but getting all tests passing and continuous deployment working with all of the correct permissions ended up taking me the entire day.
The good news is that now I have full continuous deployment.
This is foundational for my new goal, deploying something visible to the game daily.
Daily Visible Gameplay Deploys
I'm making progress on the gameplay, but I need to move more quickly.
I need to be introducing interesting new gameplay every week.
And massive new bits of gameplay every month.
I don't fully know what that looks like yet, but I have an idea on how to start to encourage that sort of pace.
Learn to release often and reliably.
So, starting this week I'll be deploying at least one visible change to the game every day, in an effort to learn how to build the habit of always improving player facing aspects of the game.
I'm not yet sure what will go into best facilitating this practice.
I'm just going to start and then learn as I go.
Other Notes / Progress
-
If the GitHub actions setup works well for a couple of months I'll want to switch to a reserved AWS instance instead of on-demand since reserved instances are cheaper.
- I'm currently using a t3-medium instance.
-
Right now tests take just shy of four minutes and building for distribution and deploying takes around 9 minutes. I have some ideas on how to shave the deploy steps down to under a minute and to shave time off the test job as well but that isn't too important right now. is fine for now.
- Basically ideas revolve around leveraging
CARGO_TARGET_DIRenv variable to maintain multiple build caches so that building is instant for unmodified crates and seconds for modified crates.
- Basically ideas revolve around leveraging
Next Week
Deploy something visible to game everyday.
Cya next time!
- CFN
071 - Quests and Tests
June 14, 2020
Coming out of last week my goals were to add more polish to the Tutor of War mini-quest and introduce
the Tutor of Navigation mini-quest.
This would mean that half of the initial four tutors were in place - leaving the rest of June for adding the other two tutors as well as continuing to improve the game's rendering and UI.
I spent the first half ot the week beefing up the quest testing infrastructure, then on Friday and Saturday I added
the Tutor of Navigation quest and cleaned up the dialogue for the Tutor of War.
A lot of room to grow in my dialogue writing but I'm already seeing some improvement so just have to keep at it. Still need to create new models for the different characters.
Testing Quests
Before this week my approach to testing quests looked something like this:
/// Squash the mosquitos behind his house
fn squash_mosquitos(game: &GameThread, player: &mut ConnectedPlayer) -> Result<(), anyhow::Error> {
    player.start_interactive_sequence_with_display_name(TUTOR_OF_WAR_DISPLAY_NAME)?;
    game.tick(1);

    player.assert_current_sequence_node_id(TUTOR_OF_WAR_GO_BACK_AND_GET_MOSQUITOS_NPC);

    player.auto_attack_target(player.find_ent_id_by_name("Mosquitos"))?;
    game.tick_until(|| player.has_ent_with_name("Squashed Mosquito"), 20);

    player.pickup_entity(EntLookup::DisplayName("Squashed Mosquito"))?;
    game.tick(1);

    player.start_interactive_sequence_with_display_name(TUTOR_OF_WAR_DISPLAY_NAME)?;
    game.tick_until(|| player.is_in_dialogue(), 20);

    player.assert_current_sequence_node_id(TUTOR_OF_WAR_HERES_MY_SEAL_NPC);

    Ok(())
}
I would use the ConnectedPlayer test struct to connect to the game server running in a separate thread in order to play the game headlessly.
This worked well as a starting point - but the big issue was that if I wanted to add more branching to the quests and dialogue it would become harder and harder to test.
I want the dialogue and decisions in the game to be branching and consequential, but I can't spend my time writing boilerplate tests for every possible path. So, I needed an easier way to test these branches.
To move in that direction I introduced two new bits of testing infrastructure this week. Interactive sequence graph smoke tests and randomized quest completion tests.
Interactive Sequence Graph Smoke Tests
I've added a new test function that iterates over every interactive sequence graph (so far there are two) and runs different assertions on them.
Different assertions guarantee different things, such as that every node in the graph is pointed to, nodes that give you items can only be reached once to prevent duplication bugs, having a certain ratio of nodes that have meaningful consequence such as changing how other characters in the game perceive you, as well as a whole host of other checks.
Here's one example:
 An example assertion from one of our smoke tests.
Analyzing things like ratios of responses doesn't suddenly make my game dialogue amazing, but I am finding that it helps with making me go back to the drawing board
and think about how to give the player more choice.
An example assertion from one of our smoke tests.
Analyzing things like ratios of responses doesn't suddenly make my game dialogue amazing, but I am finding that it helps with making me go back to the drawing board
and think about how to give the player more choice.
Over time as I add more interactive sequences I'll continue to beef up these smoke tests which will continue to minimize the odds of introducing bugs while giving me the flexibility to write significantly branching dialogue that actually impacts your gameplay experience.
Randomized Quest Completion Tests
Some quest steps involve talking to an NPC.
Testing this used to look like this:
/// Receive the tattered tunic now that you've defeated the vicious bunny
fn receive_tattered_tunic(
    game: &GameThread,
    player: &mut ConnectedPlayer,
) -> Result<(), anyhow::Error> {
    player.advance_dialogue_tick_once_after_each(
        &[
            TUTOR_OF_WAR_LAUGHING_AT_WEAKNESS_NPC,
            TUTOR_OF_WAR_WHAT_WAS_BAR_OVER_BUNNY_HEAD_PLAYER,
            TUTOR_OF_WAR_INTRODUCE_HITPOINTS_1_NPC,
            TUTOR_OF_WAR_INTRODUCE_HITPOINTS_2_NPC,
            TUTOR_OF_WAR_ACKNOWLEDGE_UNDERSTANDING_OF_HITPOINTS_PLAYER,
            TUTOR_OF_WAR_NOTICE_LOW_HITPOINTS_NPC,
            TUTOR_OF_WAR_GIVE_TATTERED_TUNIC_NPC,
        ],
        game,
    );

    player.has_item_with_icon_and_quantity(&IconName::TatteredTunic, 1);
    player.assert_quest_step(QuestId::TutorOfWar, 30);

    player.advance_dialogue_tick_once_after_each(&[END_OF_CONVO], game);

    Ok(())
}
I would manually specify the responses to choose and then assert that things worked properly.
Instead I now have a function that will randomly choose responses until some condition is met:
#[test]
fn tutor_of_navigation_quest() -> Result<(), anyhow::Error> {
    let game = GameThread::new(comps());

    // TODO: Add a way to assert that certain nodes are always visited during a quest completion.
    //  This allows us to make sure that it isn't possible to skip over certain nodes due to a
    //  misconfigured graph.
    //  Catches cases where we set poor criteria on a start node

    let new_player = game.connect_player_tick_until_in_world(NEW_USER_ID)?;
    let completed_tutor_of_war =
        game.connect_player_tick_until_in_world(COMPLETED_TUTOR_OF_WAR_USER_ID)?;

    for player in vec![new_player, completed_tutor_of_war] {
        player.random_walk_graph_until(
            InteractiveSequenceGraphId::tutor_of_navigation,
            TUTOR_OF_NAV_LOOKUP,
            || player.quest_step_eq(QuestId::TutorOfNavigation, 65535),
            || {
                if let Some(iseq) = player.maybe_iseq_main_action() {
                    assert_ne!(iseq.node_id(), Some(FALLBACK_BUG_START_NODE_ID));
                }
            },
            Duration::from_secs(1),
            &game,
        );

        assert!(player.has_item_with_icon_and_quantity(&IconName::TutorOfNavigationSeal, 1));
    }

    game.shutdown()
}
This doesn't completely automate quest testing as I still need to manually write bits such as solving the squash_mosquitos step in the Tutor of War quest,
but it does chop down the amount of code needed to test a quest by quite a bit.
Another nice piece of it is that I'm now testing lots of different branches, not just one.
Since responses are random - by running this enough times I can gain confidence that all of the paths that you can choose still lead to the correct final destination.
I can also gain confidence that things like ending and restarting a conversation or logging out during a quest don't impact your ability to complete it by having my ConnectedPlayers randomly
decide to disrupt themselves in those ways.
All and all we have a good foundation for fully automating our quest testing, but there is still more work to do.
I want to leverage some of our approaches to our autonomous NPCs in order to be able to automatically figure out how to complete quests when given enough information.
This would help eliminate needing to write my own test code for that squash_mosquitos step. The automated test could simply deduce what needs to happen to advance, and then do so while still trying
to add as much randomization to its approach as possible.
All of this will evolve over the coming months and years. I'm just focused on making one improvement at a time.
Other Notes / Progress
-
Started paying for Datadog. Bought a package for 5 million log events per month for a little under $10. This lets me log the duration of every single game tick. In the future I'll set up alerting so that I can stay on top of not ever letting a game tick take above a certain duration.
-
Introducing some quest quality assertions gave me the boundaries I needed to be creative. By needing a certain ratio of nodes to have consequence and have choice I found myself going back to the drawing board and honing and condensing the dialogue each time. Over the years this should help me gett better at crafting more interesting dialogue with fewer nodes.
-
Beefed up the asset compilation process to allow it to downsize UI elements from their source files. Needed this because I wanted to store compass as 1024x1024 PSD but I only needed it at around 128x128 in the final atlas. I ended up just adding a simple metadata file and making sure that our asset compiler used that file.
-
More progress on the Metal renderer. It can now render meshes without any lighting. This week I'll add in the physically-based lighting model. When the Metal renderer gets up to speed in the coming weeks I'll be able to start creating some world editor tools so that I can pick up the pace with creating Akigi's world.
Next Week
The primary focus for this week is to add the Tutor of Eats.
I'll also continue working on the renderer-metal crate to close the gap between it and the renderer-webgl crate.
I'll also work on improving the user interface (my daily Photoshop practice is giving me some confidence!) as well as working on adding in the skills interface.
I'm excited to be getting closer and closer to a pace of releasing new gameplay every week. It really does feel like a foundation is crystalizing below me.
Cya next time!
- CFN
070 - Particle Effects
June 7, 2020
It's been a year and a half since I last worked on the akigi.com website, so it needed some tender loving care.
I started the week by making some improvements to the home page.
 Could use a little more spacing above the play buttons, but not too shabby!
Since I was in website mode I made a couple of improvements to percy, including merging in a long outstanding PR that extended
the html! macro.
I also set up Stripe Checkout. So it's now possible to pay for the game!
I just need to make it worth it by building something unique and fun.
Particle Effects
I spent the last few days of the week working on the foundation for particles effects.
I wrote a tutorial on particle effects a few years ago, so I re-read it as a refresher for the general concepts behind particles.
Next time around I'll take the time to tweak the particle values to look more appealing, but my goal this time around was to just get it working.
After getting the particles rendering in the WebGlRenderer I spent another two days getting them working in the much
younger MetalRenderer.
Last week I wrote about some of my new tooling for iterating on the user interface's look. Right now
that tooling depends on the MetalRenderer since the WebGlRenderer needs a web browser and is thus harder to tool around.
So in order to more easily tweak the look and feel of particle effects going forwards I needed to get the MetalRenderer up to speed.
I ended up gaining a better sense of how to write Metal applications and have some nice new data structures to manage
my data buffers in a way that allows them to automatically grow when a larger allocation is needed.
As I continue to gain experience with more modern APIs like Metal I'm getting even more excited for WebGPU since once it's well supported I will
never need to write WebGL again.
I'm hoping to be able to deprecate the WebGLRenderer in the next 2-4 years, but we'll see.
 When I'm first designing a new system the data structures look a lot like this.
A lot of comments with thoughts and considerations for the future.
I don't try to design the perfect system upfront. I just jot down thoughts and
add to or remove from some of those original ideas over time.
It can take months or years for me to run into some of these sorts of TODO statements,
it all depends on how much I need to develop that system.
When I'm first designing a new system the data structures look a lot like this.
A lot of comments with thoughts and considerations for the future.
I don't try to design the perfect system upfront. I just jot down thoughts and
add to or remove from some of those original ideas over time.
It can take months or years for me to run into some of these sorts of TODO statements,
it all depends on how much I need to develop that system.
Art Practice
I started practicing art every morning on April 19th. Haven't missed a day!
This week I started using my morning sessions to practice Photoshop.
Specifically, I'm going through tutorials on how to make icons.
![]() I followed a tutorial on creating a pool icon as a learning exercise.
Far from perfect - but if from now on my icons are this quality or better I'm
fine with that as a starting point. I can just improve over time.
I followed a tutorial on creating a pool icon as a learning exercise.
Far from perfect - but if from now on my icons are this quality or better I'm
fine with that as a starting point. I can just improve over time.
Building these skills is going to help with creating a good looking user interface.
Other Progress / Notes
-
I added two new commands to my CLI:
ak deploy auth-serverandak deploy site-server. They're used likeak dist site-server --ecr-upload --tag some-tag && ak deploy site-server --tag some-tag -
In the video above you can see little seams in the terrain. I'm looking to solve that later this month so I've started to lightly research potential approaches. Currently considering the 4-tap technique in WebGL and then texture arrays for the other more modern renderers. But I still need to do more research and thinking.
Financials
Our financials for May 2020 were:
| item | cost / earning |
|---|---|
| revenue | + $4.99 |
| aws | - $189.92 |
| adobe substance | - $19.90 |
| GitHub LFS data pack | - $5.00 |
| photoshop | - $10.65 |
| --- | --- |
| total | - $220.48 |
AWS bill increased from $148.30 to $189.92 this month, but otherwise our costs are as per usual.
Next Week
One interesting mechanic in Akigi is that there is no on screen game map.
Instead you have a compass (and perhaps a few other navigational tools), and an NPC might point you towards a city that is Northwest.
This week I'll start by adding more polish to the Tutor of War and then move on to the Tutor of Navigation that
gives you your compass.
I'll also continue to improve the tooling around visualizing aspects of the game.
Right now I can generate a PNG of any world state. I have it in mind to also create a way to open a window that re-renders and calls a function each time to transform the world.
This would be useful for things like visualizing a particle effect where seeing multiple frames is necessary.
I'll also be working on the user interface. I plan on starting to add in the interface for seeing skill levels.
Cya next time!
- CFN
069 - Bliss
May 31, 2020
;)
It was only three months ago that I wrote about the struggles of going a few weeks without deploying while working through a major refactor.
I'm in a much different boat today.
I'm making visual progress every week and will sometimes just sit at my desk smiling with joy for a few moments as I appreciate the fun journey that is working on a large project alone.
I'm feeling happy about the foundation that I'm building on.
It feels great whenever I get to add another layer on top of groundwork that might have been put in place months or years ago.
I feel like the pieces of the puzzle are coming together slowly but surely.
Of course nothing gold can stay and there will be more times in the months and years to come when we have to sift through the weeds for a while.
For now, though, I'm enjoying this feeling of bliss while it's here to be appreciated.
User Interface Iteration
Coming into the week I knew that I needed to do some user interface work - which has historically been a less streamlined part of the engine.
The approach to writing tests and implementation code for interfaces has generally stabalized, but prior to this week crossing the last mile of trying to make things look decent was tedious.
So I kicked off the week by using the first three days to write some tooling to make it easier to more rapidly iterate on the game's look and feel.
Back in early April I started learning Apple's Metal Graphics API and making light touches on Akigi's
renderer-metal crate, the renderer backend that will one day power an Akigi MacOS application.
This week I dove in and added just enough to the Metal renderer in order to support displaying textured quads.
I then made a single function that renders the game to a PNG file using that renderer-metal behind
our generic Renderer trait.
This gave me the power to visualize the game world using a single function call after initializing the world with whatever data I wanted to see.
/// Verify that the first response is rendered above the second response
#[test]
fn response_1_above_response_2() {
    let mut world = create_test_world();
    set_main_action_conversing(&mut world);
    UserInterfaceSystem.run_now(&world);

    let responses = unsafe_text_sections_containing_text(&world, "Response");

    assert!(responses[0].screen_position.1 < responses[1].screen_position.1);

    // Add this line to the bottom of any test case
    world.load_assets_and_render_to_png();
}
The output of that call looks like this:
Intentionally panicking to ensure that we never accidentally leave this in a test function.

View rendered game world:
open /Users/chinedufn/Development/akigi/game-client/game-app/test-world-renders/scratchpad.png

thread 'systems::user_interface_system::dialogue_overlay::tests::pushes_dialogue_overlay_when_in_dialogue' panicked at '
Intentionally panicking to ensure that we never accidentally leave this in a test function.
I then added a test utility that can deserialize any value that implements DeserializeOwned from a file,
allowing me to tweak user interface margins and paddings and sizes without needing to recompile.
At the end I had a system that, while not perfect, was a big step up from my previous process of needing to refresh the web browser and click until I got to the desired game state.
Now whenever I have the values-from-file feature enabled and I edit the values.yml file a watcher process
regenerates a PNG file with the new values.
I have to click on the MacOS Preview app for it to refresh to the new image. In the future I might just programatically open a window and copy the bytes over or something. My Metal graphics API renderer only supports the user interface right now - but in the future I'll render meshes which should be useful for easily creating and visualizing any scene.
The ability to read values from disk is behind a feature flag so that I don't accidentally deploy that to production. In production we seek to distribute each of our applications (game-server, web-client, etc) as single binaries in order to keep our distribution process as simple as we can.
In the future I may experiment with rendering a few times at different screen sizes and then compositing that together into a final image (or perhaps a window if I ever need to be able to animate through some world states)
Inventory
Got a first pass of the inventory into the game. Needs polish, as with many things, but it generally works.
Got to test drive the new tooling around visualizing user interfaces while working on this so that was enjoyable.
We'll need to circle back and add polish, but an inventory interface is now in the game.
Art
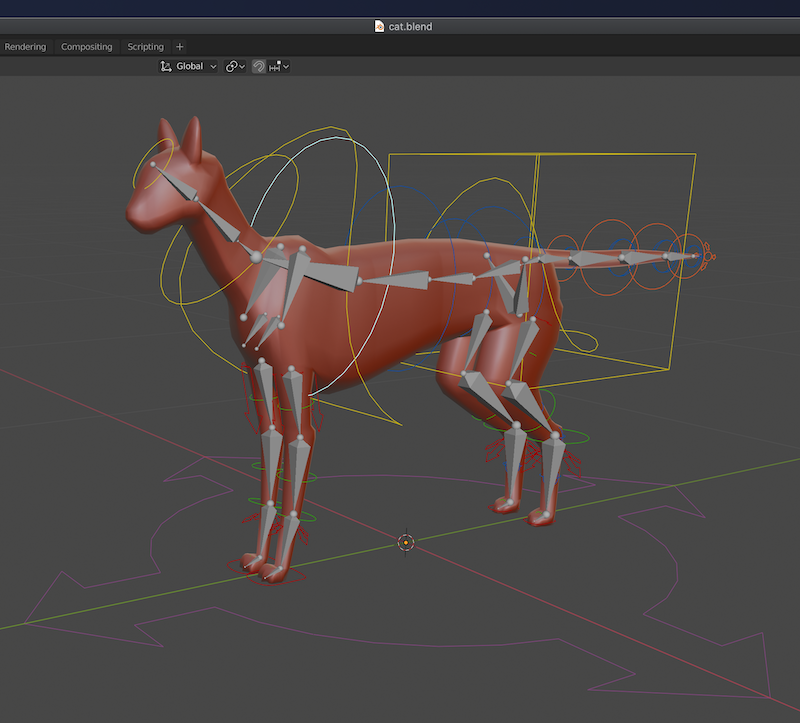 On tuesday I finished modeling the cat and got the rigify rig in place.
Loving rigify so far. In the back of my mind is at some point using some
morning practice sessions to try to re-create a rigify rig on my own
from scratch in order to learn more about how to create good rigs controls.
On tuesday I finished modeling the cat and got the rigify rig in place.
Loving rigify so far. In the back of my mind is at some point using some
morning practice sessions to try to re-create a rigify rig on my own
from scratch in order to learn more about how to create good rigs controls.
Other Progress
-
Some refactoring of the
distributed-npc-clientas a foundation for better testing now that I better understand the direction of the crate. -
Fixed some issues with exporting data from
Blenderfiles that had linked to data in other files. This took me a few hours to figure out but it's working now.
Next Week
Right now there isn't that much to do in the game - but I'm feeling good about flipping that equation over this next month.
I want June to be the month that people start to play the game for fun, not just to try it out.
This means that I'll need to spend a fair bit of time adding in more gameplay.
By the end of June I'd like to have a first paying subscriber for the game.
The gap between that and where we're at now is enormous. So we'll take it one week at a time.
Cya next time!
- CFN
069 - Bliss
May 31, 2020
;)
It was only three months ago that I wrote about the struggles of going a few weeks without deploying while working through a major refactor.
I'm in a much different boat today.
I'm making visual progress every week and will sometimes just sit at my desk smiling with joy for a few moments as I appreciate the fun journey that is working on a large project alone.
I'm feeling happy about the foundation that I'm building on.
It feels great whenever I get to add another layer on top of groundwork that might have been put in place months or years ago.
I feel like the pieces of the puzzle are coming together slowly but surely.
Of course nothing gold can stay and there will be more times in the months and years to come when we have to sift through the weeds for a while.
For now, though, I'm enjoying this feeling of bliss while it's here to be appreciated.
User Interface Iteration
Coming into the week I knew that I needed to do some user interface work - which has historically been a less streamlined part of the engine.
The approach to writing tests and implementation code for interfaces has generally stabalized, but prior to this week crossing the last mile of trying to make things look decent was tedious.
So I kicked off the week by using the first three days to write some tooling to make it easier to more rapidly iterate on the game's look and feel.
Back in early April I started learning Apple's Metal Graphics API and making light touches on Akigi's
renderer-metal crate, the renderer backend that will one day power an Akigi MacOS application.
This week I dove in and added just enough to the Metal renderer in order to support displaying textured quads.
I then made a single function that renders the game to a PNG file using that renderer-metal behind
our generic Renderer trait.
This gave me the power to visualize the game world using a single function call after initializing the world with whatever data I wanted to see.
/// Verify that the first response is rendered above the second response
#[test]
fn response_1_above_response_2() {
    let mut world = create_test_world();
    set_main_action_conversing(&mut world);
    UserInterfaceSystem.run_now(&world);

    let responses = unsafe_text_sections_containing_text(&world, "Response");

    assert!(responses[0].screen_position.1 < responses[1].screen_position.1);

    // Add this line to the bottom of any test case
    world.load_assets_and_render_to_png();
}
The output of that call looks like this:
Intentionally panicking to ensure that we never accidentally leave this in a test function.

View rendered game world:
open /Users/chinedufn/Development/akigi/game-client/game-app/test-world-renders/scratchpad.png

thread 'systems::user_interface_system::dialogue_overlay::tests::pushes_dialogue_overlay_when_in_dialogue' panicked at '
Intentionally panicking to ensure that we never accidentally leave this in a test function.
I then added a test utility that can deserialize any value that implements DeserializeOwned from a file,
allowing me to tweak user interface margins and paddings and sizes without needing to recompile.
At the end I had a system that, while not perfect, was a big step up from my previous process of needing to refresh the web browser and click until I got to the desired game state.
Now whenever I have the values-from-file feature enabled and I edit the values.yml file a watcher process
regenerates a PNG file with the new values.
I have to click on the MacOS Preview app for it to refresh to the new image. In the future I might just programatically open a window and copy the bytes over or something. My Metal graphics API renderer only supports the user interface right now - but in the future I'll render meshes which should be useful for easily creating and visualizing any scene.
The ability to read values from disk is behind a feature flag so that I don't accidentally deploy that to production. In production we seek to distribute each of our applications (game-server, web-client, etc) as single binaries in order to keep our distribution process as simple as we can.
In the future I may experiment with rendering a few times at different screen sizes and then compositing that together into a final image (or perhaps a window if I ever need to be able to animate through some world states)
Inventory
Got a first pass of the inventory into the game. Needs polish, as with many things, but it generally works.
Got to test drive the new tooling around visualizing user interfaces while working on this so that was enjoyable.
We'll need to circle back and add polish, but an inventory interface is now in the game.
Art
On tuesday I finished modeling the cat and got the rigify rig in place.
Loving rigify so far. In the back of my mind is at some point using some
morning practice sessions to try to re-create a rigify rig on my own
from scratch in order to learn more about how to create good rigs controls.
Other Progress
-
Some refactoring of the
distributed-npc-clientas a foundation for better testing now that I better understand the direction of the crate. -
Fixed some issues with exporting data from
Blenderfiles that had linked to data in other files. This took me a few hours to figure out but it's working now.
Next Week
Right now there isn't that much to do in the game - but I'm feeling good about flipping that equation over this next month.
I want June to be the month that people start to play the game for fun, not just to try it out.
This means that I'll need to spend a fair bit of time adding in more gameplay.
By the end of June I'd like to have a first paying subscriber for the game.
The gap between that and where we're at now is enormous. So we'll take it one week at a time.
Cya next time!
- CFN
068 - A Fine Foundation
May 24, 2020
Most of my coding time this week went to working on the underlying systems that power the Tutor of War short quest.
This was the type of workstream where I needed to build quite a bit of new functionality the first time around that I'll be able to re-use in future implementations.
In this case there was a lot of work around cutscenes and interactive dialogue and some of the other things that power exchanges with other entities in the game world.
It took me about three weeks to get the integration tests for the Tutor of War quest passing. I underestimated the amount of work that was needed.
I'm excited though, because all of that work has laid a fine foundation for future quests.
Need to work on the user interface - but the foundation for interacting with NPCs
is in place!
This video just shows dialogue nodes, but there are a bunch of fields in the InteractiveSequenceNode
that allow you to progress through an interaction in some interesting ways.
Exporting woes
I started off the week trying to get the latest iteration of the human mesh into the game.
This was slowed down a bit by some issues I was having with exporting my rigify rig.
I eventually got things working and added some documentation on troubleshooting rigify rigs to my exporter.
The human model lacks a unique feel - so I'll be remaking it in June.
As I get more comfortable with modeling I'm starting to gain the mental capacity to begin to think about art direction. We'll see how that plays out over the coming months.
Art
I'm working on a cat model that I'll finish up this week.
 Started working on a cat model.
Still need to model the feet and then I'll rig and texture it.
Hmm... this looks like a dog. Alas.
Started working on a cat model.
Still need to model the feet and then I'll rig and texture it.
Hmm... this looks like a dog. Alas.
After that I want to start adding some scenery to the world.
I'll likely continue to create and re-make things as my art skills improve and I begin to become capable of creating things that look good.
Equipping
Added support for equipping items to the game server.
I still have to add an interface for this on the client side.
I'll start with a quick and dirty interface and then improve it over time.
/// Equip an item from the player's inventory.
///
/// If there is already equipment in that slot it will be de-quipped.
///
/// Unless both the item and equipment are the same, in which case their quantities will be
/// summed.
pub fn equip_inventory_item(
    entity: Entity,
    icon: IconName,
    sys: &mut ClientRequestSystemData,
) -> Result<(), EquipInventoryItemError> {
    let eid: EID = entity.into();

    let inventory = sys.inventory_comps.get_mut(entity);
    let inventory = inventory.ok_or(EquipInventoryItemError::NoInventoryComp { eid })?;

    let equipment = sys.equipment_comps.get_mut(entity);
    let equipment = equipment.ok_or(EquipInventoryItemError::NoEquipmentComp { eid })?;

    let equip_id = EquipmentId::from_inventory_item(icon)
        .ok_or(EquipInventoryItemError::ItemNotEquippable { icon, eid })?;

    inventory
        .get(&icon)
        .ok_or(EquipInventoryItemError::ItemNotInInventory { icon, eid })?;

    let slot = inventory.slot(icon).unwrap();
    let item = inventory.remove_item(&icon).unwrap();

    let previously_equipped = equipment.insert_slot_maybe_combine(
        equip_id.slot(),
        Some(Equipped::new(equip_id, item.quantity)),
    );

    if let Some(previously_equipped) = previously_equipped {
        if let Some(previous_icon) = previously_equipped.equipment_id().to_inventory_item() {
            inventory
                .add_item(previous_icon, previously_equipped.quantity())
                .map_err(|ie| EquipInventoryItemError::Inventory { eid, ie })?;
            inventory
                .move_to_slot_maybe_swap(&previous_icon, slot)
                .map_err(|ss| EquipInventoryItemError::SwapSlot { eid, ss })?;
        }
    }

    Ok(())
}
Logging
I was talking to a former co-worker about my plans for monitoring game server performance by storing metrics about each game tick in a Postgres column.
I'm very glad that I brought it up because he pointed me towards a much better approach to something like that - extracting metrics from logs!
I'd coincentally been beefing up the game-server's structured logging setup over the last week or two, so
this suggestion was well timed and I decided to act on it.
After some hours of head scratching and learning, I now have datadog pulling logs from Cloudwatch Logs and a few dashboards
set up to monitor different metrics.
 Created a dashboard that I'll use to monitor the production game server's performance.
Right now the game tick interval is 600 milliseconds, so we need every game tick to always take less time to execute than that.
Eventually I'll set up alerting for any time a single tick gets too close to, say, 400 milliseconds - which will hopefully spur me
to drive towards more and more performant code.
#![deny(unused_must_use)]

use slog::{Key, Record, Serializer, KV};

/// Information that we log about every game tick
#[derive(Debug, Clone, Copy)]
pub(super) struct TickContext {
    /// The number of milliseconds that the tick took
    pub(super) duration_millis: f32,
    /// The number of players that were online at the end of the game tick.
    pub(super) end_player_count: u16,
}

impl KV for TickContext {
    fn serialize(&self, _record: &Record, serializer: &mut dyn Serializer) -> slog::Result<()> {
        serializer.emit_f32(Key::from("millis"), self.duration_millis)?;
        serializer.emit_u16(Key::from("players"), self.end_player_count)?;

        Ok(())
    }
}

#[cfg(test)]
mod tests {
  // ... snippet ...
}
Other Notes and Progress
- Introduced the landon parse command to the Landon CLI to help with processing exported data from Blender.
- I'm not currently using this since I use
landon's API instead of its CLI for the most part at this time, but it should be useful for people that are trying out the tool.
- I'm not currently using this since I use
Next Week
-
Create the inventory user interface
-
Create the equipment user interface
-
Finish the cat model and start working on scenery
-
Polish Tutor of War quest
-
Implement the ability to prevent movement to certain game tiles. Right now you can walk through anything.
-
Start planning username selection
Cya next time!
- CFN
067 - Light Drizzle
May 17, 2020
A short journal entry this week as I'm in the middle of wrapping up a couple of things but haven't quite nailed them.
This week was a light drizzle with no new deploys.
Next week will be a heavy downpour.
Interactive Sequences
This week I made a fair bit of progress on the Tutor of War quest, which has mainly required me to make some improvements to the
InteractiveSequenceSystem and its related data structures.
The InteractiveSequenceSystem is a master controller for taking players through a sequence of interactive nodes.
Nodes can have different behaviors.
For example, one node might be a dialogue node where a player chooses between one of several responses. Their selected response determins the next node in the graph.
Another node might power part of a cutscene and might not advance until a certain entity is defeated.
InteractiveSequenceNodes are typically a short lived main action that the player (or technically any eligible entity) is
currently playing through.
One of the first use cases was for dialogue with non-playing characters, but since then other use cases have slowly emerged
such as powering the Tutor of War's cut scene.
Art
I'm four weeks in to my new routine of starting my day with Blender and I'm still very happy with how I've been growing from week to week.
I'm feeling very comfortable - and nowadays I'm finding myself looking forwards to getting to work on art.
One thing that stands out to me is that before beginning my training the idea of moving around vertices until things looked right was overwhelming and I would often just giveup. Now it's instinctual. Progress!
 First time using Riggify to generate a rig.
Quite pleased with how easy it was! Much better than my previous rig that I made myself.
There's quite a bit that I could learn by studying this rig.
First time using Riggify to generate a rig.
Quite pleased with how easy it was! Much better than my previous rig that I made myself.
There's quite a bit that I could learn by studying this rig.
An early capture of me working on the walk cycle. I felt excited to finally understand all of the different views and graphs.
Got the lower body walk cycle - next the upper body.
Today was my first time working with Blender's graph editor and I got really excited as I felt and applied its power.
At one point I noticed that the feet were too far apart during the walk cycle.
In the past I would have went through the painful process of re-keying the x location for each foot, but with my new-found knowledge I simply hopped in the graph editor and slid the F-curves for the left and right foot over.
It felt great.
Other Notes and Progress
- I don't yet know if my blender exporter will work properly with my rigify rig but if it doesn't I'll dive into that and make it work.
Next Week
This week I'll create the upper body animation for the human rig and then start using the new human model in game.
I'll also work to finish the Tutor of War quest, as well as the quests for the other three tutors.
I'll also continue adding art into the game.
As well as take a look at an issue with visible seems between tiled terrain textures when mip-mapping.
Cya next time!
- CFN
066 - Integration Testing Infrastructure
May 10, 2020
It's not a coincidence that many of my journal entries mention testing.
Testing is something that I think is important for ~any code base, but especially so when you're a team of one.
Time spent searching for the root cause of an issue is time that new features and adventures aren't being added to the game.
When I had a full time job, debugging was normal and expected.
If three hours went to tracking something down, that was par for the course.
As a solo developer it becomes painfully obvious that burning time trying to fix something that you haven't thought about in months is a cost that you simply can not afford.
Consistent progress is a key ingredient to staying sane and feeling productive. Anything that takes away from that is the enemy and should be treated as a plague.
It needs to be easier to add things to the game over time, not harder.
Test driven development isn't just something that helps with that. In my personal experience, it's a requirement for creating a codebase that becomes easier to work with over time.
When you are ~always only writing code that passes tests then you are ~never debugging.
Naturally there are exceptions to the rule.
For example, when working on something so completely out of your comfort zone that you don't have the mental stamina to TDD and need to instead just throw code at the wall.
I've found that as months of strict TDD go by these deviations from the practice become more and more rare and you learn to test your way through even completely new concepts and ideas (typically after bulleting out some thoughts and ideas on paper first).
As I've written more tests my understanding of what my test suite needs to look and feel like has evolved.
I'm still making improvements to my underlying testing infrastructure and the style with which I write tests.
Just a week or two ago I introduced the struct TestWorld(specs::World), a new type wrapper around my ECS (entity component system) World where
I've started to organize helper functions that I can use across tests.
Previously when a helper function was small I would inline it in the test module that I was working on, but over months and years this means that you end up writing the same 5 line helper function multiple times.
All fine and dandy in a small codebase, but as the codebase grows the time and focus and flow saved by re-using an existing three line method instead of re-imagining it begins to become more and more noticable.
A good example of eliminating a small source of testing friction this is with accessing resources.
I recently introduced this macro.
// impl TestWorld {
//     pub fn mesh_job_descriptors(&self) -> Fetch<MeshJobDescriptors> {
//         self.fetch()
//     }
//
//     pub fn mesh_job_descriptors_mut(&self) -> FetchMut<MeshJobDescriptors> {
//         self.fetch_mut()
//     }
// }
macro_rules! resource_accessors {
    ($($res_type:ty , $fn_name:tt, $fn_name_mut:tt)*) => ($(
        #[allow(missing_docs, unused)]
        impl TestWorld {
            pub fn $fn_name (&self) -> Fetch<$res_type>{
                self.fetch()
            }

            pub fn $fn_name_mut (&self) -> FetchMut<$res_type>{
                self.fetch_mut()
            }
        }
    )*);
}

resource_accessors! {
    Arc<Mutex<GameServerReceivedMessages>>, game_server_received_messages, game_server_received_messages_mut
    ClientWorldState, client_world_state, client_world_state_mut
    GameClock, game_clock, game_clock_mut
    GpuBufferedDataResource, gpu_buffered_data_resource, gpu_buffered_data_resource_mut
    MeshJobDescriptors, mesh_job_descriptors, mesh_job_descriptors_mut
    PendingClientRequestBatch, pending_client_request_batch, pending_client_request_batch_mut
    RenderableIdData, renderable_id_data, renderable_id_data_mut
    ServerEidToLocalEntity, server_eid_to_local_entity, server_eid_to_local_entity_mut
    TextureNameMapResource, texture_name_map, texture_name_map_mut
    UserInterface, user_interface, user_interface_mut
}
All it does is let allow my tests to do this let tnm = world.texture_name_map(); instead of let tnm = world.fetch::<TextureNameMapResource>();.
At first glance one might think -
Why in the world would you write a macro to turn one one liner into another one liner?
The difference between the two invocations is subtle, but important.
The macro generated function auto completes somewhere around world.te.
Where as in the old way I had to type world.fe to autocomplete fetch, then ::<Te to autocomplete TextureNameMapResource.
Sounds small, but when you're spending the majority of time writing lots of small test cases the difference between the two becomes very claerly felt.
Integration Testing
Over a year ago in #029 I introduced the first integration test with a screen shot.
That integration test played through the game's first quest (that I've since removed) in much the same way that a player would.
It connected to the game server (over a crossbeam-channel) and sent the game server requests for things that it wanted to do.
It asserted against the state that the game server updated it with to make sure that what ia was trying to do happened.
For example, if we wanted to pick up an item we might issue a request to do so and then assert that the item was present in the inventory section of our client state that the server sent us.
This was not a replacement for unit tests. All of the underlying functionality such as picking up items had dedicated unit tests.
This was more so meant for playing through real player experiences and making sure that they could be completed from start to finish.
As with any first pass at something, there was quite a bit lacking.
The GameThread struct (that as the name suggests starts a running game-server in a thread) connected a player
to the game and returned it, so you could only write integration tests that had one player connected to the world.
You also couldn't control the components that the player had, it was whatever the default components were when the player connected to the game server.
This meant that I could really only write tests for one new human player. If I wanted to connect to the game pretending to be an arbitrary entity or multiple arbitrary entities I couldn't
Since then I've written other integration tests such as the chase_entity_while_attacking test that
led to the development of ways to connect and control arbitrary entities. In that case I connected
an entity that could attacked and one that could be attacked and proceeded to assert against different
expected behavior of two entities in combat.
// A snippet of how I initialize the components for entities that I'm controlling in an
// integration test.
// The game server allows clients to be sourced from the database or from a
// `ConnectedClientComponentsSource::Database` or
// `ConnectedClientComponentsSource::Provided`. In most integration tests we use the `Provided`
// varient in order to easily control the components of our test entities.

fn client_components_source() -> Arc<Mutex<ConnectedClientComponentsSource>> {
    let mut client_components_source = HashMap::new();

    client_components_source.insert(ATTACKER_USER_ID, Arc::new(attacker_components()));
    client_components_source.insert(TARGET_USER_ID, Arc::new(target_components()));

    let client_components_source =
        ConnectedClientComponentsSource::Provided(client_components_source);
    Arc::new(Mutex::new(client_components_source))
}

fn attacker_components() -> ComponentsToSpawnEntity {
    ComponentsToSpawnEntity {
        attacker: Some(AttackerComp::new()),
        main_action: Some(MainActionComp::new()),
        movement: Some(MovementComp::new()),
        tile_position: Some(TilePositionComp::new_1x1(5, 5)),
        trigger: Some(TriggerComp::new()),
        ..ComponentsToSpawnEntity::default()
    }
}

fn target_components() -> ComponentsToSpawnEntity {
    ComponentsToSpawnEntity {
        attackable: Some(AttackableComp::new()),
        hitpoints: Some(HitpointsComp::new(1_000_000, 10_000)),
        main_action: Some(MainActionComp::new()),
        movement: Some(MovementComp::new()),
        tile_position: Some(TilePositionComp::new_1x1(5, 5)),
        trigger: Some(TriggerComp::new()),
        ..ComponentsToSpawnEntity::default()
    }
}
Testing Quests
While working on the Tutor of War integration tests I've been adding new helper functions and assertions to the struct ConnectedPlayer that is used to
connect to the GameThread.
Examples are a method to start a conversation with another entity and one to advance through that conversation.
I'm excited for five years from now when the testing infrastructure has been shaped by dozens of use cases. I already find it beautiful, albeit still nascent.
So I can't wait to see what a mature set of integration testing tools looks like for the game.
/// When you first play the game you start on Jaw Jaw island.
///
/// On this island are four tutors, each of which gives and/or teaches you something
/// that you'll need along your journey.
///
/// One of these is the Tutor of War.
///
/// Here we verify that the Tutor of War quest works as expected by playing through it.
#[test]
pub fn tutor_of_war_quest() -> Result<(), anyhow::Error> {
    let game = GameThread::new(client_components());
    let mut player = game.connect_player_tick_until_in_world(USER_ID)?;

    start_quest(&game, &mut player)?;

    unimplemented!(
        r#"
    Add tests that the cut scene happens. Not sure what this should mean yet so just add some
    assertions and feel it out.
    "#
    );

    Ok(())
}

/// Talking to the tutor of war
fn start_quest(game: &GameThread, player: &mut ConnectedPlayer) -> Result<(), anyhow::Error> {
    player.start_dialogue_with_display_name(TUTOR_OF_WAR_DISPLAY_NAME)?;
    game.tick_until(|| player.is_in_dialogue(), 5);

    player.assert_current_dialogue_node(TUTOR_OF_WAR_FIRST_INTRO_NPC);

    player.advance_dialogue(
        &[
            TUTOR_OF_WAR_CONFUSED_ABOUT_WELCOME_TO_THIS_WORLD_PLAYER,
            TUTOR_OF_WAR_I_SUPPOSE_HE_SENT_YER_FOR_TRAINING_NPC,
            TUTOR_OF_WAR_WHAT_TRAINING_PLAYER,
            TUTOR_OF_WAR_LETS_GET_STARTED_WITH_TRAINING_1_NPC,
            TUTOR_OF_WAR_LETS_GET_STARTED_WITH_TRAINING_2_NPC,
        ],
        &game,
    );

    // TODO: Define constants for each quest step to make this easier to read. Either by hand
    //  or auto generated. Need to think through what makes more sense
    player.assert_quest_step(QuestId::TutorOfWar, 10);

    player.advance_dialogue(&[TUTOR_OF_WAR_CONFUSED_ABOUT_REQUEST_TO_HIT_PLAYER], &game);

    Ok(())
}
Art Practice
I'm three weeks into practicing art every morning and I'm getting stronger each day.
At first my practice involved following tutorials, but these days I'm spending more of my practice time by modeling things from the physical world using only my eyes for reference.
Going forwards I'd like to start my day with two practice sessions. One where I model something on my own using inspiration and reference from the physical world, then a second where I follow a tutorial.
I'd like to strike a nice balance between building my confidence and artistic critical thinking skills by creating 3D models on my own (which is far more of a problem solving endeavor that I had initially realized) while still getting exposure to expert approaches by following tutorials.
This week I finished the elephant that I started in #065.
 Felt like moving on before I made it to the trunk and tail. Even still,
my stamina is improving and I'm gaining the ability to remain focused
for longer while modeling. I'm still lacking in technique but that will
come with practice.
Felt like moving on before I made it to the trunk and tail. Even still,
my stamina is improving and I'm gaining the ability to remain focused
for longer while modeling. I'm still lacking in technique but that will
come with practice.
My sense of good vs. bad topology is improving!
I'm now better able to instinctively recognize bad topology and I am developing an intuition for why it's bad.
This is evolving as I run into more problems that are caused by bad topology.
One example of this is when I want to widen something but I can't select a single edge loop since my topology is poor and I instead need to make a bunch of clicks to select and modify my topology.
Hey, miles of room for improvement, but trending upwards!
Right now I'm still at the point where everything that I make is very obviously bad, but at at this point I'm fully confident that with continued practice I'll be able to hit the point where what I make looks good to me and I need to get feedback from others in order to see all of the places that it's bad.
I'm excited to hit that milstonee - hopefully over the next few months of daily practice!
Other Notes and Progress
-
One area that I want the game to shine is in the story and dialogue. I'm currently planning and writing the code to power cut scenes as there will be a short one included in the
Tutor of War's dialogue. -
Wrote the first draft of the
Tutor of War's dialogue. I'll want to edit and tweak it a bit but I'm happy with the direction of the character.
Next Week
I'm ready to take off the artistic training wheels.
Am I all of a sudden a grade A artist? Of course not.
But my deliberate practice has given me the confidence to know that it doesn't matter. Just keep making and keep improving.
So this week I'll be starting on creating real assets for the game.
I'll have my first art session in the morning be for real assets that I need. Then my second practice session will be something throwaway such as modeling something around my apartment or following a tutorial.
On the code side I'll be implementing cut scenes. It's the type of implementation where I'm not entirely sure of where it best fits, so I just have to pick a direction knowing that as I implement the best approach will begin to reveal itself.
So this week we're rolling up our sleeves and diving into that - learning as we go.
Lastly I want to start working on tooling at night more consistently. During the first couple of weeks of practicing art in the mornings my brain was so drained from exercising it in all of these new ways that by the time night came I had no mental energy to advance the game's tooling infrastructure.
That was the entire strategy though. Do art and gameplay first because those are the most important right now. Save tooling for last in the day because it's my favorite thing to work on so I'll have that carrot in front of me to motivate me to find a way to do it.
As art becomes less of a mental burden I'll be able to do more tooling in the evenings. I think this week is the week that I start dipping my toes into that part of the schedule.
Morning art, afternoon gameplay, evening tooling, and then on days that I'm doing consulting work I'll do it between the gameplay and tooling sessions.
In bed by 20:00. Or 21:00 if I'm in a flow state and need a bit more time. Then rinse and repeat the next day.
Cya next time!
- CFN
065 - Learning to See
May 3, 2020
A couple weeks ago I started a new routine where I start everyday by modeling in Blender.
The guidelines were very simple. As long as I open Blender and move at least one vertex, it counts.
The idea was to bring the barrier to entry close to zero so that I could stay on the wagon and begin to build a habit.
So far I've completed fourteen days in a row.
At the beginning it required some motivation, but by now it's beginning to feel as natural as showering or brushing my teeth every day.
I'm enjoying watching my mindset and skillset evolve in real time as this deliberate practice has begun to shape my understanding of what 3d modeling is.
Learning to Think
My mental model of what 3d modeling is has begun to take form over these last two weeks.
Two weeks ago I thought that I was trying to make a human, and that's about where my ability to conceptualize what I was doing ended.
Today I see it differently. At a macro level, yes, I am trying to make a human mesh.
But within that are many different sub-problems.
It's similar to how someone new to programming might think that they want to "code a website", whereas the more experienced developer can peer beneath that directive and see the pieces of that puzzle at multiple levels of detail.
I now see that what I'm really trying to do is take some vertices and position them in order to approximate a shape.
To better approximate a shape you either need more vertices or better positioning of your existing vertices.
This sounds simple, but coming to this conclusion was a revelation for me.
When following tutorials the author would add an edge loop here or extrude a face there and I could never quite tell how or why they knew that they needed to do that.
Now the answer has become clear to me.
They were trying to represent a shape and their existing vertices did not allow them to do that, so they created more.
There are other considerations such as making the mesh easy to rig or easy to texture, so I'll need to build those factors into my mental model over time as well.
Learning to See
I've come to realize that complex meshes are comprised of many connected simpler shapes.
I'm beginning to be able to see those shapes in isolation.
When I see a hand I also see cylinders of different lengths, protrusions for knuckles each slightly above or below the other, and the lines where the hand bends into itself that will need their own sets of vertices.
Over time my ability to see the smaller structures within the larger structure will sharpen, alongside my understanding of how to quickly create and connect these sub-structures.
There's nothing to do but practice and improve.
Art Practice
In my morning practice sessions I'll work on modeling something. It might take a few practice sessions before I finish.
Two weeks ago each session was around 10-30 minutes. Now we're in the 60-90 minute range.
When I'm done with a mesh I throw it away and model something else.
Here's the first human I made over a year ago in #024.
Other than these last two weeks I haven't done much modeling since then so we can say that this is approximately where I was talent wise two weeks ago.
 We all start somewhere.
Here's my most recent iteration. I called it quits before working on the head details, so it's an incomplete model but still a very big step forwards for me.
 Didn't do the ears or mouth, got to a point where I felt done with this attempt and wanted a clean slate.
After deleting the human I worked on making my left hand. What I'm happy about is that I did it without following any guides as I worked.
I just looked at my left hand and used my right hand to measure it.
For example, if I knew that something was about the length of my index finger then I could duplicate the index finger in Blender and to measure how long the thing should be.
 Really poor edge topology but I'm happy that I was able to do it without a tutorial. Practice will make perfect!
Next up I'm working on an elephant. I have a mini elephant statue in my apartment so I've put it on my desk and I'm modeling it by eye without taking any measurements.
Not that that's the best way to approach when modeling, but rather in an effort to continue to train my eye's ability to see structures and then re-create them with vertices.
 Started working on modeling an elephant. First I'm blocking out the larger structures and shape, then I'll work on honing the details.
I'll include the final mesh in next week's journal entry.
Started working on modeling an elephant. First I'm blocking out the larger structures and shape, then I'll work on honing the details.
I'll include the final mesh in next week's journal entry.
I'm enjoying practicing by using real things from the physical world as reference.
Maybe after the elephant I'll see about getting other figurines to model at a local shop or online.
Other Notes and Progress
-
Added a textured quad example to the metal-rs repository.
-
Got a few touches onto the
renderer-metalcrate within the Akigi cargo workspace. Norenderer-tests passing yet, still setting the foundation. I don't plan to release a MacOS version of the game this year. I'm only working on the metal renderer backend so that I can start to build tooling for the game that doesn't rely on a web browser (since right now there is only a WebGL renderer). One of the first tools that I want is a function to render to a window or generate a PNG from anyspecs::Worldthat I create. One benefit of this being that it allows me to more quickly iterate when working on user interfaces. Turning aspecs::Worldinto pixels is how the game already works, so I just need to enable myself to do it outside of a browser. -
Abandoned my exploration of using GitHub Actions for Akigi as I couldn't figure out how to get one of the integration tests to pass and in general most things ran slower than they did in CircleCI. I still use GitHub Actions for my open source work and I'll try them again in Akigi in a year or two. I got continuous deployment to my Kubernetes cluster working this week so there is once again a forcing function for keeping the test suite passing at all times.
Financials
Our financials for April 2020 were:
| item | cost / earning |
|---|---|
| revenue | + $4.99 |
| aws | - $148.30 |
| adobe substance | - $19.90 |
| GitHub LFS data pack | - $5.00 |
| photoshop | - $10.65 |
| chinedun@akigi.com Google email | - $12.00 |
| --- | --- |
| total | - $190.86 |
Our AWS costs have increased since we moved to our Kubernetes from around $110 per month to around $150+ per month.
A steep increaase but our total expenses are still in the cost bracket of other medium-cost hobbies such as a monthly martial arts membership.
I cancelled the chinedufn@akigi.com email so we should only get a smaller pro-rated charge in May.
Next Week
I'll be working on adding a few individuals to Jaw Jaw Island.
By the end of the week I'd like to have the Tutor of War in game along with his dialogue and the skills that he teaches you.
Cya next time!
- CFN
064 - The Road to Artistic Confidence
April 26, 2020
I started the week outlining the things that I wanted to include in the first area of the world, Jaw Jaw Island.
I enjoyed that because after spending four years primarily working on the underlying tech and tooling for the game it's nice to finally be in a place where I'm designing the gameplay experience.
It's a different way of thinking and a different set of skills that I'll enjoy honing over time.
Art Confidence
I've abandoned the notion that I'm "bad at art".
After much overthinking and what I'd summarize as aimlessly floating through the ether hoping to find a magic silver bullet, I've realized that my path forwards is fairly simple.
Make art everyday.
It sounds obvious, but when I'm new to something it can take some time before I remember that it's all about the repititions.
I let myself get lost in the Googling when the real path forwards was to start doing and then Google the problems that I got stuck on.
Googling without a well defined, specific problem that you're trying to solve is good for a little bit while you're trying to get some breadth and familiarity, but quickly hits a point of diminishing returns.
My returns were long since diminished.
Make, make, make is the key here on out.
The pre-requisite for doing things everyday is inspiration.
Willpower can only carry you so far - you need to be instrinsically motivated in order to keep the streak alive on days that you aren't feeling at your peek.
So I marinated on that for a bit and realized that I wasn't artistically motivated by the original idea for the game, "a world with intelligent animals"".
Mainly because I don't care for animals all that much in genereal.
Instead - I'll be fascinated by something temporarily, and then move on.
For example, when I was in Lagos earlier in the year I saw a Tortoise at the conservation and was fascinated by how it ate grass. In that moment I was very inspired. Today though, I don't care too much for Tortoises.
Similarly - when I've traveled to other countries or even when I've traveled around Wikipedia I've found bursts of inspiration and interest that were intense, but short lived.
I'd like to use my strong short bursts of miscellaneous inspiration as a strength. As such, I've changed the thematic direction of the game.
The game will have different areas of the world home to different Tribes and communities. One city might have humans, another viscious ogres.
This gives me the room to dive deep into different concepts and explore different ideas without being bound to them forever for the entire game.
Landing on this has me, finally, feeling inspired by the game itself, not just the technology behind it.
From there I was able to find the motivation and inspiration to start working on art daily.
I'm on day 9 now and feeling more comformtable, confident and skilled everyday.
I just need to keep racking up the practice and watch my skills soar!
Here's some art that I worked on this week:
 Normals on the cylinders are messed up since I didn't UV unwrap them properly.
But mistakes like that are how you learn.
Normals on the cylinders are messed up since I didn't UV unwrap them properly.
But mistakes like that are how you learn.
 Getting started working on a gorilla model.
Displaying Damage Received
I added damage indicators that are shown for a short time after you receive damage.
Indicators for the amount of damage dealt
There are powered by a Trajectory struct under the hood.
/// When an entity receives damage we display the amount of damage as a number animating away
/// from the entity.
///
/// The data in the DamageAnimation powers this damage display.
///
/// The damage gets an initial launch angle, velocity and gravity and then we use that to determine
/// it's position at any time.
///
/// Trajectory equation: https://www.omnicalculator.com/physics/trajectory-projectile-motion
#[derive(Debug, Copy, Clone)]
pub struct Trajectory {
    launch_angle_above_x_axis: Angle,
    velocity_per_second: f32,
    y_gravity_per_second: f32,
    started_at: SystemTime,
}
Structuring my Workdays
I do a mastermind meeting every Monday with a friend where we give eachother feedback on how we're approaching our goals and businesses.
My action item from the last one was to add some structure to my day since I was feeling out of order now that I've started working on art alongside coding.
So to start I've split by day into three sections. Art, gameplay and tooling.
Every evening before bed I write down what I'll do for my art, gameplay and tooling sections of the next day.
Splitting my day into phases has made it easier to feel focused, since when I transition from one phase to another it feels like a clean reset and I always feel like I'm doing one thing.
Scenery
I extended the TerrainChunk struct to have Vec<SceneryPlacement>, allowing me to easily add scenery into
the game that gets loaded only when we load up the terrain for that area.
Before the Q1 refactor earlier this year scenery was always loaded regardless of where you were in the world, which would not have scaled.
Today we load up a chunk of terrain, and thus it's scenery, when you're within a certain distance of it.
/// TerrainChunks are batches of data that are relevant to some square section of the world.
///
/// Chunks have no knowledge of their final placement.
///
/// So a chunk located at tile (45,45) when it is finally placed would still consider its bottom
/// left corner to be (0, 0) internally when defining placements such as water.
///
/// It is up to the user of the chunk to translate all of these things appropriately.
#[derive(Debug, Serialize, Deserialize, Clone)]
#[serde(deny_unknown_fields)]
pub struct TerrainChunk {
    terrain_chunk_id: TerrainChunkId,
    pub heightmap_png: Vec<u8>,
    pub blendmap_png: Vec<u8>,
    pub blendmap_components: BlendmapComponents,
    tile_info: TerrainChunkTileInfo,
    #[serde(default)]
    pub water_planes: Vec<TerrainWaterPlane>,
    #[serde(default)]
    pub scenery_placements: Vec<SceneryPlacement>,
}
And here's an example YAML terrain chunk definition file, wh_15_c_45_45.chunk.yml:
blendmap_components:
  red:
    color: sand-base-color
    normal: sand-normal-map
    roughness_metallic: sand-roughness-metallic
  green:
    color: grass-base-color
    normal: grass-normal-map
    roughness_metallic: grass-roughness-metallic
  blue:
    color: cracked-dirt-base-color
    normal: cracked-dirt-normal-map
    roughness_metallic: cracked-dirt-roughness-metallic
  black:
    color: cracked-dirt-base-color
    normal: cracked-dirt-normal-map
    roughness_metallic: cracked-dirt-roughness-metallic
tile_info:
  tile_border_permissions:
    [0, 0]:
      top: AllowAllMovement
      right: PreventAllMovement
  tile_pvp_permissions:
    [0, 0]: true
  tile_combat_permissions:
    [0, 0]: Unlimited
scenery_placements:
  - tile_within_chunk: [0, 0]
    tiles_wide: 1
    tiles_high: 1
    renderable_id: BeastCageNotBent
Other Notes and Progress
-
Start putting the foundation for benchmarking the different renderers (just WebGL for now) in place
-
Started putting in the foundation for a renderer powered by Apple's Metal graphics API
-
Started lightly researching WebGPU and made a documentation PR to wgpu-rs
-
Made the system that interpolates the camera always run after the system that interpolates the player in order to remove that race condition jitter at lower frame rates
-
Started setting up GitHub Actions for CI by making little bits of progress throughout the week. Still more issues to address so we're still using CircleCI alongside GitHub Actions for now.
-
Addeed mipmapping to the terrain but that introduced some texture bleeding issues that I'll need to fix in the next week or two.
Next Week
I'm dubbing this next week as my artistic ascension.
I want to complete something where I'll know that if I can do this, I can do anything.
I found a great 2.5 hour tutorial on creating a human base mesh with around 3k vertices.
This week I'll go through that tutorial and use it as a starting point for Akigi's human mesh.
I'm not sure how much stamina I'll have and whether it will take one or a few days to get through the tutorial. We'll see, as long as it is done this week.
I'll get other gameplay and tooling stuff done this week as well, but my number one priority is finishing the human mesh.
If I'm feeling up for the task I might even finish it, delete it and then do it again.
But that's just aspirational - we'll see if I have the stamina for that.
Cya next time!
- CFN
064 - The Road to Artistic Confidence
April 26, 2020
I started the week outlining the things that I wanted to include in the first area of the world, Jaw Jaw Island.
I enjoyed that because after spending four years primarily working on the underlying tech and tooling for the game it's nice to finally be in a place where I'm designing the gameplay experience.
It's a different way of thinking and a different set of skills that I'll enjoy honing over time.
Art Confidence
I've abandoned the notion that I'm "bad at art".
After much overthinking and what I'd summarize as aimlessly floating through the ether hoping to find a magic silver bullet, I've realized that my path forwards is fairly simple.
Make art everyday.
It sounds obvious, but when I'm new to something it can take some time before I remember that it's all about the repititions.
I let myself get lost in the Googling when the real path forwards was to start doing and then Google the problems that I got stuck on.
Googling without a well defined, specific problem that you're trying to solve is good for a little bit while you're trying to get some breadth and familiarity, but quickly hits a point of diminishing returns.
My returns were long since diminished.
Make, make, make is the key here on out.
The pre-requisite for doing things everyday is inspiration.
Willpower can only carry you so far - you need to be instrinsically motivated in order to keep the streak alive on days that you aren't feeling at your peek.
So I marinated on that for a bit and realized that I wasn't artistically motivated by the original idea for the game, "a world with intelligent animals"".
Mainly because I don't care for animals all that much in genereal.
Instead - I'll be fascinated by something temporarily, and then move on.
For example, when I was in Lagos earlier in the year I saw a Tortoise at the conservation and was fascinated by how it ate grass. In that moment I was very inspired. Today though, I don't care too much for Tortoises.
Similarly - when I've traveled to other countries or even when I've traveled around Wikipedia I've found bursts of inspiration and interest that were intense, but short lived.
I'd like to use my strong short bursts of miscellaneous inspiration as a strength. As such, I've changed the thematic direction of the game.
The game will have different areas of the world home to different Tribes and communities. One city might have humans, another viscious ogres.
This gives me the room to dive deep into different concepts and explore different ideas without being bound to them forever for the entire game.
Landing on this has me, finally, feeling inspired by the game itself, not just the technology behind it.
From there I was able to find the motivation and inspiration to start working on art daily.
I'm on day 9 now and feeling more comformtable, confident and skilled everyday.
I just need to keep racking up the practice and watch my skills soar!
Here's some art that I worked on this week:
Normals on the cylinders are messed up since I didn't UV unwrap them properly.
But mistakes like that are how you learn.
Getting started working on a gorilla model.
Displaying Damage Received
I added damage indicators that are shown for a short time after you receive damage.
Indicators for the amount of damage dealt
There are powered by a Trajectory struct under the hood.
/// When an entity receives damage we display the amount of damage as a number animating away
/// from the entity.
///
/// The data in the DamageAnimation powers this damage display.
///
/// The damage gets an initial launch angle, velocity and gravity and then we use that to determine
/// it's position at any time.
///
/// Trajectory equation: https://www.omnicalculator.com/physics/trajectory-projectile-motion
#[derive(Debug, Copy, Clone)]
pub struct Trajectory {
    launch_angle_above_x_axis: Angle,
    velocity_per_second: f32,
    y_gravity_per_second: f32,
    started_at: SystemTime,
}
Structuring my Workdays
I do a mastermind meeting every Monday with a friend where we give eachother feedback on how we're approaching our goals and businesses.
My action item from the last one was to add some structure to my day since I was feeling out of order now that I've started working on art alongside coding.
So to start I've split by day into three sections. Art, gameplay and tooling.
Every evening before bed I write down what I'll do for my art, gameplay and tooling sections of the next day.
Splitting my day into phases has made it easier to feel focused, since when I transition from one phase to another it feels like a clean reset and I always feel like I'm doing one thing.
Scenery
I extended the TerrainChunk struct to have Vec<SceneryPlacement>, allowing me to easily add scenery into
the game that gets loaded only when we load up the terrain for that area.
Before the Q1 refactor earlier this year scenery was always loaded regardless of where you were in the world, which would not have scaled.
Today we load up a chunk of terrain, and thus it's scenery, when you're within a certain distance of it.
/// TerrainChunks are batches of data that are relevant to some square section of the world.
///
/// Chunks have no knowledge of their final placement.
///
/// So a chunk located at tile (45,45) when it is finally placed would still consider its bottom
/// left corner to be (0, 0) internally when defining placements such as water.
///
/// It is up to the user of the chunk to translate all of these things appropriately.
#[derive(Debug, Serialize, Deserialize, Clone)]
#[serde(deny_unknown_fields)]
pub struct TerrainChunk {
    terrain_chunk_id: TerrainChunkId,
    pub heightmap_png: Vec<u8>,
    pub blendmap_png: Vec<u8>,
    pub blendmap_components: BlendmapComponents,
    tile_info: TerrainChunkTileInfo,
    #[serde(default)]
    pub water_planes: Vec<TerrainWaterPlane>,
    #[serde(default)]
    pub scenery_placements: Vec<SceneryPlacement>,
}
And here's an example YAML terrain chunk definition file, wh_15_c_45_45.chunk.yml:
blendmap_components:
  red:
    color: sand-base-color
    normal: sand-normal-map
    roughness_metallic: sand-roughness-metallic
  green:
    color: grass-base-color
    normal: grass-normal-map
    roughness_metallic: grass-roughness-metallic
  blue:
    color: cracked-dirt-base-color
    normal: cracked-dirt-normal-map
    roughness_metallic: cracked-dirt-roughness-metallic
  black:
    color: cracked-dirt-base-color
    normal: cracked-dirt-normal-map
    roughness_metallic: cracked-dirt-roughness-metallic
tile_info:
  tile_border_permissions:
    [0, 0]:
      top: AllowAllMovement
      right: PreventAllMovement
  tile_pvp_permissions:
    [0, 0]: true
  tile_combat_permissions:
    [0, 0]: Unlimited
scenery_placements:
  - tile_within_chunk: [0, 0]
    tiles_wide: 1
    tiles_high: 1
    renderable_id: BeastCageNotBent
Other Notes and Progress
-
Start putting the foundation for benchmarking the different renderers (just WebGL for now) in place
-
Started putting in the foundation for a renderer powered by Apple's Metal graphics API
-
Started lightly researching WebGPU and made a documentation PR to wgpu-rs
-
Made the system that interpolates the camera always run after the system that interpolates the player in order to remove that race condition jitter at lower frame rates
-
Started setting up GitHub Actions for CI by making little bits of progress throughout the week. Still more issues to address so we're still using CircleCI alongside GitHub Actions for now.
-
Addeed mipmapping to the terrain but that introduced some texture bleeding issues that I'll need to fix in the next week or two.
Next Week
I'm dubbing this next week as my artistic ascension.
I want to complete something where I'll know that if I can do this, I can do anything.
I found a great 2.5 hour tutorial on creating a human base mesh with around 3k vertices.
This week I'll go through that tutorial and use it as a starting point for Akigi's human mesh.
I'm not sure how much stamina I'll have and whether it will take one or a few days to get through the tutorial. We'll see, as long as it is done this week.
I'll get other gameplay and tooling stuff done this week as well, but my number one priority is finishing the human mesh.
If I'm feeling up for the task I might even finish it, delete it and then do it again.
But that's just aspirational - we'll see if I have the stamina for that.
Cya next time!
- CFN
063 - Shadows
April 19, 2020
I started off the week giving a bit of thought to how to decrease the iteration time when working on assets.
Right now after editing an asset I need to run ak asset compile and then launch the game in order to see it in game.
Our ideal future is either hot reloading of those assets while I have the game running, or in certain cases being able to edit different assets and settings while I'm in the game through a world editor interface.
This initiative will require some thought and dedicated effort that I was not ready to spend.
So for now I started by adding a benchmark to the asset compilation process and seeing where I could save some time.
The bulk of the asset compilation time is spent encoding PNG files when packing texture atlases.
By parallelizing the texture atlas generation I was able to shave things down from 11 seconds to around 7.5 seconds.
I cut things short there - in the future I'll circle back and continue investing in faster asset iteration.
Making the game look better
I've decided that I'm not going to let my inexperience with applying the artistic side of my brain be an excuse for producing a low quality visual experience.
For some reason I've always had an aversion to buying a course. It's strange because I'll buy a book in a heart beat.
I haven't thought too deeply into the exact reason.
But I decided to get over it and bought a Blender course that was 90% on sale for a cool $17 and have begun working through it.
It's giving me some confidence and I'm learning some new things - but ultimately the real gains will come when I stumble into an art style or muse that has me inspired and motivated to push my own boundaries.
All in due time.
Shadows
On the subject of making the game look better - I added shadow mapping.
 Rendering shadows in the game
The FPS dropped to a noticable choppiness. A few minutes of profiling suggests that the issue lies in the terrain rendering pipeline, but I'll need to dive deeper into that.
I decided to make some more progress on the art and gameplay before fixing up the performance.
So I'll save performance profiling as a weekend task.
Next Week
-
Plan out the first area of the game and start creating the assets
-
Need to get continuous deployment back up and running soon. I shut it off when we migrated to Kubernetes around a month ago because the old process was no longer applicable. Not having CD is leading me to not always running the entire test suite before deploying - which is slowly leading to more and more tests failing. This is pretty important to address so that quality trends upwards not downwards.
-
Make some performance optimizations over the weekend
Cya next time!
- CFN
062 - Water
April 12, 2020
In the previous journal entry I experimented with the hitpoints display above characters' heads using a 3D heart mesh.
It looked wonky and didn't feel intuitive - so at the start of this week I moved to a more traditional health bar.
 Scrapped the health bar experiments from the last journal entry and went with a more traditional
health bar.
Scrapped the health bar experiments from the last journal entry and went with a more traditional
health bar.
I got that done on Monday, and from there my goal was to get both water and shadow mapping working in the engine.
I spent a couple of days re-jigging the data structure that describes what needs to be rendered to have the notion of multiple render targets.
In the case of WebGL, these render targets map to different framebuffers. The WebGlRenderer iterates through these RenderTargetJob one by one and renders them.
For the water I needed to add two framebuffers, one for the reflection and one for the refraction.
I didn't end up working on shadow mapping this week - but when I do it will be built on top of this ability to render to multiple targets. So hopefully that turns into a one to two day's effort for tests and implementation.
By Thursday I had my water tests passing and was ready to move towards rendering water in game.
 When adding a new rendering capability to the engine I'll start by a writing test case.
It took until Sunday to get everything working in the RenderSystem. If the testing quality of the rest of the codebase is a B+, the RenderSystem is at a C-.
This was on full exhibit throughout the weekend as I would spend two hours figuring out an issue that would've been caught had the system been better tested.
I did some clean up during this past week and we'll continue to improve the testing in the RenderSystem over time.
 Rendering water in the game. I'm not entirely happy with the look right now so I'll have to come back to it at some point.
World Design
I started thinking about how to quickly add terrain and scenery to the world.
As part of thinking through different approaches I experimented with designing multi-textured terrain in Blender that I could then export to a blendmap PNG file to be used in the game.
 Got a blendmap in Blender's node editor working the same way that they work in my engine.
 Cleaned things up using Blender's node groups.
I ultimately scrapped this approach. As it felt a bit laggy when I started to deal with 250k vertices in Blender.
One guiding principle for future tooling is that, to the degree possible, editing the games look should happen inside the real game engine.
An example of this would be the world editor. This should involve firing up the game and switching to a world editing mode.
The idea is that spending more time in the game leads to tooling and visual improvements that help the game - instead of investing into improving other tools.
Within reason though - modeling will always happen in Blender because it would take years to write a comparable modeling solution.
I think the way to bridge the gap could be hot reloading. If I can edit a heightmap in Photoshop and have it update the terrain in the game in real time I get most of the benefits of being able to edit it in the engine without needing to implement that just yet.
I'm going to give this some more thought - but it seems like a potential direction forwards for the terrain.
Other Notes and Progress
- While refactoring some parts of the
RenderSystemas I added the notion of multiple render targets, I noticed that my refactoring skills have improved since the big client side refactor from the top of this year. I had better intuition around when to delete something and work through the list of 30 compiler errors vs. when to incrementally get the new approach working before deleting the old one. The end result is the same, but managing the mental burden that comes with refactoring multiple parts of a system is a skill that I'll need to continue to hone over time.
Next Week
This past week was focused on things that you can see. I'd like to focus this week on things that you can do / interact with.
I'm going to give some thought to the world editor to get a sense of where I'd like to go directionally.
If there are any quick steps that I can take - I'll take them. But this will be a longer term iterative effort.
I'll be doing more work on the Hand to Hand skill. Things like adding in some animations, adding in a skills tab to view your experience, and generally experimenting with the feel of combat in order to land on something that feels fun.
I'd like to properly heightmap the terrain and add a few textures to blend onto the terrain, but that might have to wait until next week.
Cya next time!
- CFN
061 - Npc Strikes Back
April 5, 2020
Back in 052 I updated blender-armature to add support for bone groups as a pre-requisite for being able to play different animations on the upper and lower bodies of a character.
An example of when I need this is when a character is chasing down another entity while they're fighting.
The character's upper body would be playing an attack animation while their lower body would be playing a walk animation.
The reason that I put that on pause was the the game client's code was getting too complex and adding that in felt like building on top of a jenga puzzle.
Fast forward to today where we're living our post-refactor life - I was able to fit in in pretty nicely.
Based on what the entity is currently doing the SkeletalAnimationSystem will select the upper and lower body armature animations, calculate the dual quaternions and then store them in
the SkeletalAnimationComponent so that the RenderSystem can later uses them when rendering.
Handling lower and upper body animations took a few iterations. I started with something incredibly complex with some traits and new type wrappers - and then after a few rounds of throwing things away and starting over landed on a simple struct.
/// The current action for the armature.
///
/// If the armature does not have an upper and lower body then only the upper body should be used.
#[derive(Debug)]
pub struct CurrentAction {
    pub(super) upper_body: ActionSettings<'static>,
    pub(super) lower_body: ActionSettings<'static>,
}
Hitpoints
After getting the skeletal animations working I moved on to working on combat.
I wanted to experiment with the way that we display hitpoints.
I started off by firing up Blender and working on a model to use.
 Made a heart model in Blender to use for testing our hitpoints visual.
The first iteration was a display with multiple hearts.
A red heart was meant to represent one hitpoint, and other colors would represent 5, 10, 20, 50, etc.
I worked on some transitions between the display when you gain or lose hitpoints that would make the hearts grow/shrink and interpolate between colors.
The first prototype of the overhead hitpoints display. I didn't like it. The animations are placeholders.
I didn't like how busy it felt and how having the different colors didn't feel very intuitive. Seeing several different colors at once was a little confusing.
I also didn't like that you couldn't really tell how much damage you did. If you went from one 5-heart to three 1-hearts you were increasing the number of hearts displayed while the current hitpoints were decreasing. Unintuitive.
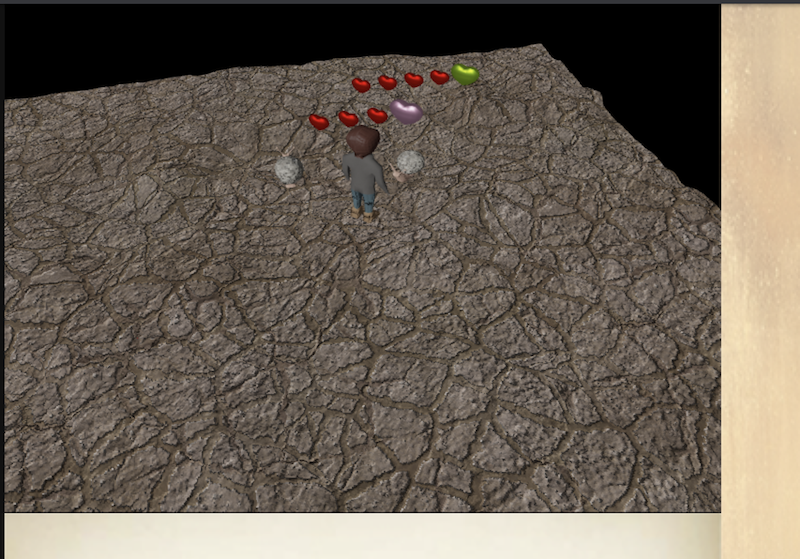 Throwing this code away, but kept a screenshot for the memories.
Now I'm leaning into a simpler system. There is one heart above your head when you've recently been attacked, and there is one color.
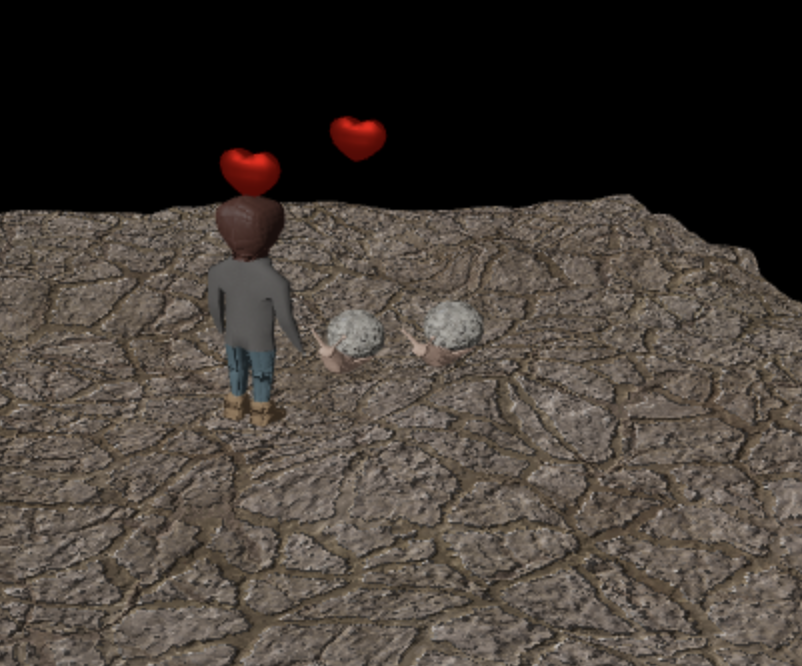 Work in progress - working on an improved hitpoints display.
I'm going to experiment with things such as having the heart's size grow/shrink as you gain and lose hitpoints. I'll also try adding a number next to the heart with the exact number of remaining hitpoints and interpolating between the numbers as you receive damage or heal.
I want the combat in the game to feel satisfying, so I'm willing to invest in prototyping and scrapping ideas until we land on something smooth.
I'm also not sold on using a 3d model for the overhead display and could potentially move to a 2d sprite. I need to think and experiment more.
Npc Decision Making
I first introduced the concept of Npcs making decisions based on what they know about the world in 049.
This is in contrast to a more common approach of having a planner process that has global state visibility and controls what NPCs do.
This complete decoupling of one NPC from all other NPCs and restriction of visibility to a view of state specific to just that NPC allows NPCs to run the process of deciding what to do on any machine, not just the game server. As long as their state is sent to that machine.
In the code I'm referring it as a distributed npc architecture.
The essence of it is that npcs are by design meant to be processed on other servers and then these servers communicate back to the main game server with requests for what they want the npc to do.
The npcs use a system similar to goal oriented action planning to make decisions on what to do every tick. If they decide to take an action they must communicate over the same protocol that human players use.
An npc is no different from a human player in the servers mind. Both players and npcs have the ConnectedClientComponent. The game server just sends some state to you, and you send
ClientRequestBatch to the game server whenever you want to make something happen.
This means that any behavior that I design for an npc can be given to players - and vice versa.
Another nice part is that the system is designed from the beginning to allow an npc to be processed on one server and then another server could process it on the next tick.
When an npc is processed it stores everything that its paying attention to on disk (in production we use a Kubernetes volume) and when we process the npc again on the next tick it first reads from this cache.
So since zero state is stored on a npc client we can:
-
Use cheap AWS spot instances for running our npc planning
-
Dynamically decide which distributed npc client to use to process an npc on a tick by tick basis. If one npc is repeatedly taking a long time to plan we can dynamically decide to process it on a larger server. And in general the system can auto-tune itself to maximize resource utilization and minimize dead time by storing heuristics on how long servers are taking to process npcs and moving these workloads around accordingly.
-
Actually now that I type the above - I could see a potentially better approach of just having a queue of jobs and having the clients pull from that queue. Yeah that would probably be much simpler. If a job is added and doesn't get processed in a reasonable amount of time then we'd just scale up the AWS auto-scaling group of clients. Nice!
Granted none of this is needed right now so I haven't gone as far as building this sort of workload management, but I'm happy that when it is needed the architecture will support it.
For now I'm running the distributed client in a thread on the main game server.
The main cost of this approach is needing to serialize the npcs state and then send it over the wire, but this should pale in comparison to the cost of pathfinding through possible tasks in order to build a plan to meet a goal. So I'm hoping that this will end up scaling rather nicely.
If this architecture pans out and stabilizes over the next year or two I'll write a more detailed blog post on it.
Back in 049 the npc decision making was based on a random function. This week we implemented a system similar to goal oriented action planning by pathfinding through possible tasks to accomplish a goal.
The available tasks and their costs are dynamic based on what the npc knows about the world.
Right now I'd rate the code quality a C-.
The structure is in place and it's working - but it still needs to be exercised more for me to land on something that feels super clean to work with.
It took a couple of days to get to the C-. At the beginning I was just flailing and throwing unimplemented!()
in left and right as I tried to land on a servicable structure.
In the video above I attack an npc that has a StateRequirement::AvoidDeathByAttack(RiskTolerance::Medium).
// Dev Journal Note: In the future I can use two side by side vectors instead of having this nested indirection.
// Dev Journal Note: A weighted vec is just a vector where items can be randomly chosen based on their weighting.
//       This allows me to add some variety in the order that goals are visited. I use the WeightedVec
//       in a few other places in the codebase.

pub type StateRequirements = Vec<(WeightedVec<StateRequirement>, GoalTier)>;
This state requirement has a higher priority than any of its other state requirements.
The npc checks if it's met by keeping a local cache of facts that it has observed. In this case it leans on its tracking of everytime it has been attacked.
/// Keep track of entities that have recently attacked the NPC.
///
/// After enough time has elapsed since an attacker has attacked this entity they'll be removed
/// from the NPC's memory.
#[derive(Debug, Serialize, Deserialize)]
pub struct RecentlyAttackedBy {
    attackers: HashMap<EID, AttackerInfo>,
    pub(super) last_attacked_at_tick: Option<u32>,
}

/// Information that we store about an entity that attacked the NPC, such as when they first
/// attacked and all of the damage that they've dealt.
#[derive(Debug, Serialize, Deserialize)]
struct AttackerInfo {
    first_attacked_at_tick: u32,
    last_attacked_at_tick: u32,
    hits: Vec<u16>,
}
If the npc has been attacked recently the StateRequirement.is_met function will return false - and it will pathfind through Tasks that are able to solve for that requirement until it lands on a
Vec<Task> plan.
Then from tick to tick it will process the current task and when it is completed move on to the next task.
Since this system is so young right now there is only only applicable task here, Task::DestroyEntity(EntityId). So it selects this and then sends a ClientRequest::AutoAttack(EntityId) to the server. Thus
beginning to fight back.
In the future we can add more potential tasks to make things far more interesting.
For example, if an npc knows that the enemy attacking it is a 2x2 tile enemy and it knows of a nearby area that can only be reached by 1x1 tile entities it might decide to make a run for it using Task::MoveToTile.
I'm expecting this system to get really cool over time as I add more and more possible Task nodes into the system and the NPCs start to choose plans that I would've never expected.
Again, the distributed npc client code is still bad and not very organized or fluid - but we'll get there. Such is the nature of building something for the first time. It starts off messy - despite having decent test coverage in place.
I relish the moment when the code is still trash but you can see that underneath the rubble is a sparking beam of light that will just take the honing that comes from needing to solve a few more problems before it lights up the sky.
Other Notes and Progress
-
Basic dependency injection into shaders via string replacements to share code between shaders. Removed a lot of duplicated shader code.
-
What initially started as me taking a little break to read up on Apple's Metal Graphics API led to about six hours on the couch that ultimately led to PRing an example of headless rendering into metal-rs. Learned a lot!
Financials
Our financials for March 2020 were:
| item | cost / earning |
|---|---|
| revenue | + $4.99 |
| aws | - $107.82 |
| adobe substance | - $19.90 |
| GitHub LFS data pack | - $5.00 |
| photoshop | - $10.65 |
| ngrok | - $10.00 |
| chinedun@akigi.com Google email | - $12.00 |
| --- | --- |
| total | - $160.48 |
I've cancelled the google email to save money. I can add it back when we need it.
Next Week
I wanted to release/announce an alpha of the game on April 9th - yeah that's just not happening.
I was only expecting to have one or two things to do and then just grow from there, but we're still at zero.
So we'll aim for May 21st.
We're making good progress from week to week ever since finishing the refactor so just need to keep pushing and land on something that's fun.
Cya next time!
- CFN
060 - Adding Some Visuals
March 29, 2020
In the last journal entry I said that this week we'd be focused on the visuals. Adding things that players can see and starting to iterate towards something that looked and felt like a game.
We made great progress on this - here's a before and after of the beginning of the week vs. today.
 Good progress this week!
Still some work to do before things look good, but we're approaching a point where things are at least servicable.
Good progress this week!
Still some work to do before things look good, but we're approaching a point where things are at least servicable.
Prepping for an initial alpha release
In 054 I said that I'd be moving for April 9th to be the alpha release date. This is still on pace.
There are lots of things that I want to add to the game and wish were there before "announcing" it to folks, but those can be added over time.
I'm planning to work on Akigi for years to come so there will always be more things to do. It's time to start letting people play the game.
Or rather - it's time to have a game for them to play after years of a nearly blank canvas.
UserInterfaceSystem
I started the week by adding backgrounds to the bottom and side panel.
To accomplish this I introduced the UserInterfaceSystem which pushes to a Vec<UiElement>.
The RenderSystem later iterates over these UI elements in order to draw textured quads on the screen.
TransformationInterpolationSystem
The TransformationInterpolationSystem was introduced in order to interpolate entities positions and rotations over time.
The rotation interpolation is a little choppy so I'll give that a few tweaks sometime soon.
SkeletalAnimationSystem
The SkeletalAnimationSystem was introduced to power determining the dual quaternions that an entity should be using for its corresponding armature.
This is powered by blender-armature under the hood.
Nearby Chat
A few systems were introduced on the frontend and backend in order to power chatting with other nearby players.
When a player sends a message - players that are close by will see it above their head and also see it inside of their message panel.
I ran into a big scare while working on this where the frames per second plummeted.
I was worried, but at the same time confident that there would be a fix since before the refactor everything was running smoothly.
The issue ended up being that I was accidentally pushing to a vector of text to render every frame without clearing it out.
So I was essentially rendering the same text on top of eachother thousands of times.
I discovered this when I implemented deleting text - because characters that I was trying to delete were still getting rendered since I wasn't clearing out previous frames.
I'm using glyph-brush under the hood for the text rendering.
Here's a glance at how a typical UserInterfaceSystem unit test looks.
My general approach is to verify that the user interface element is near other user interface elements that it should be near.
// A look into how I write tests for the user interface. I mainly test the positioning.
// In the future I might add tests that render the element and confirm that it matches
// an image that was manually approved once.

/// In the bottom left corner of the bottom panel we render the player's username along with
/// their pending chat message that they're typing out.
#[test]
fn pushes_pending_chat_message() {
    let world = create_test_world();
    world.fetch_mut::<ChatResource>().push_char('a');

    create_entity_with_display_name(&world);

    UserInterfaceSystem.run_now(&world);

    let mut chat_text = text_sections_containing_text(&world, "My Username: a*");
    assert_eq!(chat_text.len(), 1);

    let chat_text = chat_text.remove(0);
    let viewport = world.fetch::<Viewport>();

    let close_to_screen_left = viewport
        .within_x_distance_to_the_right_of_left_side(chat_text.screen_position.0 as i16, 10);
    let close_to_screen_bottom =
        viewport.within_y_distance_above_bottom__side(chat_text.screen_position.1 as i16, 10);

    assert!(close_to_screen_left);
    assert!(close_to_screen_bottom);
}
Planning out the pace of progression
Towards the end of the week I started planning out the pacing of progression in the game.
This felt great, because it was one in the first times since I started working on the game four years ago that I worked on game design.
It confirmed to me that the time has finally come that I'll be focusing on making a game instead of just writing underlying tech and tooling for the engine.
WaterPlaneJob
I started adding a WaterPlaneJob to the RenderJob struct. I've written about the water technique that I'll be using before.
 Right now the water plane render job can only specify a blue plane.
When we're done it will look more like water.
Right now the water plane render job can only specify a blue plane.
When we're done it will look more like water.
I'm going to put this on pause since I didn't finish this during this week. I'll circle back to it at some point in April - but for now I want to start the week working on some gameplay.
I also realised that I'll likely want to wait a few months to a year before implementing another client (such as a native macOS client). The renderer-core and renderer-test and renderer-webgl crates are
still evolving and taking shape as I add more variety to the RenderJob, so we'll want that to stabilize before we start introducing another rendering target.
// This is a work in progress - by the time I'm done there will be a bunch more fields to
// describe how to render the water plane.

/// Describes a water plane that needs to be rendered.
#[derive(Debug)]
pub struct WaterPlaneJob {
    model_matrix: [f32; 16],
    should_refract: bool,
    should_reflect: bool,
}
Other Progress
-
I started working on a launch checklist for the alpha "release" on April 9th. By release I just mean having enough for people to play and then continuing to work to add new features quickly.
-
Made improvements to the
renderer-corecrate to normalize some concepts that were duplicated with theRenderJobstruct that describes how to render a frame. -
Ran into some troubles a few journal entries ago with getting WebGL in Chrome working in a Docker container. I've fixed this - so I can start running the renderer tests in CI.
-
Implemented the
InteractionMenuResourceto store what should be shown when you click on things, as well as mousing out of the interaction menu closing the menu.
Next Week
I liked having a theme last week - it helped all of my work feel connected.
Last weeks theme was things that you can see.
This weeks theme will be things that you can do. I'll be adding a couple of gameplay mechanics that should start to set the foundation for Akigi.
Cya next time!
- CFN
060 - Adding Some Visuals
March 29, 2020
In the last journal entry I said that this week we'd be focused on the visuals. Adding things that players can see and starting to iterate towards something that looked and felt like a game.
We made great progress on this - here's a before and after of the beginning of the week vs. today.
Good progress this week!
Still some work to do before things look good, but we're approaching a point where things are at least servicable.
Prepping for an initial alpha release
In 054 I said that I'd be moving for April 9th to be the alpha release date. This is still on pace.
There are lots of things that I want to add to the game and wish were there before "announcing" it to folks, but those can be added over time.
I'm planning to work on Akigi for years to come so there will always be more things to do. It's time to start letting people play the game.
Or rather - it's time to have a game for them to play after years of a nearly blank canvas.
UserInterfaceSystem
I started the week by adding backgrounds to the bottom and side panel.
To accomplish this I introduced the UserInterfaceSystem which pushes to a Vec<UiElement>.
The RenderSystem later iterates over these UI elements in order to draw textured quads on the screen.
TransformationInterpolationSystem
The TransformationInterpolationSystem was introduced in order to interpolate entities positions and rotations over time.
The rotation interpolation is a little choppy so I'll give that a few tweaks sometime soon.
SkeletalAnimationSystem
The SkeletalAnimationSystem was introduced to power determining the dual quaternions that an entity should be using for its corresponding armature.
This is powered by blender-armature under the hood.
Nearby Chat
A few systems were introduced on the frontend and backend in order to power chatting with other nearby players.
When a player sends a message - players that are close by will see it above their head and also see it inside of their message panel.
I ran into a big scare while working on this where the frames per second plummeted.
I was worried, but at the same time confident that there would be a fix since before the refactor everything was running smoothly.
The issue ended up being that I was accidentally pushing to a vector of text to render every frame without clearing it out.
So I was essentially rendering the same text on top of eachother thousands of times.
I discovered this when I implemented deleting text - because characters that I was trying to delete were still getting rendered since I wasn't clearing out previous frames.
I'm using glyph-brush under the hood for the text rendering.
Here's a glance at how a typical UserInterfaceSystem unit test looks.
My general approach is to verify that the user interface element is near other user interface elements that it should be near.
// A look into how I write tests for the user interface. I mainly test the positioning.
// In the future I might add tests that render the element and confirm that it matches
// an image that was manually approved once.

/// In the bottom left corner of the bottom panel we render the player's username along with
/// their pending chat message that they're typing out.
#[test]
fn pushes_pending_chat_message() {
    let world = create_test_world();
    world.fetch_mut::<ChatResource>().push_char('a');

    create_entity_with_display_name(&world);

    UserInterfaceSystem.run_now(&world);

    let mut chat_text = text_sections_containing_text(&world, "My Username: a*");
    assert_eq!(chat_text.len(), 1);

    let chat_text = chat_text.remove(0);
    let viewport = world.fetch::<Viewport>();

    let close_to_screen_left = viewport
        .within_x_distance_to_the_right_of_left_side(chat_text.screen_position.0 as i16, 10);
    let close_to_screen_bottom =
        viewport.within_y_distance_above_bottom__side(chat_text.screen_position.1 as i16, 10);

    assert!(close_to_screen_left);
    assert!(close_to_screen_bottom);
}
Planning out the pace of progression
Towards the end of the week I started planning out the pacing of progression in the game.
This felt great, because it was one in the first times since I started working on the game four years ago that I worked on game design.
It confirmed to me that the time has finally come that I'll be focusing on making a game instead of just writing underlying tech and tooling for the engine.
WaterPlaneJob
I started adding a WaterPlaneJob to the RenderJob struct. I've written about the water technique that I'll be using before.
Right now the water plane render job can only specify a blue plane.
When we're done it will look more like water.
I'm going to put this on pause since I didn't finish this during this week. I'll circle back to it at some point in April - but for now I want to start the week working on some gameplay.
I also realised that I'll likely want to wait a few months to a year before implementing another client (such as a native macOS client). The renderer-core and renderer-test and renderer-webgl crates are
still evolving and taking shape as I add more variety to the RenderJob, so we'll want that to stabilize before we start introducing another rendering target.
// This is a work in progress - by the time I'm done there will be a bunch more fields to
// describe how to render the water plane.

/// Describes a water plane that needs to be rendered.
#[derive(Debug)]
pub struct WaterPlaneJob {
    model_matrix: [f32; 16],
    should_refract: bool,
    should_reflect: bool,
}
Other Progress
-
I started working on a launch checklist for the alpha "release" on April 9th. By release I just mean having enough for people to play and then continuing to work to add new features quickly.
-
Made improvements to the
renderer-corecrate to normalize some concepts that were duplicated with theRenderJobstruct that describes how to render a frame. -
Ran into some troubles a few journal entries ago with getting WebGL in Chrome working in a Docker container. I've fixed this - so I can start running the renderer tests in CI.
-
Implemented the
InteractionMenuResourceto store what should be shown when you click on things, as well as mousing out of the interaction menu closing the menu.
Next Week
I liked having a theme last week - it helped all of my work feel connected.
Last weeks theme was things that you can see.
This weeks theme will be things that you can do. I'll be adding a couple of gameplay mechanics that should start to set the foundation for Akigi.
Cya next time!
- CFN
059 - Deploying Again
March 22, 2020
In the last journal entry I wrote about how I'd be moving to Kubernetes.
I'm inexperienced when it comes to the best practices for modern deployments - so landing on Kubernetes came down to choosing something that met all of my current deployment needs in a way that I wouldn't be too coupled to in the long term.
I mention that because I'm hearing that "micro VMs", whatever those are, are gaining traction these days so I'll try to keep my ears open over the coming years to different ways that I can continue to simplify my deploy process while keeping security in mind.
Kind
My main goal with moving to Kubernetes was seeking greater dev-prod parity. I want to continue to gain the confidence that if everything is working on my development machine that everything will be working in production.
I don't actually run the full game very often locally. I'd say that 90%+ of my development time is spent just writing small tests and making them pass.
I'll fire the game up when I want to interact with and feel something out - but even then I just run a script that starts the game on my host machine, not in any docker containers.
So the dev-prod parity that I seek is more of a "If I can get my infrastructure working locally it will also work when I deploy it to production."
I began with minikube which was mostly nice - but had some aspects that left me desiring more.
Mainly the long cluster start up time and that you had to run some script in order to mount volumes. There was also a not-too-ergonomic process for getting local docker images into your cluster - which was my main deal breaker.
I eventually stumbled on kind and it solved all of my problems. Going from nothing to a fully working cluster takes about 2 minutes if my crate dependencies and my docker layers are already cached.
There's room to speed this up in the future if I need to by trying to parallelize some of the setup, but for now a roughly 2 minute cold start is totally fine.
Most of that time is spent running kind load to add different docker images from my local host machine to the cluster,
and my docker images are based on debian:buster-slim which is 40 Mb, much larger than the actual binaries themselves.
If I can move to a smaller base image in the future I'd imagine that the cluster startup and preparation time would drop to sub one minute, but this isn't a concern at the moment.
Now I run ak k8s create-new-cluster to start up my cluster locally.
$ ak k8s --help
ak-k8s 0.0.1
Work with our Kubernetes clusters

USAGE:
    ak k8s <SUBCOMMAND>

FLAGS:
    -h, --help       Prints help information
    -V, --version    Prints version information

SUBCOMMANDS:
    create-local-cluster    Start a k8s cluster locally using kind
    help                    Prints this message or the help of the given subcommand(s)
I don't expect to use Kubernetes locally very often as just running binaries directly on my host machine has been fine and fast to date.
Really my main use case for the local cluster now for when I want to try something out and get something working before applying it to the production cluster.
In the future I might also have a staging cluster, but I don't need that just yet.
Deploying Again
Last week I mentioned an error where the game was working locally but in production it would mysteriously crash whenever a player logged out.
This ended up being due to me not running the latest database migrations.
I updated the code path that tries to load players from the database to log an error if anything goes wrong.
I also refactored the entity spawning and removal systems to have only a notion of entities instead of treating human players as a separate concept.
This led to things being much cleaner and extensible - so I'm happy with that investment.
I added and tweaked some new and old command in the ak CLI for building production distributions of the different
services and uploading binaries to S3 and docker containers to AWS ECR.
I've turned off continuous deployment for now as I need to move our CI/CD pipeline to use these new commands.
I'll give it a little bit of time before I re-jig it so that I can focus on getting some basic functionality deployed after spending quite a bit of time working on non-visible underlying technical progress.
In the meantime I'll be deploying to the production cluster by running the release commands on my host machine.
Other Progress
- Fixed some issues with our
RenderSystemaround the rendering of terrain and user interfaces
Next Week
I'm dedicating this week's work to things that players can see and interact with.
I'm starting off my getting some of the user interface in place.
Then I'll create some terrain textures and add more terrain and meshes into the game.
So we'll finally start having screenshots and other visuals in the journal entries again.
Cya next time!
- CFN
058 - Right Back on my Feet
March 15, 2020
In #052 I started working on refactoring the game's client side to be well tested and use specs ECS, motivated by a refactor of the backend at the end of last year that significantly sped up my ability to add functionality to the backend.
In #056, over a month later, I was feeling a bit drained from going too long without shipping anything.
This week we finally merged the refactor branch and deployed - it felt great.
 I've been working on this branch since the end of January, save for two weeks I spent on vacation.
I'm very glad to be able to merge and start deploying frequent improvements again.
I've been working on this branch since the end of January, save for two weeks I spent on vacation.
I'm very glad to be able to merge and start deploying frequent improvements again.
The first glimmer of hope
My major goal for this passed week was to deploy something, even if it was severely lacking. I knew I could iterate quickly with the new code and get something more compelling up in short order. I just needed to release something and get back the sanity and bliss that frequent deploys provide.
I felt a major feeling of joy and relief on Tuesday when I finally got all of the new systems in the the game client hooked up.
The client would load, download a map that described where it could find different assets, and then dynamically load the
assets that it needed. The RenderSystem would push these assets onto the GPU and create a RenderJob every frame that
the WebGlRenderer could use to render the game.
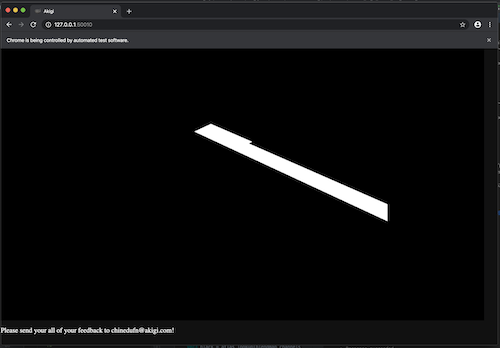 Wow. 17:06 on Tuesday and you have no idea how much of a smile this image brought to my face.
This image confirms that the game's WebAssembly binary is running without any hitches.
The fact that I can see those little white squares means that everything will be okay.
I'm unreasonably pumped right now - let's keep pushing and get some real assets in there!
Wow. 17:06 on Tuesday and you have no idea how much of a smile this image brought to my face.
This image confirms that the game's WebAssembly binary is running without any hitches.
The fact that I can see those little white squares means that everything will be okay.
I'm unreasonably pumped right now - let's keep pushing and get some real assets in there!
It felt really good.
Asset Compilation Rewrite
I have a command line interface that I use to automate different tasks and aspects of working on AKigi, powered by StructOpt.
$ ak --help
ak 0.0.1
Chinedu Francis Nwafili <frankie.nwafili@gmail.com>
The Akigi Development CLI

USAGE:
    ak <SUBCOMMAND>

FLAGS:
    -h, --help       Prints help information
    -V, --version    Prints version information

SUBCOMMANDS:
    asset               Work with our PSD, Blender and other asset files.
    bash-completions    Generate bash completions in $HOME/.tw/
    build               Build non-optimized versions of applications / assets for local development
    db                  Work with our database
    deploy              Deploy our different production services
    dist                Build applications / assets for distribution
    help                Prints this message or the help of the given subcommand(s)
    test                Run unit/integration tests
The command ak asset compile takes all of our asset source files such as .blend, .png and .psd and exports the data into formats that the game expects.
The previous code backing this command was untested and hard to work with. As with all older parts of the codebase I've learned quite a lot about writing maintainable Rust code since I first wrote it and it was in need of a good tune up.
The new code is well tested and much more DRY.
Most of the test cases use the tempfile crate to generate temporary directories, place a .blend or other asset files into this directories, and then
verify that the output directory contains what I expected to have been exported.
// An example asset export test

/// Verify that we export the armatures from a .blend file.
///
/// We provide a source Blend file then check the output dir and verify that the output
/// file deserialized back into a valid BlenderArmature.
#[test]
fn exports_armatures_from_blender() -> Result<(), anyhow::Error> {
    let (source_dir, cache_dir, out_dir) = three_temp_dirs()?;

    copy_file_to_source_dir(&mesh_and_armature_blend(), &source_dir)?;

    let content_hashes = process_blender_files(&source_dir, &out_dir, None, None)?;

    let (armature_name, armature_hash) = content_hashes.armatures.iter().next().unwrap();
    assert_eq!(armature_name.as_str(), "SomeArmature");

    let out_dir = out_dir.into_path();
    let armature = std::fs::read(out_dir.join(armature_hash))?;

    let armature: BlenderArmature = bincode::deserialize(armature.as_slice())?;

    assert_eq!(armature.actions.len(), 1);
    assert!(armature.actions.get(&"SomeAction".to_string()).is_some());

    Ok(())
}
The rectangle-pack crate that I wrote a week or two ago worked like a charm.
I'm packing a texture atlases as 2048x2048, 4096x4096, 8192x8192 and 16384x16384 then the client downloads the appropriate atlases based on their device's max texture size.
The asset compilation process generates several different atlases per size to accomodate different detail levels. Higher detail levels use larger textures, at the cost of more GPU memory. Lower detail atlases pack in more textures at smaller resolutions but sacrifice visual quality.
I want the game to be playable on older hardware so having the ability to select the quality level of textures that the game uses should come in handy.
// Here's a snippet with the initialization function for the web client
// When we initialize the `web-client` we get the max texture size.
// The `game-app` crate then uses this when determining which assets
// to download.
//
// ---

impl WebClient {
    /// Create a new instance of the WebClient.
    ///
    /// This typically happens once.
    ///
    /// TODO: Pass in the canvas' id instead of hard coding it so that we can embed the
    /// web client on any site should we want to (i.e. I could embed it into the dev journals).
    #[wasm_bindgen(constructor)]
    pub fn new() -> WebClient {
        #[cfg(not(feature = "production"))]
        console_log::init_with_level(Level::Debug);

        console_error_panic_hook::set_once();

        let canvas = get_akigi_canvas();
        let gl = get_webgl_context(&canvas);

        let max_texture_size = gl
            .get_parameter(WebGlRenderingContext::MAX_TEXTURE_SIZE)
            .unwrap()
            .as_f64()
            .unwrap() as u32;

        let app = App::new(ClientSpecificResources {
            device_info: DeviceInfoResource::new_with_device_max_texture_size(max_texture_size),
            game_server_connection: ClientSpecificGameServerConn(Box::new(
                WebClientGameServerConn::new(),
            )),
            renderer: ClientSpecificRenderer(Box::new(WebGlRenderer::new(gl).unwrap())),
            asset_loader: ClientSpecificAssetLoader(Box::new(WebClientAssetLoader::new())),
            system_time: ClientSpecificSystemTimeFn(Box::new(|| {
                perf_to_system(performance().now())
            })),
        });

        WebClient {
            app: Rc::new(RefCell::new(app)),
        }
    }
}
Terrain chunks are loaded dynamically based on the camera's location.
Right now the terrain is powered by files that look like this:
ls game-assets/terrain/
wh_15_c_0_0.blendmap.png        wh_15_c_0_0.chunk.yml           wh_15_c_0_0.heightmap.png
The asset compiler takes these and generates TerrainChunk structs that pack everything that you need to know about a piece of terrain and the tiles within that terrain.
I'm not worrying about levels of detail at the moment - but I built things in a way to make that easy to add in later if I need to. I'm not yet sure if this will be necessary.
Deploying
I first introduced continuous deployment in #038 back in July 2019.
It's been great, except for one big caveat.
The website, authentication server and payment server used AWS ECS, but the game-server was deployed to EC2.
The ECS deployments were easy, the EC2 deployments weren't.
This was because the game-server runs a websocket connection which isn't a good fit for ECS. The game-server also has special needs. I can't just update it while players are connected - so the game server
needs to know ahead of time when it's going to be terminated so that it can notify connected players.
I had a couple of crates and terraform scripts that handled provisioning the EC2 instance and deploying new versions of the game server, but it just never felt as easy as pushing a container to ECS and being done.
I also was weary of investing further in that process if there were already things out there that could handle my deployment needs.
When we deployed our code this week the game-server was crashing whenever a user logged out.
This was odd because I couldn't replicate it locally and that area of the code had both unit and integration tests that were passing. It was a classic "works on my machine" issue.
I spent a few hours investigating and then eventually decided that it was time to invest in true dev-prod parity.
I turned to Kubernetes, something I've been considering for a couple of months, and after a lot of struggling and troubleshooting I now have a cluster running locally and am close to deploying one to production.
So from now on our game server will run in Docker and be deployed to a Kubernetes cluster on AWS EKS.
I'm happy about this because it means that I won't be inventing my own deploy processes - I can leverage existing tried and true work that is much more robust than my hodge podge of scripts.
Other Progress
- I learned a boat load about networking while setting up the Kubernetes cluster.
Next Week
Top of the week I'm focused on deploying the game to AWS EKS and tweaking our CI/CD process now that we no longer use AWS ECS.
I'll start the process of moving away from CircleCI towards GitHub actions - which I like much better.
Then mid week I'll be back to working on the actual game. I'm starting off focusing on the start area of the game and adding back some things that I haven't done yet in the new refactored client.
After that I'll take a couple of hours to take stock an prioritize what to work on, with a goal of launching on April 9th and iterating publicly from there on out.
Cya next time!
- CFN
057 - Four Year Anniversary
March 8, 2020
In the previous journal entry we were down.
At the end of January we started working on refactoring the client into specs ECS, along the way adding much needed test coverage and fast-forwarding
the code quality using everything I've learned in my last two years of Rust.
Without counting the two weeks I spent on vacation that makes this about four weeks straight of working on this.
Now, don't get me wrong, I don't regret it at all. The original goal of being able to add gameplay at top speed looks like it will pan out. Functions are small, everything has a clear place, the landscape is lovely.
But even with things shaping up there's still the unfortunate reality that a month straight without shipping anything is boring.
I feel like I haven't really had any fun for weeks now.
It's nice to solve problems that I run into as I go, but without that capstone of deploying the game it doesn't quite give me the same joy that I've been used to for the passed few years.
I've made some adjustments to combat that though.
I was originally trying to deploy with analogues of everything that was already live. Things like skeletal animation, and user interfaces and some other things.
But, I realized that I can instead deploy a bit earlier and just accept a short-term regression.
Especially since during this refactor I've added a lot of things that weren't there before or were broken before - so a step backwards here is made up for with a step forwards there.
This change in approach allowed me to focus on just finishing up the most critical pieces of the refactor so that I can get back to deploying one or more times per day and start having fun and feeling like I'm moving quickly again.
So that should be done by the next journal entry. All that remains is to deploy again is:
-
Changes to the texture atlas generation part of the asset compilation process.
-
Adding a terrain asset compilation step to the asset compilation process.
-
Finishing up the
RenderSystemto properly make use of textures and terrain. -
A couple days of plugging little issues to get tests passing and everything working
-
Start deploying again!
Should be getting all of that done this week.
Four Year Anniversary
The first commit for Akigi was on March 8th, 2016 - four years ago!
I planned to do some reflecting on the last four years in this journal entry - but I'm so mentally wrapped up in finishing this refactor that I don't feel like reflecting.
So - let's circle back at the five year anniversary.
Other Progress
- Published rectangle-pack, a library I wrote to power our texture atlas generation.
Next Week
START SHIPPING AGAIN
Cya next time!
- CFN
056 - Keep on Pushing
March 1, 2020
I'm going to keep it short this week.
I got a lot done on the client side refactor last week - but it still wasn't enough.
I got the new terrain renderer working.
I got the game server received messages system that processes incoming bytes from the server and updates the world state accordingly working.
I got the asset loader system working to dynamically loaded up assets as needed.
And some other stuff.
I felt a little bit of discouragement during the week knowing that I've spent three weeks straight working on the codebase without a single visible change to the game to show for it.
That's sort of the nature of a massive refactoring. I haven't been deploying new features. I haven't been trying out new ideas for the game. I've just been straight up writing code without shipping anything.
I kept reminding myself that it's temporary, and once I make it to the other side of this refactoring the things that I'll be enabled to do very quickly from here on out will be well worth the time investment.
But - that's hard to keep in mind at all times.
Just have to stay positive and keep pushing.
Financials
Our financials for February 2020 were:
| item | cost / earning |
|---|---|
| revenue | + $4.99 |
| aws | - $114.76 |
| adobe substance | - $19.90 |
| GitHub LFS data pack | - $5.00 |
| photoshop | - $10.65 |
| ngrok | - $10.00 |
| chinedun@akigi.com Google email | - $12.00 |
| --- | --- |
| total | - $167.36 |
Next Week
Finish re-working the asset compilation/build process to produce assets in the format that the runtime asset loader expects.
Start to hook up all of these pieces that we've built over the last few weeks.
I really want to be able to load up the game again - just to have that feeling of progress.
Keep on pushing!
Cya next time!
- CFN
055 - Physically Based Terrain Rendering
February 23, 2020
I ended last week in the middle of writing the new renderer.
At the time ideas were settling into place and things weren't entirely stable - so I found myself doing a lot of thinking and code sketching around how to organize and design the renderer based on my requirements.
Today the renderer is largely stable from a code structure perspective and adding new aspects has been boiling down to fitting them into the existing patterns instead of needing to carefully think through what I'm trying to accomplish.
I'm happy with where it's at structurally even though I'm sure it will evolve over time as I have more requirements and learn more.
Rendering Meshes
I started the week working on rendering non skinned meshes and then once that was working I added support for skinned meshes.
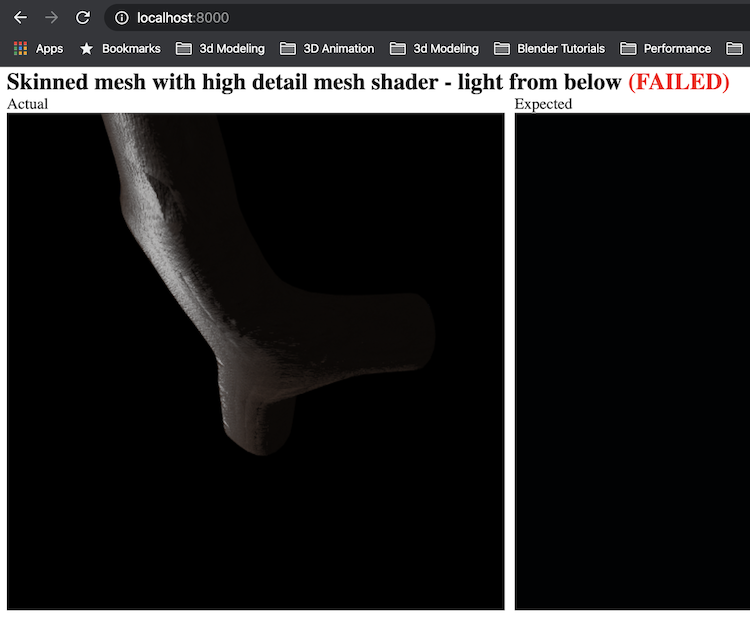 Rendering a skinned letter "F" mesh with a principled shader.
I'm using a physically based lighting model. I'm sure that I'll tweak and experiment with the look closer to release - but for now I have enough to keep moving forwards.
I incorporated the concept of levels of detail from the beginning. I only actually implement a single level of detail at the moment - but it should be straightforwards to add a couple more in the coming months.
One nice thing about the test suite is that when I'm staring at a still image that I'm supposed to mark as the correct passing case I'm finding myself paying very close attention to just about every pixel.
This has led to me catching several issues in my shaders that I might not have otherwise noticed. These mostly boiled down to silly oversights and slightly incorrect math.
It also led me to taking the time to add face weighted normals to my mesh preparer.
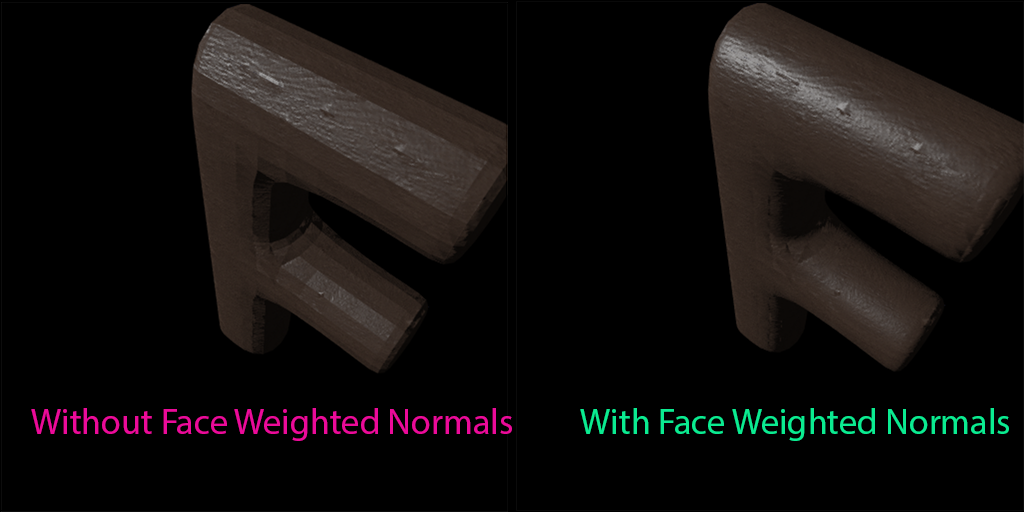 Rendering the same normal mapped 1,000 vertex mesh with and without face weighted normals.
Rendering Terrain
After getting the non-skinned and skinned mesh shaders working I moved on to handling terrain rendering.
I did a lot of reading around different terrain rendering techniques and level of detail techniques.
Even though I took in a lot of information I wasn't really able to find the "one correct way" - but that's usually the name of the game when it comes to graphics programming.
So I eventually decided that I was researching too much and needed to just start and adjust over time as I better understand my own use case. I whipped out my notebook to plan out an implementation and got started.
Eventually I moved on to my typical post-notebook thinking place - my IDE comments.
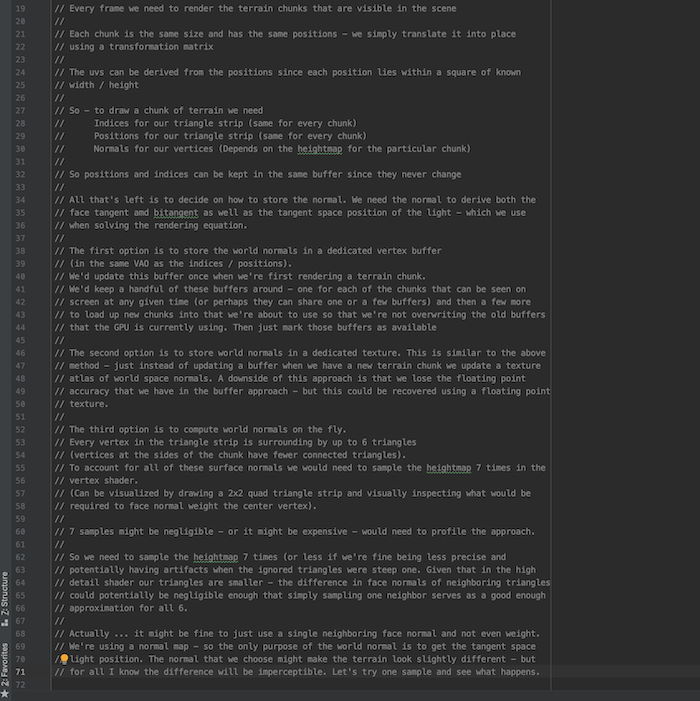 When I'm thinking through how to implement something I'll use one of a few different approaches - depending on the topic.
One of these approaches is writing out a comment explaining what I'm trying to do - illustrated in this screenshot.
This tends to help me realize what I know and don't know and gives me a more targeted sense of what I still need to research.
When I'm thinking through how to implement something I'll use one of a few different approaches - depending on the topic.
One of these approaches is writing out a comment explaining what I'm trying to do - illustrated in this screenshot.
This tends to help me realize what I know and don't know and gives me a more targeted sense of what I still need to research.
I got started by writing a function to generate the geometry for my terrain at any detail level.
/// A 1x1 chunk with one subdivision.
///
/// This means that there are two rows of triangles - so we need to use degenerate triangles
/// in order to render our triangle strips.
///
/// We accomplish this by duplicating the last vertex in the row that's ending and the first
/// vertex in the new row that's beginning.
///
/// ```text
///      Pos 6         Pos 7         Pos 8
///    Index 9       Index 11      Index 13
///       ┌┬────────────┬┬────────────┐
///       │└─┐          │└─┐          │
///       │  └─┐        │  └─┐        │
///       │    └─┐      │    └─┐      │
///       │      └─┐    │      └─┐    │
///       │        └─┐  │        └─┐  │
///       │          └─┐│          └─┐│
///    Pos 3   ────   Pos 4   ─────   Pos 5
/// Index 1,7,8    Index 3,10      Index 5,6,12
///       │  └─┐        │  └─┐        │
///       │    └─┐      │    └─┐      │
///       │      └─┐    │      └─┐    │
///       │        └─┐  │        └─┐  │
///       │          └─┐│          └─┐│
///       └────────────┴▶────────────┴▶
///     Pos 0         Pos 1         Pos 2
///    Index 0       Index 2       Index 4
#[test]
fn indices_1x1_tile_chunk_1_subdivision() {
    let indices = generate_terrain_chunk(1, 1).indices;

    #[rustfmt::skip]
    let expected_strip = vec![
        0, 3, 1, 4, 2, 5,
        5, 3, // Degenerate triangles
        3, 6, 4, 7, 5, 8
    ];

    assert_eq!(indices, expected_strip);
}
After that I got working on rendering the terrain.
Here are some screenshots I took as I made progress working on the terrain renderer.
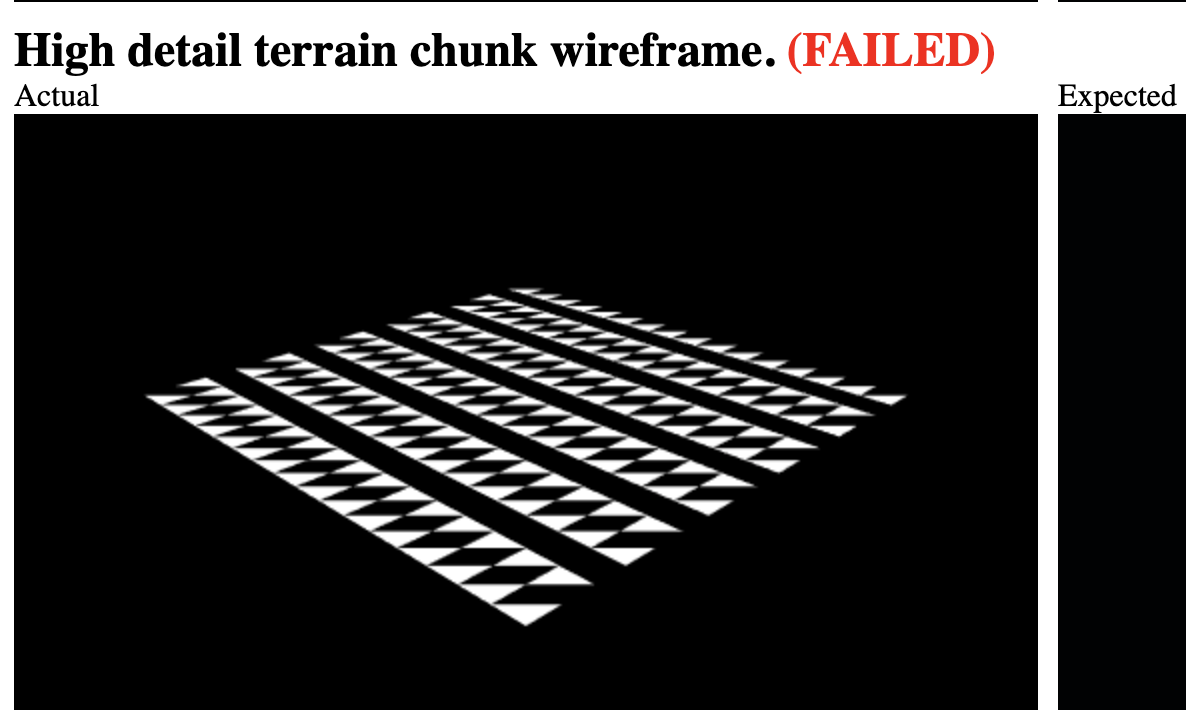 First terrain render. Using a very simple
 TerrainRenderJob.
Accidentally used TRIANGLES instead of TRIANGLE_STRIP.
Will continue to iterate from here.
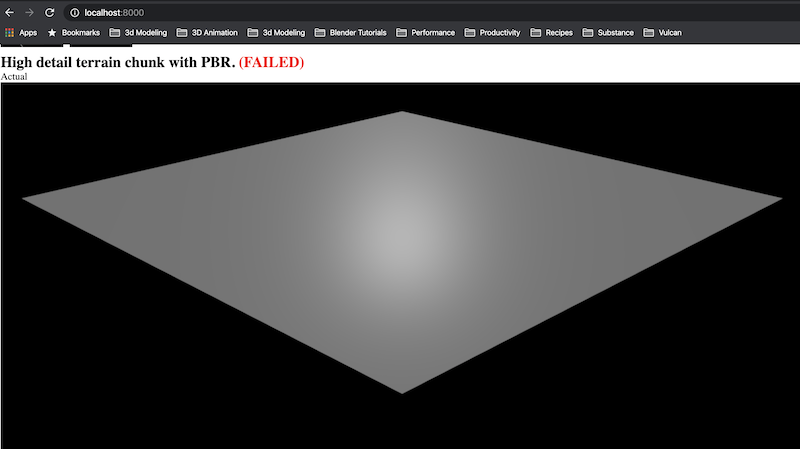 Working on one aspect of the terrain shader at a time. This go around I added
physically based lighting. Surface normals and face tangents will be calculated
in the terrain shader - but here they're hard coded.
Working on one aspect of the terrain shader at a time. This go around I added
physically based lighting. Surface normals and face tangents will be calculated
in the terrain shader - but here they're hard coded.
 Have our color textures tiling using a blendmap. They're simple test textures - but the exact same
code will work for our real textures.
Have our color textures tiling using a blendmap. They're simple test textures - but the exact same
code will work for our real textures.
 Sampling a heightmap in the vertex shader and also computing the normal, tangent and bitangent vectors
in the vertex shader.
Sampling a heightmap in the vertex shader and also computing the normal, tangent and bitangent vectors
in the vertex shader.
Right now the roughness is hard coded and the tangent space normal vector is also hard coded - but replacing those with a roughness and normal map will be trivial.
Other Progress
-
Made some changes to
blender-meshto add a method to interleave vertex data. Haven't pushed these changes up yet - will cut a newblender-meshrelease when I wrap up this game client refactor. -
I started going through a Substance Designer tutorial as I'll be needing to get good at creating high quality PBR (physically-based rendering) textures quickly.
Next Week
I'm going to kick off the week by finishing up the terrain renderer - which will boil down to creating a quick roughness map and normal map and verifying that we're sampling them correctly.
After that I'm going to continue pushing on finishing this large refactor of the game client. There are a few main things left to do - most of which are already in progress.
The one big unstarted piece is changing the asset build and deploy process to generate individual files for our meshes and armatures instead of lumping them together in one file. This will play nicely with our new on demand asset loader.
I want to get all of this stuff out of the way this week so that I can spend March focused on implementing actual gameplay. Going to try and make a big splash this week.
Cya next time!
- CFN
055 - Physically Based Terrain Rendering
February 23, 2020
I ended last week in the middle of writing the new renderer.
At the time ideas were settling into place and things weren't entirely stable - so I found myself doing a lot of thinking and code sketching around how to organize and design the renderer based on my requirements.
Today the renderer is largely stable from a code structure perspective and adding new aspects has been boiling down to fitting them into the existing patterns instead of needing to carefully think through what I'm trying to accomplish.
I'm happy with where it's at structurally even though I'm sure it will evolve over time as I have more requirements and learn more.
Rendering Meshes
I started the week working on rendering non skinned meshes and then once that was working I added support for skinned meshes.
Rendering a skinned letter "F" mesh with a principled shader.
I'm using a physically based lighting model. I'm sure that I'll tweak and experiment with the look closer to release - but for now I have enough to keep moving forwards.
I incorporated the concept of levels of detail from the beginning. I only actually implement a single level of detail at the moment - but it should be straightforwards to add a couple more in the coming months.
One nice thing about the test suite is that when I'm staring at a still image that I'm supposed to mark as the correct passing case I'm finding myself paying very close attention to just about every pixel.
This has led to me catching several issues in my shaders that I might not have otherwise noticed. These mostly boiled down to silly oversights and slightly incorrect math.
It also led me to taking the time to add face weighted normals to my mesh preparer.
Rendering the same normal mapped 1,000 vertex mesh with and without face weighted normals.
Rendering Terrain
After getting the non-skinned and skinned mesh shaders working I moved on to handling terrain rendering.
I did a lot of reading around different terrain rendering techniques and level of detail techniques.
Even though I took in a lot of information I wasn't really able to find the "one correct way" - but that's usually the name of the game when it comes to graphics programming.
So I eventually decided that I was researching too much and needed to just start and adjust over time as I better understand my own use case. I whipped out my notebook to plan out an implementation and got started.
Eventually I moved on to my typical post-notebook thinking place - my IDE comments.
When I'm thinking through how to implement something I'll use one of a few different approaches - depending on the topic.
One of these approaches is writing out a comment explaining what I'm trying to do - illustrated in this screenshot.
This tends to help me realize what I know and don't know and gives me a more targeted sense of what I still need to research.
I got started by writing a function to generate the geometry for my terrain at any detail level.
/// A 1x1 chunk with one subdivision.
///
/// This means that there are two rows of triangles - so we need to use degenerate triangles
/// in order to render our triangle strips.
///
/// We accomplish this by duplicating the last vertex in the row that's ending and the first
/// vertex in the new row that's beginning.
///
/// ```text
///      Pos 6         Pos 7         Pos 8
///    Index 9       Index 11      Index 13
///       ┌┬────────────┬┬────────────┐
///       │└─┐          │└─┐          │
///       │  └─┐        │  └─┐        │
///       │    └─┐      │    └─┐      │
///       │      └─┐    │      └─┐    │
///       │        └─┐  │        └─┐  │
///       │          └─┐│          └─┐│
///    Pos 3   ────   Pos 4   ─────   Pos 5
/// Index 1,7,8    Index 3,10      Index 5,6,12
///       │  └─┐        │  └─┐        │
///       │    └─┐      │    └─┐      │
///       │      └─┐    │      └─┐    │
///       │        └─┐  │        └─┐  │
///       │          └─┐│          └─┐│
///       └────────────┴▶────────────┴▶
///     Pos 0         Pos 1         Pos 2
///    Index 0       Index 2       Index 4
#[test]
fn indices_1x1_tile_chunk_1_subdivision() {
    let indices = generate_terrain_chunk(1, 1).indices;

    #[rustfmt::skip]
    let expected_strip = vec![
        0, 3, 1, 4, 2, 5,
        5, 3, // Degenerate triangles
        3, 6, 4, 7, 5, 8
    ];

    assert_eq!(indices, expected_strip);
}
After that I got working on rendering the terrain.
Here are some screenshots I took as I made progress working on the terrain renderer.
First terrain render. Using a very simple TerrainRenderJob.
Accidentally used TRIANGLES instead of TRIANGLE_STRIP.
Will continue to iterate from here.
Working on one aspect of the terrain shader at a time. This go around I added
physically based lighting. Surface normals and face tangents will be calculated
in the terrain shader - but here they're hard coded.
Have our color textures tiling using a blendmap. They're simple test textures - but the exact same
code will work for our real textures.
Sampling a heightmap in the vertex shader and also computing the normal, tangent and bitangent vectors
in the vertex shader.
Right now the roughness is hard coded and the tangent space normal vector is also hard coded - but replacing those with a roughness and normal map will be trivial.
Other Progress
-
Made some changes to
blender-meshto add a method to interleave vertex data. Haven't pushed these changes up yet - will cut a newblender-meshrelease when I wrap up this game client refactor. -
I started going through a Substance Designer tutorial as I'll be needing to get good at creating high quality PBR (physically-based rendering) textures quickly.
Next Week
I'm going to kick off the week by finishing up the terrain renderer - which will boil down to creating a quick roughness map and normal map and verifying that we're sampling them correctly.
After that I'm going to continue pushing on finishing this large refactor of the game client. There are a few main things left to do - most of which are already in progress.
The one big unstarted piece is changing the asset build and deploy process to generate individual files for our meshes and armatures instead of lumping them together in one file. This will play nicely with our new on demand asset loader.
I want to get all of this stuff out of the way this week so that I can spend March focused on implementing actual gameplay. Going to try and make a big splash this week.
Cya next time!
- CFN
054 - Light and the End of the Tunnel
February 16, 2020
In the previous journal entry I wrote about how I was just getting back into the swing of things after a two week vacation in Nigeria.
I'm back in stride. This week was full of progress on the refactoring of the game client, a journey that I started on in 052.
This time a week ago I felt a bit overwhelmed by all of the details of improving the client's code architecture, but since then I've laid out data structures and tests for all of the main pieces and gotten a good sense of how everything should fit together.
So we're coasting now - just writing and implementing more tests until all of the pieces are fully in place.
It's looking like about 1-2 more weeks of work on this refactoring and then we can dive back into working on actual gameplay.
So for now there aren't many player facing things to talk about. Instead I'll write about some of the code changes that I worked on over the last week.
Terrain Loading and Rendering
I spent most of Monday researching and planning out how we'd handle terrain.
The world is too large to be able to load up all of the terrain data at once so I needed to think through both the rendering of the terrain and how we'd dynamically load terrain data as needed.
I landed on a path forwards where every chunk of terrain data has an ID and when we need a new chunk of terrain we insert the ID that we need into a HashSet<TerrainChunkIdentifier>.
Our AssetLoaderSystem will see these and then call the ClientSpecificAssetLoaderFn which will load the terrain chunk and eventually insert it into the LoadedAssets struct.
All of our asset loading / deloading will be powered by a handful of data structures and coordinated by the AssetLoaderSystem - I'm already seeing the benefits of the de-coupling as opposed
to how things looked before this refactoring.
There's still work left to do to get all of the new tests passing - but the system looks solid so there isn't much more creative thought left for this bit of the workstream.
Input Event Processor System
I took several passes at figuring out the data structures and responsibilities for the InputEventProcessorSystem and eventually landed on something that felt smooth.
Raw input comes in from the client, then we look at the current World state and convert the input into a NormalizedEvent, then apply that NormalizedEvent in order to change
the World state.
/// When the user types or clicks or moves their mouse or enters any other sort of input we create
/// an `InputEvent`.
///
/// Every frame the `InputEventProcessorSystem` iterates through the input events and translates
/// them into into `NormalizedEvent`s.
///
/// TODO: NormalizedEvent does not feel like the right name
#[derive(Debug, PartialEq, Clone)]
pub enum NormalizedEvent {
    // ... snippet ...
    /// Push a character to the pending chat message
    PushChatChar(char),
    /// Remove one character from the pending chat message
    RemoveChatChar,
    // ... snippet ...
}
I'm happy with how this piece shaped up after a lot of early struggles.
User Interface Elements
I simplified the implementation for user interface event handling - making interactive UI elements will be a breeze going forwards.
There isn't too much of a UI in the game yet so I'm sure what I landed on will change - but things are now isolated and well tested enough that I anticipate future changes being much, much easier to accomplish.
The UiElement enum currently looks like this.
// Comments omitted for brevity

#[derive(Debug)]
pub enum UiElement {
    TexturedQuad {
        ui_quad: UiQuad,
        event_handlers: EventHandlers,
    },
    Text {
        section: OwnedVariedSection,
        event_handlers: EventHandlers,
    },
}

#[derive(Debug, Default)]
pub struct EventHandlers {
    onclick_inside: Option<EventHandler>,
    onclick_outside: Option<EventHandler>,
    onmouseover: Option<EventHandler>,
    onmouseout: Option<EventHandler>,
}

#[derive(Debug)]
pub struct EventHandler {
    event: NormalizedEvent,
    captures: bool,
}
Whenever we render the game we update a cache of the most recent Vec<UiElement>s that were rendered.
/// A resource used for handling the user interface
#[derive(Debug, Default)]
pub struct UserInterface {
    /// Once per tick the RenderSystem determines all of the user interface elements that need to be
    /// rendered.
    ///
    /// We store the most recent batch of ui element data here.
    ///
    /// By knowing what is currently being displayed we can interpret mouse clicks and other
    /// user input events accordingly.
    latest_ui_batch: Vec<UiElement>,
}
Then in the InputEventProcessorSystem we can iterate through the Vec<UiElement> to see if we need to trigger any of its event handlers.
for ui_element in sys_data.user_interface.latest_ui_batch() {
    if let Some(ui_elem_bounds) = ui_element.bounds(&sys_data.text_renderer) {
        // ... snippet ...

        let pointer_inside_elem = ui_elem_bounds.contains(ui_coord);

        if !pointer_inside_elem {
            if let Some(onclick) = ui_element.event_handlers().onclick_outside() {
                let event = onclick.event().clone();
                normalized_events.push(event);

                click_captured = click_captured || onclick.captures();
            }
        }

        // ... snippet ...
    }
}
The WebGL Renderer
Before we started the refactor our WebGL renderer was a module inside of the web-client
(every client has its own crate that calls the game-app crate with some ClientSpecificResources.).
I created a new crate renderer-webgl dedicated to the WebGlRenderer. It has only a few dependencies and doesn't know anything about the game.
There's now a renderer-core crate that provides a Renderer trait and RenderJob<'a> struct.
/// Provides functionality useful for rendering the game
pub trait Renderer {
    /// Render to the render target given the provided `RenderJob`
    fn render(&mut self, render_job: RenderJob);

    /// Get the most recent frame's pixels.
    ///
    /// Currently used in our test suite - but could be used in the future to help players take
    /// screenshots.
    fn read_pixels_rgba(&self) -> Vec<u8>;
}
The RenderJob<'a> holds just enough data for a Renderer to know what to render, and nothing more.
Every frame in the RenderSystem the game-app creates a RenderJob<'a> then uses it to call the ClientSpecificRenderFn.
The piece that I'm most excited about is the new renderer-test crate.
The renderer-test crate allows us to test our renderers in a graphics API agnostic way.
So the renderer-webgl has the renderer-test crate as a dev dependency and has a single test that looks like this.
/// Run all of the render tests on the WebGlRenderer
#[wasm_bindgen_test]
fn render_tests() {
    init_console();

    let renderer_creator = |viewport_width, viewport_height| {
        let canvas = create_canvas(viewport_width, viewport_height).unwrap();
        let gl = get_webgl(&canvas).unwrap();

        Box::new(WebGlRenderer::new(gl).unwrap()) as Box<dyn Renderer>
    };

    let test_results_fn = |render_test_results| {
        for render_test_result in render_test_results {
            append_test_result_to_dom(render_test_result).unwrap();
        }
    };

    renerer_test::test_renderer(&renderer_creator, &test_results_fn);
}

fn append_test_result_to_dom(render_test_result: RenderTestResult) -> Result<(), JsValue> {
    // ... snippet ...

    let test_case_description_div = document().create_element("div")?;
    test_case_description_div.set_attribute("style", "font-size: 24px; font-weight: bold;")?;
    test_case_description_div.set_inner_html(render_test_result.description());

    let passed = document().create_element("label")?;
    passed.set_inner_html(" (passed)");
    passed.set_attribute("style", "color: rgb(50, 205, 50)")?;

    let failed = document().create_element("label")?;
    failed.set_inner_html(" (FAILED)");
    failed.set_attribute("style", "color: rgb(255, 0, 0)")?;

    match render_test_result.was_successful() {
        true => test_case_description_div.append_child(&passed)?,
        false => test_case_description_div.append_child(&failed)?,
    };

    // .. snippet ...
}
Future renderes would have their own similar version of the above test - but instead of creating a WebGlRenderer they'd create their own renderer.
Because of the beautiful libraries that are wasm-bindgen wasm-bindgen-test and web-sys and wasm-pack I'm able to test the WebGlRenderer in Chrome, Firefox and Safari
and optionally view the tests in a browser headfully if I need to visualize what happened.
Right now there are only two test cases - but I'm super excited to see this evolve as I continue to add to the new renderer.
Here's how it looks when tests are failing:
wasm-pack test --chrome -- -p renderer-webgl
 Created a way to visualize the test suite without having to write any JavaScript or HTML.
All thanks to by wasm-bindgen-test, [wasm-bndgen] web-sys and wasm-pack.
Created a way to visualize the test suite without having to write any JavaScript or HTML.
All thanks to by wasm-bindgen-test, [wasm-bndgen] web-sys and wasm-pack.
And here's what it looks like when tests are passing.
 Took all of Sunday but finally got the instanced rendering of quads working in WebGL.
That green feels so satisfying.
Took all of Sunday but finally got the instanced rendering of quads working in WebGL.
That green feels so satisfying.
Adding a new test is as simple as creating a new RenderTest and pushing it to a Vec<RenderTest> - so the test suite should evolve quite nicely.
/// Verify that we properly render a ui quad from an RGB texture
pub fn rgb8_ui_quad_test() -> RenderTest {
    let viewport_width = 25;
    let viewport_height = 40;

    let mut render_job = RenderJob::new([0., 0., 0.], viewport(viewport_width, viewport_height));

    let quad_width = 15;
    let quad_height = 20;

    let textured_quad_render_job = UiQuadRenderJob::new(
        TextureAtlasId::Zero,
        ViewportSubsection::new(5, 10, quad_width, quad_height),
        TextureAtlasSubBounds::new([0.1875, 0.875], [0.8125, 0.125]),
        0,
    );

    let texture_to_create = TextureToBufferOntoGpu::new(
        16,
        TextureFormat::RGB_8,
        textured_quad_subtexture().to_rgb().to_vec(),
    );

    render_job.insert_texture_to_create(TextureAtlasId::Zero, texture_to_create);
    render_job.push_textured_quad_job(textured_quad_render_job);

    let expected_rgba_pixels = rgba_ui_quad_test_expected().to_rgba().to_vec();

    RenderTest {
        description:
            "Renderer should render a textured quad using a sub-section of a specified texture",
        render_job,
        expected_rgba_pixels,
    }
}
One low point while working on the WebGlRenderer was spending all of Sunday afternoon and early evening trying to render a single textured quad.
I was using instanced rendering for the first time and felt motivated to figure out why it wasn't working.
I eventually figured it out - and got a reminder of how much time can be wasted when you don't have the usual amount of type safety that Rust spoils you with since you're dealing with browser APIs.
The issue was that I was constructing a js_sys::Float32Array with a pointer to a Vec<f64>.
I converted it into a Vec<f32> and things immediately worked.
Due to my inexperience with instanced rendering I was looking all over the place to figure out what could've been going wrong, so on the bright side I learned a lot about instancing after combing through code for around six hours straight.
// ... snippet ...

// FIXME: Remove allocations
let mut vertices: Vec<f32> = vec![]; // This was previously a `Vec<f64>` since I hadn't specified the type :(

let memory_buffer = wasm_bindgen::memory()
    .dyn_into::<WebAssembly::Memory>()
    .unwrap()
    .buffer();

let data_location = vertices.as_ptr() as u32 / 4;

let data_array = js_sys::Float32Array::new(&memory_buffer)
    .subarray(data_location, data_location + vertices.len() as u32);

// FIXME: Only buffer if the vertices > than the most we've ever buffered.
// Otherwise we should update the subbuffer
gl.buffer_data_with_array_buffer_view(GL::ARRAY_BUFFER, &data_array, GL::DYNAMIC_DRAW);

// ... snippet ...

self.angle_instanced_arrays.draw_arrays_instanced_angle(
    GL::TRIANGLE_STRIP,
    0,
    4,
    quad_count,
);
Overall Thoughts on the Week
I'm seeing the light at the end of the tunnel. Things are starting to fall right into place and pieces are beginning to get re-used across systems. Feeling proud of the direction.
When this refactor is finished I'm hoping that I'll be able to add functionality to the client at a truly special pace.
Other progress
- Sent a small PR to glyph_brush while working on refactoring the text renderer.
Pushing for an alpha release
Akigi's first commit was on March 8, 2016.
I'm setting the official alpha release date as Thursday April 9, 2020. 4 years 4 weeks and 4 days after the initial commit.
This should be a nice forcing function to finish up all of this behind the scenes work and start making progress on real gameplay.
Akigi isn't really a game yet - it's effectively just a lot of technology that has the potential to make it easy to make and maintain a game.
Let's change that!
Next Week
More work to do on the client side refactoring.
There's stuff left on everything that I wrote about in this journal entry, as well as some work to do on our asset build step.
I can see the end though. A week or two until we're off this train.
Cya next time!
- CFN
053 - More Client Side Refactoring
February 9, 2020
For the last two weeks I was in Nigeria on vacation - I got back to Manhattan on Friday around 6pm.
I haven't gotten a lot done over the last two weeks - but I'm back in gear and it should be full steam ahead again.
I'm still working on moving the client side of the game into specs and refactoring / TDDing as I go. I expect it this to take 2-3 more weeks before I'm done and ready to get back to working on gameplay.
Even though 2-3 weeks feels realistic - in my head I'm targeting one week. If I can hit that I'll be thrilled.
It will come down to how many focused hours of progress I can make per day. I'm anticipating ending this large refactor with a lot of learning around how to stay at peak productivity for longer amounts of time during a large refactoring - although hopefully there aren't too many more of these in my future as I progressively eliminate the old, untested parts of the codebase.
Input Event Processor System
So far I've made a lot of progress on the InputEventProcessorSystem.
This system reads raw input (from an Arc<Mutex<Vec<InputEvent>>> that the client populates) and translates them into NormalizedEvents.
So if the client pushes an InputEvent::TouchMove(..) the InputEventProcessorSystem might translate that into a NormalizedEvent that moves the camera or that zooms the camera, depending
on other state in our World such as how many fingers are currently touching the screen.
In this way all of our different target platform clients will only need to feed in raw events and they'll be handled accordingly by the core game-app crate where our entity component system lives.
Financials
Our financials for January 2020 were:
| item | cost / earning |
|---|---|
| revenue | + $4.99 |
| aws | - $113.44 |
| adobe substance | - $19.90 |
| GitHub LFS data pack | - $5.00 |
| photoshop | - $10.65 |
| ngrok | - $10.00 |
| chinedun@akigi.com Google email | - $12.00 |
| --- | --- |
| total | - $166.00 |
I still need to cancel ngrok, the Google email account and maybe photoshop since I haven't used that for months.
Next Week
I'm fully focused on finishing the refactoring of the web-client and game-app crates and adding tests as I go.
That's all I'll be working on this week. I can't see the light at the end of the tunnel yet but I can already feel how much easier it is going to be to add new gameplay after this is all done.
Cya next time!
- CFN
052 - Combat
January 26, 2020
I'm traveling for a couple of weeks as of a couple of days ago so I didn't get as much done this week and I might have usually liked.
This week I introduced the combat system. I want combat (especially player vs. player combat) to be one of the highlights of the game - so this will be one of many times that I work on this system.
We're starting from humble beginnings - but hopefully we grow into something grand.
My general vision for the combat in the game is that it will be simple enough for beginners while still allowing more advanced players to demonstrate their skill through combining and better timing these simple attacks. I want to avoid complexity at all costs.
I'm aiming for simple rules that can be combined in interesting ways.
Chasing down a snail while attacking it. Snails aren't actually attackable at this time - this was just for the video.Implementing Chasing
It took a bit of elbow grease to get the chasing while attacking to work properly - I'll explain.
Say we have two entities - we'll call them Attacker and Target.
Every game tick we run our MovementSystem. The gist of the MovementSystem is that it iterates through all entities that have the MovementComp and, if they need to move, moves them one square along their path.
Say Attacker is attacking Target and the following happens.
-
MovementSystemprocessesAttacker.Attackeris in range. Nothing happens. -
MovementSystemprocessesTarget.Targetis trying to run away to a tile in the distance.MovementSystemmoves theTargetby one tile.
The Attacker now ends this game tick out of range. Even if the Attacker now begins chasing after the Target - it will always be out of range since the Target is also moving one tile per tick.
To avoid this we implemented a recursive system for processing entities in the MovementSystem. Let's revisit the above, but with the recursive implementation
-
MovementSystemprocessesAttackerand sees that it is targeting theTarget.MovementSystemalways processes a target entity first. -
MovementSystemprocessesTarget.Targetis trying to run away to a tile in the distance.MovementSystemmoves theTargetby one tile. -
MovementSystemis now back at theAttacker. It sees thatTargetis out of range and moves theAttackerback into range.
// One of our test cases

/// # Start State
///
/// - All entities start in range of their target
/// - Entity 1 targets Entity 2
/// - Entity 2 targets Entity 3
/// - Entity 3 is targeting a tile
///
/// # Process order:
///  1. Entity 1 does not move
///  2. Entity 2 does not move
///  3. Entity 3 moves
///  4. Entity 2 should now move towards Entity 3
///  5. Entity 1 should now move towards Entity 2
///
/// ```text
/// ┌─────────┐     ┌─────────┐    ┌─────────┐
/// │         │     │         │    │         │
/// │Entity 1 │     │Entity 2 │    │Entity 3 │
/// │         │─────┼────▶    │────┼─────▶   │─────────▶
/// └─────────┘     └─────────┘    └─────────┘
/// ```
#[test]
fn chain_of_three() {
  // ... snippet ...
}
I implemented the chasing in a general purpose way so that all mechanics that involve an entity targeting another entity get this behavior for free.
Simplifying spawning of test entities
Made it a bit easier to create test entities for our integration tests.
There is now a ComponentsToSpawnEntity struct - basically a serializable / deserializable type that holds an option of every component and has a method to insert all of its components into the world.
/// Every component in the game in one struct that we can can use to spawn entities
#[derive(Debug, Serialize, Deserialize, Default)]
#[serde(deny_unknown_fields)]
#[allow(missing_docs)]
pub struct ComponentsToSpawnEntity {
    // ... snippet ...
    pub attacker: Option<AttackerComp>,
    pub attackable: Option<AttackableComp>,
    // ... snippet ...
}

impl ComponentsToSpawnEntity {
    /// Insert an entity into the world with these components
    pub fn insert_with_entity(self, world: &mut World, entity: Entity) {
        // ... snippet ...
        maybe_insert_component(world, entity, self.attackable);
        maybe_insert_component(world, entity, self.attacker);
        // ... snippet ...
    }
}

fn maybe_insert_component<T: Component>(world: &mut World, entity: Entity, component: Option<T>) {
    if let Some(c) = component {
        let mut storage: WriteStorage<T> = world.write_storage::<T>();
        storage.insert(entity, c).unwrap();
    }
}
Right now I'm mainly using this from my integration tests to easily create test entities for the scenario under test (in this weeks case two entities in combat) - but in the future this will be one of the pieces that powers our entity editor tool that will allow us to create and modify entities in our world editor.
Neither the world editor nor entity editor exist yet - but they will some day - likely later this year.
Client side specs
I've begun re-organizing the client side game client around specs - writing tests as I go.
The early results are looking great and I can already see that the front-end will be much more pleasurable to work in when I'm done.
Given that I'm traveling for a couple of weeks I'm not sure if this will be finished over the next couple of dev journal entries - but I'll keep you posted.
Other misc work this week
-
Took an hour detour to remove the
Send + Syncrequirement onspecsresources when the parallel feature is disabled specs #573 now that we're using specs in the web client (which doesn't support threading). -
Added a way to test what gets logged from a system. We're using slog for our application logs.
/// Log an error if we accidentally created an attacker without giving it a MainActionComp #[test] Fn log_error_if_no_main_action() { let mut world = create_test_world_without_entities(); let target = create_target(&mut world); let attacker = create_attacker(&mut world, target, 1); remove_maintain::<MainActionComp>(&mut world, attacker); let (logger, logs) = test_logger(); CombatSystem::new(logger).run_now(&world); let logs = logs.lock().unwrap(); assert_eq!(logs.len(), 1); assert_eq!( logs[0].msg(), CombatSystemError::AttackerMissingMainAction.to_string() ); assert_eq!(logs[0].level(), &Level::Error); } -
Started researching alternatives to Substance Painter. I've been spoiled by Blender and have been surprised that it's difficult to find a scriptable PBR painting tool. I want to be able to automated export my PBR textures via a command line interface but SP doesn't have a headless mode
-
Fought the borrow checker for a while while trying to simplify part of the test suite and eventually learned that I was running into an issue called the
sound generic dropproblem. I ended up just needing to use some mutable pointers and a sprinkle of unsafe to solve my problems. This struggle ended up taking a few hours to figure out but now I can use my new knowledge the next time I run into something similar. I'm starting to gain a better understanding of when and how to use pointers in Rust and finding myself referencing theRust nomicona bit more as of late. -
Entities drop the items in their inventory upon death
-
Updated
akCLI to run the up migrations when we restart our local dev and integration testing databases so that I don't have to run the command myself (which I usually forget to do) -
Persisted the amount of remaining hitpoints to the database (as well as all other temporary stat changes)
-
Added exporting of bone groups to
blender-armatureso that I can animate the lower and upper body separately when needed without needing to remember the indices of every bone. I plan to use this during chases for giving the lower body a walk animation while the upper body is attacking. -
Took some steps to simplify our skills code
Next Week
Client Side Palooza - making as much of a dent on migrating the game frontend to specs as I can while still making sure to appreciate my time traveling for the next couple of weeks!
Cya next time!
- CFN
051 - Capuchins and Kubernetes
January 19, 2020
This week I picked up where I left off in 050 with normalizing the pre-defined TileBoxees.
I made some changes to the PredefinedTileBox data structure that I mentioned last week in order to make it more flexible.
I also normalized a pattern that I'm using in a few places now - using a build script to take the keys from a YAML map and code generate an enum so that I can reference the deserialized data from the map in a type safe way.
Now going forwards whenever I have to do this again it should be straightforwards instead of duplicative.
Capuchin walk cycle
I added the AutonomousNpcComp, the MovementComp and the AreaConstrainedComp to Pookie - but the web client crashed when he attempted to walk.
This was due to code that assumed that if an entity walks its armature has a walk animation - but I hadn't made one for the Capuchin mesh.
At first I considered just making the code fall back to Idle to prevent mistakes like this in the future - but then I thought that I'd much rather have some sort of linter that ensured that every armature has all of the animations
that it needs.
This would be complex since it would mean we'd need to statically know all of the animations that an armature might need to play - based on all of the entity's that use that armature. I decided to save this for another day.
It took me a hours to finish the animation since I had to re-do the rig and weights a few times due to different mistakes that I made.
But from that rework I ended up learning a lot about rigging. Practice makes perfect!
Far from perfect - but good enough for now. As my skills improve I can come back and redo a lot of the early art in the game. Practice makes perfect!I was having trouble with Spline IK for the tail and I forgot how I ended up getting Spline IK working a few months ago so switched to a much easier to set up but much less flexible method for animating the tail using a single IK bone.
At some point I can change back to Spline IK but did not want to continue spending time on it and I wasn't finding any tutorials online.
I should've written down the process that I used when I got it working a few months ago. Alas.
Researching Kubernetes
Our game server is stateful in the sense that at any point there could be players connected to it - so we don't automatically update it during our continuous deployment process.
Instead we have a command ak deploy game-server that we run manually whenever we want to update the game server.
$ ak deploy game-server --help
ak-deploy-game-server 0.0.1
Chinedu Francis Nwafili <frankie.nwafili@gmail.com>
Deploy our game server

USAGE:
    ak deploy game-server [OPTIONS] --minutes <minutes_until_shuwdown>

FLAGS:
    -h, --help       Prints help information
    -V, --version    Prints version information

OPTIONS:
    -m, --minutes <minutes_until_shuwdown>    The minutes from now that the game server should shut itself down
    -c, --commit <s3_commit_hash>             The commit hash of the game server deploy
    -n, --name <s3_name>                      The name of the game server deploy
This sends an HTTP request to our game-server-deploy-manager that runs on the same EC2 instance as the game server.
It then tells the game-server to shut itself down in some number of --minutes. The game server can use this time to let connected players know that a shutdown is coming so that they can be sure not to be in a dangerous area when
they're eventually disconnected.
Then when the minutes elapse the game server disconnects all players and gracefully shuts itself down and lets the game-server-deploy-manager know that everything went alright.
Once the game-server-deploy-manager is notified of the clean shutdown it runs the new version that was specified with --name or --commit. An example --name=latest-green-master will deploy the last binary to pass our master branch CI.
This process works - but there are already a few things that make me want to explore something like Kubernetes to manage as much of my deployment process as possible.
The first is that right now if you try to deploy the same version twice the first server binary will get shutdown but the new binary won't start. I wrote the game-server-deploy-manager before I started test-driven development so the code isn't as
well put together as it could be - hence a bug like this surfacing.
This of course could be fixed and I could clean up and better test that code - but if I'm going to continue to invest in a custom solution I should first be certain that it is the right path forwards.
Another thing is that I am currently managing an EC2 instance - and I'd much prefer to deal only with deploying Docker containers and not have to manage any underlying infrastructure. This is one of the reasons that I use AWS ECS for the game's website, authentication server and payment server.
Which brings me to another advantage - if I started using Kubernetes I could move my ECS services over to Kubernetes and only have to invest in one tool instead of several.
There are other advantages - as well as potential downsides such as needing to invest in and learn and manage another tool.
My preference is to leverage something existing if it meets my needs and meets them well - but I'm too inexperienced with Kubernetes to know whether or not that is the case.
Even if I incorporate another tool I will still need some sort of light deploy manager that would notify servers that they need to shut down in --minutes and then trigger the new server version to run when --minutes elapses, but
it would be nice to trigger these shutdowns and updates by interacting with something like the existing Kubernetes API instead of maintaining a custom process of downloading binaries from S3 and spawning a child processes like we do now.
This is all just preliminary research though as I don't need to address this problem right now.
At some point I'll mess around with getting a Kubernetes cluster in place locally to see if it meets my needs or not and then make a decision from there.
More time working on the game
Last week was my last week working full time. Starting in February I'll be contracting for around 15-20 hours per week.
I'm happiest when I'm spending my time consumed with programming and computer graphics related goals and projects that feel incredibly challenging.
So I'm working on designing my life to lean even more in that direction than it already is.
I'll be using the extra time per week to continue to study and implement different computer graphics concepts and work on the game.
Next Week
I started working on the CombatSystem and some of the related components.
Each time I write a system I improve upon the patterns I put in place in the last one. This takes a little time and thought - but I can see myself getting closer to having a mostly stable approach to building the systems in my Entity Component System.
This time around I'm making sure to consider logging right from the start.
I read up on slog! to figure out how to make including key-value context a bit more seamless and started using thiserror.
I'll get combat working and deployed this week - but it'll take more tuning over time to really nail it. Combat is something that I want to be very fun for both beginners and experience players - and I have a lot of ideas around how to accomplish this.
I'll explain some of the inner workings of the combat system in next week's journal entry.
One caveat though - I'm traveling for two weeks starting on Friday and I haven't decided whether or not I'll be bringing my laptop due to a couple areas that I'm going not being all that safe.
If I don't end up bringing it I might miss the next two dev journals.
We'll see.
Cya next time!
- CFN
050 - Let there by life
January 12, 2020
In last week's journal entry I wrote about laying the foundation for the autonomous NPCs.
This week I picked up where we left off and got the autonomous-client crate in our cargo workspace
sending up requests to the game server to move.
The logic is rudimentary right now - just randomly requesting to move to some area within the areas that their
AreaConstrainedComp says that they're allowed to visit - but over time we'll introduce and iterate on a goal oriented
action planning based system.
A cool side effect of the de-coupling of the autonomous NPCs that I'm realizing is that in the future if we distribute autonomous NPC processing across machines we can deploy updates to our NPCs without needing to restart the game server.
This would be powered by a process similar to how we deploy the web-client,
where we would test the new autonomous NPC client against a copy of the current production game-server static library.
This week was cut short
I didn't get as much done this week and I might've liked as I was visiting a friend over the weekend - and the weekend is usually my prime time.
I left off in the middle of normalizing some of our logic around TileBoxes to be able to re-use our definitions of regions of the game across different contexts.
This refactoring was prompted by adding an AreaConstrainedComp to Pookie.
The
AreaConstrainedCompdefines all of the areas that an entity is allowed to move around in.
I wanted to constrain him to his house - but his house was defined in our scenery.yml - so I would've had to duplicate that TileBox into Pookie's area constrained component.
The data structure is small, only a few fields:
pub struct TileBox {
    left_x: u32,
    bottom_y: u32,
    total_x: u8,
    total_y: u8,
}
But the problems would come whenever we wanted to move things around.
If we were to move Pookie's house we would need to move both the scenery.yml definition of his house's TileBox and then also the TileBox that was powering his AreaConstrainedComp.
Instead we're moving to a system where we have a TileBoxName enum - and all of our different configurations such as scenery locations and area constraints and any other TileBox
based future configuration can all share the same infrastructure.
We'll maintain one map of TileBoxName -> PredefinedTileBox which we then deserialize and convert into a map of TileBoxName -> TileBox.
The PredefinedTileBox just allows us to define a TileBox relative to another TileBox. So that if we move one TileBox all of its other relative TileBoxes will also move.
// Here's a look at the `PredefinedTileBox`.

/// Powers being able to define the data for all of our `TileBoxName`s. We recursively process `::Relative`
/// definitions to determine the final `TileBox`.
pub enum PredefinedTileBox {
    /// Most commonly - you will place a TileBox relative to another TileBox.
    /// So a desk might be placed relative to the house it's in.
    /// A chair might be placed relative to the desk that it is slid under.
    ///
    /// When we traverse our map of `TileBoxName -> PredefinedTileBox` we convert relative boxes
    /// into TileBox.
    ///
    /// This works because predefined boxes will not be moved at runtime, so once we determine
    /// the position once it'll always be correct.
    Relative {
        /// This TileBox will be placed relative to the tile box of TileBoxName
        relative_to: TileBoxName,
        /// Translate the entire box along the X axis. Use the slide the entire box left/right.
        #[serde(default)]
        all_trans_x: i16,
        /// Translate the entire box along the Y axis. Used to slide the entire box up/down.
        #[serde(default)]
        all_trans_y: i16,
        /// Translate just the top row along the Y axis.
        /// Used to make the box taller (positiive translation) or shorter (negative translation)
        #[serde(default)]
        top_trans_y: i16,
        /// Translate just the bottom row along the Y axis.
        /// Used to make the box shorter (positive translation) or taller (negative translation)
        #[serde(default)]
        bottom_trans_y: i16,
        /// Translate just the bottom row along the X axis.
        /// Used to make the box more narrow (positive translation) or wider (negative translation)
        #[serde(default)]
        left_trans_x: i16,
        /// Translate just the bottom row along the X axis.
        /// Used to make the box more narrow (negative translation) or wider (positive translation)
        #[serde(default)]
        right_trans_x: i16,
        /// A cache of the calculated location for this scenery.
        ///
        /// When we recursively determine the absolutely positioned location of relatively positioned
        /// scenery we use this to store positions so we don't have to calculate them twice
        #[serde(skip)]
        cached_absolute_box: RefCell<Option<TileBox>>,
    },
    /// This TileBox has a location independent of all other TileBoxes. That is to say that there
    /// is nothing that will move that will cause this TileBox to move.
    Absolute(TileBox),
}
I was in the middle of these changes was my train arrived - so I'll have to pick up on Monday.
Should just be a few hours of cleanup and getting tests passing again. Already looking much more flexible.
This will be especially useful when we eventually have a world editor - as when we move things around we won't need to move all of the things that are placed relative to it. They'll all share the same underlying positioning system.
Next Week
Next week I'll be working on the ability to train hitpoints.
I'll be introducing the combat system, persisting remaining hitpoints to the database and adding a few components that will be needed for the first hitpoints training mechanic.
It'll be fun to have a discipline to train - we're starting to add more and more real gameplay.
Cya next time!
- CFN
049 - Initial benchmarking of the autonomous NPC architecture
January 5, 2020
Rendering Pookie's House
We started off the week by creating a mesh for the sticks that surround Pookie's house.
We created one mesh and then rendered it repeatedly in different orientations on the tiles surrounding Pookie's home - leveraging some of the Scenery and RenderableId work over
the last two weeks.
 Rendering Pookie's house, Still need to add a few more things inside - also need to eventually become a good artist - practice makes perfect hopefully.
Autonomous entity movement
After getting Pookie's house rendering I wanted to quickly add some components to my specs entity component system that would allow non-player characters to move around - instead of just
standing still like they do now.
I spent a few minutes planning this out on paper - then realized that it would be best to first do some reading on some of the latest techniques for designing autonomous NPCs.
My googling landed on behavior trees first - but they didn't feel quite as modular as I would like.
I then found goal oriented action planning and it seemed to fit the bill of what I was looking for. I started to get ideas and inspiration on how I could add interesting autonomous behavior to NPCs over time without things progressively becoming unmaintainable.
I started by trying to plan out the first pass at the goal oriented action planning system - but that proved a bit difficult. It's hard to design when you don't have a use case in mind just yet.
So I took it back to the basics. I only planned out the higher level data flow - making sure that it would allow me to fill in more blanks over time as I learned and had more requirements.
The flow that I landed on was to treat NPCs in much the same way we treat players. Right now players have a ClientConnectionComp which is used to send them the latest information that they know about the world
once per game tick.
/// Powers clients being able to connected to the game and control an entity
#[derive(Component, Debug)]
pub struct ClientConnectionComp {
    /// The user_id for this player / client.
    ///
    /// During real gameplay this typically comes from the `users` table, or in integration
    /// tests its a made up key into a HashMap of components.
    user_id: i32,
    /// Used to send state updates to the client by either WebSocket or MPMC channel.
    client_sender: ClientSender,
    /// Indicates that the ClientSender's connection has closed - and when that happened.
    ///
    /// After some time has elapsed the ClientConnectionMonitorSystem will remove this entity
    /// from the world.
    connection_closed_at: Option<DateTime<Utc>>,
}
There is also a PendingClientRequests struct that holds requests that the client has sent to the server and processes them once per game tick. A client request might, for example, be to walk, or drink, or drop something.
We want our NPCs to behave similar. They receive their known world state and can look at that and send client requests indicating what they want to do. From the game's perspective an NPC is really no different than a real player.
They just happen to use code to decide what ClientRequestBatches to send up to the server instead of eyes, hands and a brain.
So with that planned out the only thing I needed to do for now implementation wise to start was get a quick version one in place that sent state to autonomous entity's and have the entity's not even look at state and instead just randomly send up a request to move. Then over time as I need more behavior I can start looking at the client's state and use something similar to goal oriented action planning to decide on client requests to send.
This architecture has another benefit of allowing me to distribute NPC goal selection over multiple machines should I ever need to. Each machine would just have a TCP or WebSocket connection to the server - receive state - send up client requests. NPC autonomous behavior would be decoupled from the game server.
Assessing technical feasibility
There was one major assumption in our autonomous NPC architecture that needed to be validated before we could lock into the strategy.
Can we iterate over thousands of entity's every game tick (around 600ms) and calculate, serialize and then send them their known world state?
If the answer to this question was yes - we'd be in great position. If our autonomous decision making ever got too slow for the single game server we could spread it across multiple additional machines.
If the answer was no - it was back to the drawing board.
Starting the benchmarking adventure
So we needed to verify that we could iterate through thousands of entity's - calculate their state - serialize their state - and send their state over some sort of ClientSender (our light abstraction over how a client is connected to the game).
I made up a rough goal of getting to sub 300ms for 10,000 connected clients. Going into the game I wanted to support 5,000 connected players - so this would mean that there was a maximum of 5,000 autonomous NPCs being processed alongside them.
The nature of the code under test is that it more or less looks like this (psueodocode):
#![allow(unused_variables)]
fn main() {
// Pseudocode for how we send known state to entities every game tick.
for entity in entities {
    let state = ClientWorldState::new();
    for other_entity in entities {
        state.add_entity(other_entity);
    }
    entity.send_state(state);
}
}
All of my benchmarking is on a 6 core 2019 MacBook Pro - so I went in hoping that if I could achieve sub 300ms my personal computer I'd be in good shape running the game on a much more powerful AWS EC2 instance.
Here's how the benchmark looks (powered by criterion):
/// Benchmark a run of the ClientStateUpdaterSystem with
/// 10_000 idle entities at the same location.
pub fn csu_10_000_idle_entities(c: &mut Criterion) {
    c.bench_function("CSU 10_000 idle entities", |b| {
        let mut world = create_world_without_entities().world;

        let mut receivers = vec![];

        for user_id in 0..10000 {
            let (sender, receiver) = crossbeam_channel::unbounded();
            receivers.push(receiver);

            world
                .create_entity()
                .with(ClientConnectionComp::new(
                    user_id,
                    ClientSender::new_mpsc(sender),
                ))
                .with(TilePositionComp::new_1x1(50, 50))
                .build();
        }

        b.iter(|| {
            ClientStateUpdaterSystem.run_now(&world);

            // Clear the buffer of state updates after each run
            for receiver in receivers.iter() {
                receiver.try_recv();
            }
        })
    });
}
Note that at the end of each iteration we run 10,000 try_rec. This is just to prevent the memory footprint from increasing on each run of the loop by ensuring that we clear out any ClientWorldState that was sent to our fake clients.
In the future I could adjust the benchmark to not have this happen inside of the part that is timed - but I wasn't going for perfection here - just a ballpark benchmark.
First take - humble beginnings
I took a first look at the numbers before changing any of the code. We were synchronously looping over 10,000 entities with a nested loop over another 10,000 entities - so I expected things to be a little slow.
Benchmarking CSU 10_000 idle entities: Warming up for 3.0000 s
Warning: Unable to complete 100 samples in 5.0s. You may wish to increase target time to 171781.7s or reduce sample count to 10
Benchmarking CSU 10_000 idle entities: Collecting 100 samples in estimated 171782 s (5050 iterations)
171782 / 5050 = ~34 seconds per iteration. Very far from our 300ms target.
Try outer par join
Using specs's parallel iterator was a one line change and dropped the time per iteration to 16.6 seconds on my 6 core machine.
Benchmarking CSU 10_000 idle entities: Warming up for 3.0000 s
Warning: Unable to complete 100 samples in 5.0s. You may wish to increase target time to 84072.6s or reduce sample count to 10
Benchmarking CSU 10_000 idle entities: Collecting 100 samples in estimated  84073 s (5050 iterations)
Note that in a real benchmark you should wait for the benchmark to finish. For our technical feasibility testing I just took the estimate that criterion prints out within a few seconds of starting the benchmark and ran with that.
Now limit to only letting you know about up to 100 other entities
We dropped things down to around 156 milliseconds per iteration by letting clients only know about a maximum of 100 other entities by calling .filter on the inner parallel iterator loop.
Benchmarking CSU 10_000 idle entities: Warming up for 3.0000 s
Warning: Unable to complete 100 samples in 5.0s. You may wish to increase target time to 789.8s or reduce sample count to 10
Benchmarking CSU 10_000 idle entities: Collecting 100 samples in estimated 789.81 s (5050 iterations)
One of my unofficial goals is for the game to work smoothly on a dial up connection - which is 56 Kbps or 33,600 bytes per tick (600ms). If the average update per entity was 300 bytes then a player on dial up could know about up to 100 other entities.
Better yet - though - is I want updates so be much smaller than that. From second to second players will for the most part barely change at all.
If a player legitimately hasn't changed in any way the diff should be one byte. If they've only changed position - the diff would be around 20 bytes.
So say we estimated around 50 bytes per player when a bunch of players were packed together would mean that we could certainly fit 100 players into your state update - and in fact we could fit 600 pretty comfortably.
Using Take instead of Filter
I was experimenting with par_join on the inner loop but it was slower. I was using .filter and AtomicUsize to count to 100 and filter out additional entities once we counted to 100.
I switched back to join and things were faster (the thread overhead wasn't worth it for only 100 entities.)
Then I rememebered - oh I can use take now. My jaw dropped:
The iteration time dropped to 4.6 ms!
Benchmarking CSU 10_000 idle entities: Warming up for 3.0000 s
Warning: Unable to complete 100 samples in 5.0s. You may wish to increase target time to 234.4s or reduce sample count to 10
Benchmarking CSU 10_000 idle entities: Collecting 100 samples in estimated 234.37 s (5050 iterations)
HashMap with capacity
I used cargo-flamegraph to dive into what was taking time within the ClientStateUpdaterSystem.
 Using
Using cargo-flamegraph to analyze performance.
The number one thing that was taking up time was our HashMap.insert call.
We haven't implemented state diffing yet so I'm anticipating some time will go to that when we eventually have it.
I tried replacing the HashMap with a Vec but there wasn't much of a speedup.
I was ready to stop here - but after chatting with my dad letting him know about my progress he asked if there was anything I could do to get it in the 3ms range.
Somehow from that question my brain realized that the reason HashMap -> Vec didn't have much of an impact was because the bulk of the cost wasn't from the insertions - but the allocations as the HashMap grew.
I pre-allocated the HashMap with enough space for 100 entities and dropped the time to 3.96ms.
Benchmarking CSU 10_000 idle entities: Warming up for 3.0000 s
Warning: Unable to complete 100 samples in 5.0s. You may wish to increase target time to 200.1s or reduce sample count to 10
Benchmarking CSU 10_000 idle entities: Collecting 100 samples in estimated 200.06 s (5050 iterations)
Things would probably be faster if I switch to a Vec now - but I'm saving that as future work. No sense spending any more time optimizing now that we've achieved our proof of concept.
Final benchmarking notes
There are more allocations in the ClientStateUpdaterSystem that I can get rid of to drop the runtime down even further - but that isn't a priority right now. We've achieved our goals with this
technical feasibility exploration - and can call this strategy of treating NPCs like players viable.
Right now we're optimized for a large number of entities - but in the future we want to also benchmark and optimize for a small number of entities. For example - par_join might not make sense for only 200 players are online as the overhead of multi-threading might cause a slowdown in that case.
But these aren't problems we need to solve for now.
Overall I'm excited about the implications of this test. We should now be poised to have virtually uncapped goal planning for our NPCs. If things are slow - distribute them across machines. Nice!
Also - we might be able to support much more than 5,000 players technically - so this opens up our game design in the sense that we'd no longer constrained to that limit and should we see fit can increase it.
Financials
Our financials for December 2019 were:
| item | cost / earning |
|---|---|
| revenue | + $4.99 |
| aws | - $111.19 |
| adobe substance | - $19.90 |
| GitHub LFS data pack | - $5.00 |
| photoshop | - $10.65 |
| ngrok | - $10.00 |
| chinedun@akigi.com Google email | - $12.00 |
| CLion yearly subscription | - $89.00 |
| --- | --- |
| total | - $252.75 |
Okay - I need to cut ngrok and the chinedufn@akigi.com email as I'm legitimately not using them - I'll do that this month.
We bought a CLion subscription since the Rust plugin is fantastic.
Otherwise more of the same.
Other Work Last Week
Trying to get browser tests running in CI
Spent a few hours trying to get the browser test from last week passing in my Docker container (since we use the container in CI) but couldn't. The canvas WebGlRenderingContext is null for some reason. I'll revisit this another day but moving on for now.
Unit testing conversations
Ran into an issue playing the game where I could not complete the quest if I had more than one of an item.
Adjusted my integration test tooling to make it easy to try a quest multiple times with different configuration.
But then realized this problem of validating these smaller variations in the flow was better suited by a unit test - so added a way to unit test an individual conversation node. I'll continue to use and expand on this initial conversation unit testing infrastructure in the future as we add more dialogue into the game.
/// Fix an issue with our conversation graph where you were expected to have at least one
/// SnailBody in your inventory but we were accidentally only allowing the conversation to
/// progress if you have exactly one SnailBody.
#[test]
fn talk_to_pookie_on_quest_step_20_with_multiple_snail_bodies() {
    let mut run_args = make_conversation_run_args_production_graph();

    for quantity in 1..=2 {
        assert_talk_to_pookie_on_quest_step_20_with_multiple_snail_bodies(&mut run_args, quantity);
    }
}

fn assert_talk_to_pookie_on_quest_step_20_with_multiple_snail_bodies(
    run_args: &mut ConversationSystemRunArgs,
    quantity: u32,
) {
    run_args.set_quest_step(&QuestId::SpookieMosquitoes, 20);
    run_args.add_item_to_inventory(IconName::SnailBody, quantity);

    run_args.set_current_and_advance_to(CONVO_GRAPH_ID, None, None);

    run_convo_system(run_args).unwrap();

    let conversing = run_args.main_action_comp.maybe_conversing().unwrap();
    let current_text = conversing.current_text_and_responses().unwrap();

    assert!(current_text.text().contains(USE_PESTLE_TO_GRIND_UP_SNAIL));
}
Focusing on portability from day one
Added specs to the front-end game app and introduced the RenderSystem.
We're keeping the game-app frontend crate client agnostic.
The client passes in Boxd functions to handle different target specific functionality.
For example, the web-client crate passes in Box<dyn FnMut(&RenderJobs) -> () + 'static> function that the game-app calls. The web-client is using WebGL to render the game based on what client agnostic RenderJobs (raw data) it
receives. One day we'll have other clients - such as a Mac desktop client - that pass in their own set of ClientSpecificResources.
In this sense we're designing for portability from the beginning - even if we don't plan to port to other platforms anytime soon.
/// Resources that are platform dependent
pub struct ClientSpecificResources {
    /// Powers communicating with the game server backend
    pub game_server_connection: Box<dyn GameServerConn>,
    /// Used by the RenderSystem to render a frame.
    pub renderer: Box<dyn FnMut(&RenderJobs) -> () + 'static>,
}
Next Week
We'll put enough of our autonomous NPC architecture in place to have an NPC that decides when to wander around the world.
For simplicty we'll start off by ignoring it's state and basing the decision off of random chance.
Over time we'll rely more and more on state and goal oriented action planning for NPC decision making.
We'll also be working on training of the Hitpoints discipline this week. I have some interesting ideas for the mechanics of this training that I want to implement - and I'll be sure to dive into that in next weeks journal entry.
Cya next time!
- CFN
048 - December 29, 2019
A yak shaving adventure
This week started off with a simple goal - but very rapidly morphed into a yak shaving adventure.
I originally set out to finish up getting pathfinding working between arbitrarily sized sets of tiles (so pathfinding between a 2x2 entity to a 3x3 entity, for example) and after a good bit of elbow grease things started falling into place.
 Got all of the pathfinding tests passing at my parents house on the night of Christmas - put me right to sleep.
After that my goal was to start rendering scenery into the game - reading from the scenery.yml file that I talked about last week.
The game sever doesn't know about scenery (it just knows about the tiles in the world that the scenery is making unreachable, but it doesn't know or care why) but scenery and entities both use the same renderers on the client side - so naturally they share some data structures.
This is where the yak shaking deep dive began. The game server would previously send down a Renderable3dComp to the client - a component that describes
how to render an entity.
This broke one of our architectural rules - the game server should not knowing anything about the 3D nature of the clients. From a data perspective - the game is entirely two dimensional (just a big tile grid with lots of different entities). Our clients take that information in order to render a 3D world - but the server should never need to know about that.
While modifying the codebase to render our scenery I decided to fix this knowledge leak. I introduced a RenderableId enum that is auto generated from build script
that reads from a yaml file.
Here are some snippets showing how that's put together.
###################################################################################################

A map of RenderableId -> Render3dComp

###################################################################################################

RenderableId
Snail:
  RenderDescription
  Absolute:
    mesh_names:
      - Snail

SnailBody:
  Relative:
    relative_to: Snail
    rotation:
      - 0.0
      - 0.0
      - 1.5708
    scale: 0.85
    disable_animation: true
// One of our build scripts
fn main() {
    // ... snippet ...
    generate_renderable_id_enum();
    // ... snippet ...
}
//! RenderableId

include!(concat!(env!("OUT_DIR"), "/renderable_id_enum"));
One slightly pesky thing about using the
include!concat!technique for code generation is thatintellij-rustdoesn't currently auto-complete the code - but hey it gives me so many other powerful features that I'm certainly not going to complain.
Now all our server knows is that an entity can have a RenderableId - accomplishing our goal of minimizing the amount of information that the server needs to know
about the nature of our clients.
Our client then uses these RenderableIds to look up Render3dComps when rendering the game.
User Equipment
When loading up a player into the game I was previously stuffing their Render3dComp with some MeshName enums for their head, torso, legs, etc.
This broke down when the server no longer knew about the MeshName enum (because we don't want the server to know about anything related to drawing the game).
So I did something I've been meaning to do and introduced a user_equipment table (where we persist your worn equipment) and some data structures around equipment.
The server know sends down an EquipmentComp component with different EquipmentIds in the EquipmentSlots and the client calls EquipmentId.into::<RenderableId>()
in order to figure out how to render it.
By now I take for granted how easy serde makes it to share data structures / code between the client and serve .. but as I type this journal entry I'm feeling a sense of appreciation for that amazing project.
Specs ECS
Back in mid October we started gearing up to use specs ECS in our game-server - as it was very clearly superior to my own hand rolled ECS in every way.
commit 3fb152f3c6e454f369c3bde729448463c0e9678f
Author: Chinedu Francis Nwafili <frankie.nwafili@gmail.com>
Date:   Tue Oct 15 10:49:33 2019 -0400

    Add specs dependency

    Need to start using it in a future PR. Just adding the dep for now
Since then it's been such a pleasure to work with and re-shaped how I structure and approach my code so nicely that I'm ready to start using it in on the game client side.
I've introduced the dependency to the game-app crate in my workspace (powers our web browser client and in the future will power clients on other targets such as mac or windows)
and will be slowly moving move things into my specs::World over time.
Fortunately there are no design constraints that force me to make this move all at once like there were on the server side - so I can just casually migrate over the coming months as I touch different parts of the client.
Introducing our first browser test
I've been in a test driven development cadence since around August or September of 2019 and I'm excited as I see my code quality rising to the next level.
These days the only time I spend debugging is when I'm getting a new test that I'm writing to work or when I'm touching old code that I wrote earlier in the codebase's life before I was testing.
So - now that I'm gearing up to work on the renderer and make some client side changes I wanted to extend this TDD to the client side (I've been heavy on the server side for the last couple of months).
When I'm working on the game server I never run it outright. I'm always either running a unit test or running an integration test
(so far there's only one major test in our game-server-integration-tests crate that plays through the first quest in the game - but there are some smaller integration tests sprinkled around.)
On the web client though - it was a different story. I wrote about using test-driven development on our game UI back in September - but even then I eventually had to boot up the game to see if it all looked right to a human eye. (For example - does the spacing look too large, too small?)
My vision around this is to instead be able to automatically generate a screenshot of a UIElem that I'm working on - or any other visual aspect of the game that I'm
touching such as when I'm working on shaders.
I write some unit tests - then when I'm ready to see the thing I call some function that will produce a rendered screenshot of whatever I need to see.
Note that I'm being general as I describe this. I'm not looking to prescribe a solution just yet. I just know that as I dive into the client side I'll be automating the process of being able to visualize whatever I'm working on (even if it's in baby steps over time) and I'm excited for whatever I end up landing on.
A step in the right direction
The first step in this direction is a new crate in the workspace called web-client-integration-tests.
Whenever I'm ready to deploy a bigger change to the game I'll usually fire it up and do a quick sanity check that it loads.
This is a violation of my longer term goal of never needing to run the game myself to check if things that I already built are still working (I should mainly only run the game when I want to feel out the new gameplay or just generally feel out the overall gameplay experience).
To combat this we used rust-headless-chrome to create our first browser test.
It more or less just fires up the game in Chromium and verifies that the canvas renders.
/// Start a game-server
///
/// Start a static server to serve:
///   1. The web-client HTML, Wasm and JS
///   2. The game assets such as mesh and armature data
///
/// Compile the web-client in release mode with debug symbols enabled
///
/// Load the game in Chromium and wait until the canvas gets painted.
/// The first time the canvas is painted the web-client appends an element to the DOM as
/// confirmation - so we wait for that element to appear.
///
/// Check the console and verify that there are no errors or warnings of any kind.
///
/// Take a screenshot of the canvas and verify that we rendered to the canvas.
#[test]
fn load_game_without_errors() -> Result<(), failure::Error> {
    thread::spawn(|| start_game_server());
    thread::spawn(|| start_static_server());

    compile_web_client();

    let browser = init_browser()?;
    let tab = browser.wait_for_initial_tab()?;
    tab.enable_log()?;

    let errors_and_warnings = Arc::new(Mutex::new(vec![]));
    begin_monitoring_chrome_console(&tab, errors_and_warnings.clone())?;

    tab.navigate_to(web_client_url().as_str())?;

    wait_for_first_canvas_render(&tab)?;

    assert_no_errors_or_warnings(errors_and_warnings);

    assert_webgl_rendering_occured(&tab)?;

    Ok(())
}
 After I got the test running there was an (expected) failed assertion around there being warnings in the console.
I needed to add a Favicon and not try to render meshes until the textures were downloaded.
After I got the test running there was an (expected) failed assertion around there being warnings in the console.
I needed to add a Favicon and not try to render meshes until the textures were downloaded.
I like to lean on as many unit tests as possible and only write a heavier integration test for critical code paths - so I can't say when or how often we'll be adding new browser tests.
Ideally there will be very few browser tests - and most of our server/client integration testing will happen outside of a browser (we already have one now for the first quest in the game - it connects to the game server using a crossbeam channels).
Here's one of our integration testing data structures that doesn't use a browser:
/// A player that is connected to our game server via a mpmc crossbeam channel,
/// similar to how a real player might be connected via websocket.
///
/// ## Persisting Player To Database
///
/// We don't currently persist our simulated player to the database - although in the future
/// we might want to add a way to do that in case we want to have integration tests that
/// verify that the database is updated correctly.
pub struct ConnectedPlayer {
    /// The user_id for the player
    ///
    user_id: u32,
    /// Every game tick the server sends state to all connected players.
    /// This is how we receive that state.
    state_receiver: Receiver<Vec<u8>>,
    /// Used to send ConnActivity::* to the game server.
    ///
    /// For example, this might be a new ClientRequest, or a ClientDisconnect.
    conn_activity_sender: Sender<ConnActivity>,
    /// Receive an acknowledgement that our connection activity was received and processed.
    conn_ack_receiver: Receiver<()>,
}
I always enjoy writing the first integration test for some major code path as it typically exposes a lot of unnecessary coupling or inflexible code and makes for a good learning experience and spring cleaning.
But I definitely default to carefully thinking about whether I can accomplish what I want to accomplish with unit tests before I dip my hand into the integration testing realm. It's something to be used sparingly/appropriately in my opinion as it's inherently much more coupled to your codebase.
Other Changes that I remember
-
Fix the
impl Iterator For TilesBetweenWorldPointsimplementation - it was broken in a few cases. -
Center entities within their TileBox when rendering on the client.
-
Allow the game to load player data from a provided HashMap - useful for our integration tests so they don't need to hit the database.
This Week
This week I'll be starting to populate the client side specs::World - with our first client side components, resources and systems revolving around rendering our
game scenery.
After that I can finally get back to finishing modeling Pookie's house in Blender and getting that scenery rendered in the game.
Cya next time!
- CFN
048 - December 29, 2019
A yak shaving adventure
This week started off with a simple goal - but very rapidly morphed into a yak shaving adventure.
I originally set out to finish up getting pathfinding working between arbitrarily sized sets of tiles (so pathfinding between a 2x2 entity to a 3x3 entity, for example) and after a good bit of elbow grease things started falling into place.
Got all of the pathfinding tests passing at my parents house on the night of Christmas - put me right to sleep.
After that my goal was to start rendering scenery into the game - reading from the scenery.yml file that I talked about last week.
The game sever doesn't know about scenery (it just knows about the tiles in the world that the scenery is making unreachable, but it doesn't know or care why) but scenery and entities both use the same renderers on the client side - so naturally they share some data structures.
This is where the yak shaking deep dive began. The game server would previously send down a Renderable3dComp to the client - a component that describes
how to render an entity.
This broke one of our architectural rules - the game server should not knowing anything about the 3D nature of the clients. From a data perspective - the game is entirely two dimensional (just a big tile grid with lots of different entities). Our clients take that information in order to render a 3D world - but the server should never need to know about that.
While modifying the codebase to render our scenery I decided to fix this knowledge leak. I introduced a RenderableId enum that is auto generated from build script
that reads from a yaml file.
Here are some snippets showing how that's put together.
###################################################################################################

A map of RenderableId -> Render3dComp

###################################################################################################

RenderableId
Snail:
  RenderDescription
  Absolute:
    mesh_names:
      - Snail

SnailBody:
  Relative:
    relative_to: Snail
    rotation:
      - 0.0
      - 0.0
      - 1.5708
    scale: 0.85
    disable_animation: true
// One of our build scripts
fn main() {
    // ... snippet ...
    generate_renderable_id_enum();
    // ... snippet ...
}
//! RenderableId

include!(concat!(env!("OUT_DIR"), "/renderable_id_enum"));
One slightly pesky thing about using the
include!concat!technique for code generation is thatintellij-rustdoesn't currently auto-complete the code - but hey it gives me so many other powerful features that I'm certainly not going to complain.
Now all our server knows is that an entity can have a RenderableId - accomplishing our goal of minimizing the amount of information that the server needs to know
about the nature of our clients.
Our client then uses these RenderableIds to look up Render3dComps when rendering the game.
User Equipment
When loading up a player into the game I was previously stuffing their Render3dComp with some MeshName enums for their head, torso, legs, etc.
This broke down when the server no longer knew about the MeshName enum (because we don't want the server to know about anything related to drawing the game).
So I did something I've been meaning to do and introduced a user_equipment table (where we persist your worn equipment) and some data structures around equipment.
The server know sends down an EquipmentComp component with different EquipmentIds in the EquipmentSlots and the client calls EquipmentId.into::<RenderableId>()
in order to figure out how to render it.
By now I take for granted how easy serde makes it to share data structures / code between the client and serve .. but as I type this journal entry I'm feeling a sense of appreciation for that amazing project.
Specs ECS
Back in mid October we started gearing up to use specs ECS in our game-server - as it was very clearly superior to my own hand rolled ECS in every way.
commit 3fb152f3c6e454f369c3bde729448463c0e9678f
Author: Chinedu Francis Nwafili <frankie.nwafili@gmail.com>
Date:   Tue Oct 15 10:49:33 2019 -0400

    Add specs dependency

    Need to start using it in a future PR. Just adding the dep for now
Since then it's been such a pleasure to work with and re-shaped how I structure and approach my code so nicely that I'm ready to start using it in on the game client side.
I've introduced the dependency to the game-app crate in my workspace (powers our web browser client and in the future will power clients on other targets such as mac or windows)
and will be slowly moving move things into my specs::World over time.
Fortunately there are no design constraints that force me to make this move all at once like there were on the server side - so I can just casually migrate over the coming months as I touch different parts of the client.
Introducing our first browser test
I've been in a test driven development cadence since around August or September of 2019 and I'm excited as I see my code quality rising to the next level.
These days the only time I spend debugging is when I'm getting a new test that I'm writing to work or when I'm touching old code that I wrote earlier in the codebase's life before I was testing.
So - now that I'm gearing up to work on the renderer and make some client side changes I wanted to extend this TDD to the client side (I've been heavy on the server side for the last couple of months).
When I'm working on the game server I never run it outright. I'm always either running a unit test or running an integration test
(so far there's only one major test in our game-server-integration-tests crate that plays through the first quest in the game - but there are some smaller integration tests sprinkled around.)
On the web client though - it was a different story. I wrote about using test-driven development on our game UI back in September - but even then I eventually had to boot up the game to see if it all looked right to a human eye. (For example - does the spacing look too large, too small?)
My vision around this is to instead be able to automatically generate a screenshot of a UIElem that I'm working on - or any other visual aspect of the game that I'm
touching such as when I'm working on shaders.
I write some unit tests - then when I'm ready to see the thing I call some function that will produce a rendered screenshot of whatever I need to see.
Note that I'm being general as I describe this. I'm not looking to prescribe a solution just yet. I just know that as I dive into the client side I'll be automating the process of being able to visualize whatever I'm working on (even if it's in baby steps over time) and I'm excited for whatever I end up landing on.
A step in the right direction
The first step in this direction is a new crate in the workspace called web-client-integration-tests.
Whenever I'm ready to deploy a bigger change to the game I'll usually fire it up and do a quick sanity check that it loads.
This is a violation of my longer term goal of never needing to run the game myself to check if things that I already built are still working (I should mainly only run the game when I want to feel out the new gameplay or just generally feel out the overall gameplay experience).
To combat this we used rust-headless-chrome to create our first browser test.
It more or less just fires up the game in Chromium and verifies that the canvas renders.
/// Start a game-server
///
/// Start a static server to serve:
///   1. The web-client HTML, Wasm and JS
///   2. The game assets such as mesh and armature data
///
/// Compile the web-client in release mode with debug symbols enabled
///
/// Load the game in Chromium and wait until the canvas gets painted.
/// The first time the canvas is painted the web-client appends an element to the DOM as
/// confirmation - so we wait for that element to appear.
///
/// Check the console and verify that there are no errors or warnings of any kind.
///
/// Take a screenshot of the canvas and verify that we rendered to the canvas.
#[test]
fn load_game_without_errors() -> Result<(), failure::Error> {
    thread::spawn(|| start_game_server());
    thread::spawn(|| start_static_server());

    compile_web_client();

    let browser = init_browser()?;
    let tab = browser.wait_for_initial_tab()?;
    tab.enable_log()?;

    let errors_and_warnings = Arc::new(Mutex::new(vec![]));
    begin_monitoring_chrome_console(&tab, errors_and_warnings.clone())?;

    tab.navigate_to(web_client_url().as_str())?;

    wait_for_first_canvas_render(&tab)?;

    assert_no_errors_or_warnings(errors_and_warnings);

    assert_webgl_rendering_occured(&tab)?;

    Ok(())
}
After I got the test running there was an (expected) failed assertion around there being warnings in the console.
I needed to add a Favicon and not try to render meshes until the textures were downloaded.
I like to lean on as many unit tests as possible and only write a heavier integration test for critical code paths - so I can't say when or how often we'll be adding new browser tests.
Ideally there will be very few browser tests - and most of our server/client integration testing will happen outside of a browser (we already have one now for the first quest in the game - it connects to the game server using a crossbeam channels).
Here's one of our integration testing data structures that doesn't use a browser:
/// A player that is connected to our game server via a mpmc crossbeam channel,
/// similar to how a real player might be connected via websocket.
///
/// ## Persisting Player To Database
///
/// We don't currently persist our simulated player to the database - although in the future
/// we might want to add a way to do that in case we want to have integration tests that
/// verify that the database is updated correctly.
pub struct ConnectedPlayer {
    /// The user_id for the player
    ///
    user_id: u32,
    /// Every game tick the server sends state to all connected players.
    /// This is how we receive that state.
    state_receiver: Receiver<Vec<u8>>,
    /// Used to send ConnActivity::* to the game server.
    ///
    /// For example, this might be a new ClientRequest, or a ClientDisconnect.
    conn_activity_sender: Sender<ConnActivity>,
    /// Receive an acknowledgement that our connection activity was received and processed.
    conn_ack_receiver: Receiver<()>,
}
I always enjoy writing the first integration test for some major code path as it typically exposes a lot of unnecessary coupling or inflexible code and makes for a good learning experience and spring cleaning.
But I definitely default to carefully thinking about whether I can accomplish what I want to accomplish with unit tests before I dip my hand into the integration testing realm. It's something to be used sparingly/appropriately in my opinion as it's inherently much more coupled to your codebase.
Other Changes that I remember
-
Fix the
impl Iterator For TilesBetweenWorldPointsimplementation - it was broken in a few cases. -
Center entities within their TileBox when rendering on the client.
-
Allow the game to load player data from a provided HashMap - useful for our integration tests so they don't need to hit the database.
This Week
This week I'll be starting to populate the client side specs::World - with our first client side components, resources and systems revolving around rendering our
game scenery.
After that I can finally get back to finishing modeling Pookie's house in Blender and getting that scenery rendered in the game.
Cya next time!
- CFN
047 - December 22, 2019
Over the last week I started putting in some of the groundwork for adding scenery to Capuchin City, the first city in the game.
Right now the scenery is defined in a .yml file that currently looks like this:
####################################################################################################
#
# Scenery
#
# This file defines all of the scenery in the game.
#
# Right now we keep it all defined as one batch of scenery, but in the future we migth want to split
# this into many batches so that the client can only download scenery information that they need.
#
# These batches might be created by hand - or by an automated process that looks at the positions
# of the different scenery to determine how to group them. We'll worry about this when we have much
# more scenery to manage.
#
# TODO: We eventually want to automatically manage / edit our Scenery from an in-game editor dev tool
# instead of by hand - but that can come when there is much more scenery to manage.
#
# TODO: Use this file to automatically generate the SceneryId enum
#
# @see client-server-common/src/resources/scenery.rs
####################################################################################################

# SceneryId
PookieHouse:
# SceneryItem
    meshes: [SnailBody] # FIXME: Instance rendered Pookie's house fence
    permissions:
      EntireFootprint: AllowAllMovement # FIXME: We want to prevent movement at outer ring, but allow through door
    location:
      Absolute:
          bottom_left:
            x: 10
            y: 10
          tiles_wide: 8
          tiles_high: 8

# SceneryId
PookieDesk:
  # SceneryItem
  meshes: [Desk]
  permissions:
    EntireFootprint: PreventAllMovement
  location:
    Relative:
      rel_bottom_left_of: PookieHouse
      x_offset: 0
      y_offset: 0
      tiles_wide: 2
      tiles_high: 1
One of the more interesting bits of the scenery is that for each piece of scenery we define the permissions that it stamps onto the tiles that it covers.
/// The walkability / flyability of an individual tile
#[derive(Debug, Deserialize, Serialize, Copy, Clone, Eq, PartialEq)]
pub enum IndividualTilePermission {
    /// Allow all movement
    AllowAllMovement = 0,
    /// Allow flying but prevent walking
    AllowFlyPreventWalk = 1,
    /// Prevent all movement
    PreventAllMovement = 2,
}
So if a piece of scenery takes up a 3x3 set of tiles in the grid - we automatically set the walkability/flyability of those tiles based on the scenery in that space.
This is done by deserializing the scenery.yml file into a HashMap<SceneryId, SceneryItem> - resolving any relative positions (some scenery are positioned relative to other scenery) -
then stamping permissions onto the TileMap based on where the scenery is absolutely positioned.
All of the above is working smoothly - right now I'm in the middle of updating the pathfinding algorithm to take into account the TileMap's tile permissions as well as
updating the pathfinding algorithm to work with arbitrarily sized boxes of tiles instead of only pathfinding between two tiles.
So - for example - we'll be able to pathfind between a 1x1 entity and within some DistanceRange::new(u8, u8 ) of a 3x3 destination.
Making the first Scenery
I modeled Pookie's desk during the week. I planned to model his desk, some of the science equipment on his desk and the fencing (instance rendered) around his house, but
I got sidetracked by the setting up the scenery, TileMap and pathfinding data structures.
So I should get back to making these meshes in a few days.
 The shader nodes in Blender for Pookie's desk.
The desk has 650 vertices - but I'm not really sure whether or not that's too high, too low or just right.
I still need to think through what sort of vertex budget I want.
As someone who is learning to do art - I think that my skill development will be aided by having well defined parameters such as my maximum number of vertices to work with.
At some point I'll want to benchmark the scene on a mobile device and start to get a sense of how much I can render under different performance constraints.
 Pookie's desk - modeled in Blender.
There are 650 vertices, we're using a normal map from a mesh with 12k vertices
Pookie's desk - modeled in Blender.
There are 650 vertices, we're using a normal map from a mesh with 12k vertices
Pathfinding algorithm changes
The pathfinding algorithm used to work with only individual tiles. This is a problem because some entities will be able to take up multiple tiles - and we'll need to be able to pathfind between them.
For example - a 1x1 player might be attacking a 3x3 monster - and we need to pathfind the player to be within 0 or 1 tile (or more if you have a long distance weapon) of the 3x3 monster's perimeter.
For problems like this that have lots of different cases to consider - I'll typically start by sketching out test cases.
When the problem is visual - such as this pathfinding one - I use a program called Monodraw to create diagrams to include in the code comments so that if I revisit some code or a test in a few years
I don't forget what it's trying to prove or explain.
/// The path should not contain any un-walkable tiles
///
/// DistanceRange::new(1, 1 )
///
///
/// ```text
///   ┌───────┬───────┬───────┬───────┬───────┐
///   │ ┌─────┴─────┐ │  ┌────┴────┐  │       │
/// 4 │ │           │ │  │         │  │       │
///   │ │           │ │  │  Start  │  │       │
///   ├─┤    End    ├─┼──┤(Finish) ├──┼───────┤
///   │ │           │ │  │         │  │       │
/// 3 │ │           │ │  └▲───┬────┘  │       │
///   │ └─────┬─────┘ │   │   │       │       │
///   ├───────┼───────┼───┼───┼───────┼───────┤
///   │       │███████│   │   │       │       │
/// 2 │       │███████│   │   │       │       │
///   │       │███████│   │   │       │       │
///   ├───────┼───────┼───┼───┼───────┼───────┤
///   │       │       │   │   │       │       │
/// 1 │  ┌────┴────┐  │   │   │       │       │
///   │  │         │  │   │   │       │       │
///   ├──┤  Start  ├──┼───┼───┼───────┼───────┤
///   │  │         │  │   │   │       │       │
/// 0 │  ├─────────┼──┼───▶   │       │       │
///   │  └────┬────┘  │       │       │       │
///   └───────┴───────┴───────┴───────┴───────┘
///       0       1       2       3       4
/// ```
#[test]
fn does_not_use_non_walkable_tiles() {
    unimplemented!("")
}
After writing out some unimplemented test cases I'll usually create a test struct that can be re-used across all of these test cases.
struct TileBoxPathfindTest {
    tile_map: TileMap,
    start: TileBox,
    destination: TileBox,
    start_in_range_when: StartInRangeWhen,
    // Starting at the bottom_left tile in the TileBox
    expected_path: Vec<TilePos>,
}

impl TileBoxPathfindTest {
    fn test(self) {
        let mut calculated_path = vec![];
        let mut neighbors_holder = vec![];

        find_path_between_tile_boxes(
            &self.tile_map,
            &self.start,
            &self.destination,
            &self.start_in_range_when,
            &mut calculated_path,
            &mut neighbors_holder,
        );

        assert_eq!(calculated_path, self.expected_path);
    }
}
And then in every test I'll call it with the data that I need for that test like so:
/// Test moving up vertically to get into range
///
/// ```text
///   ┌───────┬───────┬───────┬───────┐
///   │       │ ┌─────┴─────┐ │       │
/// 4 │       │ │           │ │       │
///   │       │ │           │ │       │
///   ├───────┼─┤    End    ├─┼───────┤
///   │       │ │           │ │       │
/// 3 │       │ │           │ │       │
///   │       │ └─────┬─────┘ │       │
///   ├───────┼───────┼───────┼───────┤
///   │       │       │       │       │
/// 2 │       │▲      │       │       │
///   │       ││      │       │       │
///   ├───────┼│──────┼───────┼───────┤
///   │       ││┌─────┴─────┐ │       │
/// 1 │       │││           │ │       │
///   │       │││           │ │       │
///   ├───────┼│┤   Start   ├─┼───────┤
///   │       │││           │ │       │
/// 0 │       │││           │ │       │
///   │       │ └─────┬─────┘ │       │
///   └───────┴───────┴───────┴───────┘
///       0       1       2       3
/// ```
#[test]
fn straight_up_vertical_path() {
    TileBoxPathfindTest {
        tile_map: TileMap::default(),
        start: TileBox::new((1, 0), 2, 2),
        destination: TileBox::new((1, 3), 2, 2),
        start_in_range_when: StartInRangeWhen::StartPerimeterOutsideOfEndPerimeter(
            DistanceRange::new(0, 0 ) ,
        ),
        expected_path: vec![TilePos::new(1, 0), TilePos::new(1, 1), TilePos::new(1, 2)],
    }
    .test();
}
I keep every test to one specific case. This makes it easier to come back to a test suite 12 months later and visualize or fix one specific aspect of the suite vs. needing to wade through a bunch of noise. It also helps me focus on getting one test passing at a time and then moving onto the next one.
It also makes authoring the tests easier because I only need to think about one case at a time - write it down - then move on to the next.
This Week
This week is Christmas! I'll be heading home to spend some time with family - but I'll still have some time to make progress on the game.
I'm looking to finish the new pathfinding between arbritrarily sized start and end TileBoxes, and then get back to modeling more scenery for Pookie's house in Capuchin City.
Cya next time!
- CFN
046 - December 15, 2019
These last two weeks have seen quite a bit of progress!
I finished up porting the game server to use specs, an open source, well designed entity component system that was in all ways better than my hand rolled one.
Along the way I had to make some changes (and some rewrites) of code that I wrote when I first started using Rust in January 2018, so I ended up significantly improving the codebase.
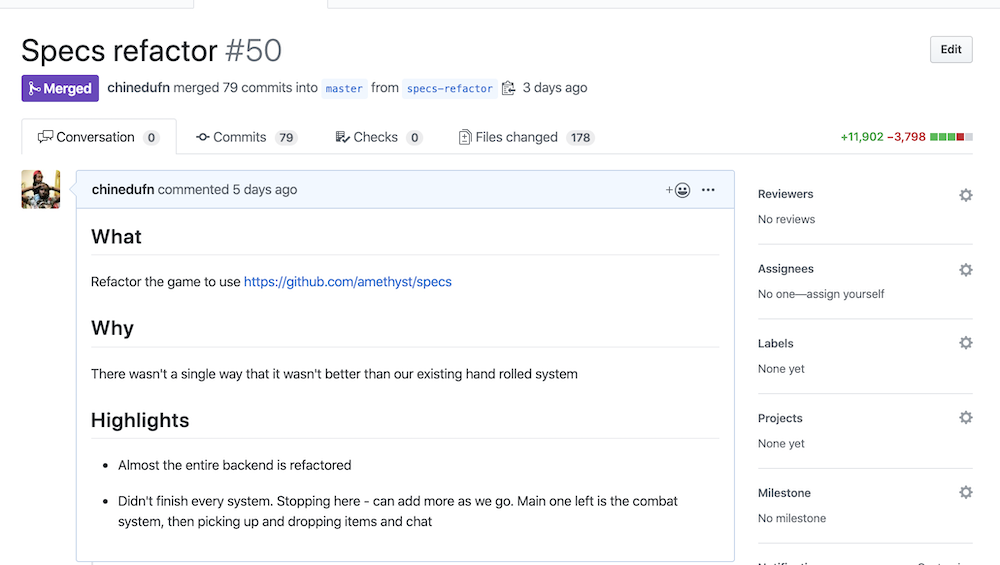
I used test-driven development for the entire port - so I ended up with a much more solid backend and I'm really excited about the speed at which I'll be able to add new features.
If I maintain this pace of TDD I anticipate spending very little time debugging and almost all of my time writing tests and getting them to pass.
In the near future I'll start using specs on the front-end. Fortunately that won't require a re-write since the front-end state is mainly used to render the screen and isn't as intertwined as the backend state was.
Handling entity death and respawning
One place that I got stuck on for some time was handling entity death and respawning.
Before the refactor I had a complex respawn component that had three stages. Alive, about to respawn and respawning.
If an entity was alive it would get sent down to the client, if it was about to respawn it would also be sent down to the client but without most of its components so the client could play a death animation.
Then when it was respawning it wouldn't get sent down to clients.
This was an overly involved process - but as I was rewriting the spawn system I was struggling to come up with a better system. We needed to let players know when an entity was respawning so it could play a death animation, but we also didn't want our backend systems to accidentally process entities that were respawning. I didn't want to make every system check if an entity was respawning before acting on it - so I started thinking and sketching things out in my notebook.
Eventually I landed on just keep tracking of the entities that died in each "region" of the game (a region right now is a 16x16 block of tiles). Then on that tick we'd let all players in that region and neighboring regions know that that entity ID has died.
Now the client can be responsible for playing the death animation for that entity and then removing it from the client's local state.
The only accomodation the backend needs to make for this is sending down the entities that died this tick - nothing more.
In general this is how we want to move forwards with things like this. The backend should do as little as possible to accomodate frontend specific things like animations. The game server should know as little about how to deal with the visual representations of entity's as possible.
It should just worry about data for the most part.
When an entity with a respawn component dies we push a new entity to our entities_to_spawn: Vec<EntityToSpawn> resource and after some time it will spawn.
#[derive(Debug, Copy, Clone, PartialEq, Eq)]
pub struct EntityToSpawn {
    kind: EntitySpawnKind,
    position: TilePos,
    /// The number of ticks until this entity spawns - if this is zero at the beginning of this
    /// tick then the entity will spawn during this tick
    tick_delay: u16,
}
Financials
Our financials for November 2019 were:
| item | cost / earning |
|---|---|
| revenue | + $4.99 |
| aws | - $113.44 |
| adobe substance | - $19.90 |
| GitHub LFS data pack | - $5.00 |
| photoshop | - $10.65 |
| ngrok | - $10.00 |
| chinedun@akigi.com Google email | - $12.00 |
| akigi.com domain renewal | - $14.90 |
| upby12.com | - $12.00 |
| upbytwelve.com | - $12.00 |
| UpBy12LLC Formation | - $65.06 |
| --- | --- |
| total | - $269.96 |
A bit over the usual expenses this month.
We formed an LLC that we'll be filing taxes for the business and it's expenses under.
We also bought and renwed a few domain names. The $12.00 for the gmail account is questionable - I think it's on the chopping block of things I don't need right now. ngrok is also on that chopping block - I hope to get around to finding an alternative.
I haven't used ngrok for over a year now so that's just wasted money right now.
This Week
This week I'll be diving back into making things that players can see and interact with. I'm working on Pookie's (an NPC in Capuchin City) house.
The Capuchin's aren't the most architectural bunch - so their "houses" are just fenced off patches of grass and dirt sometimes partially "roofed" by an overhanging tree leaf.
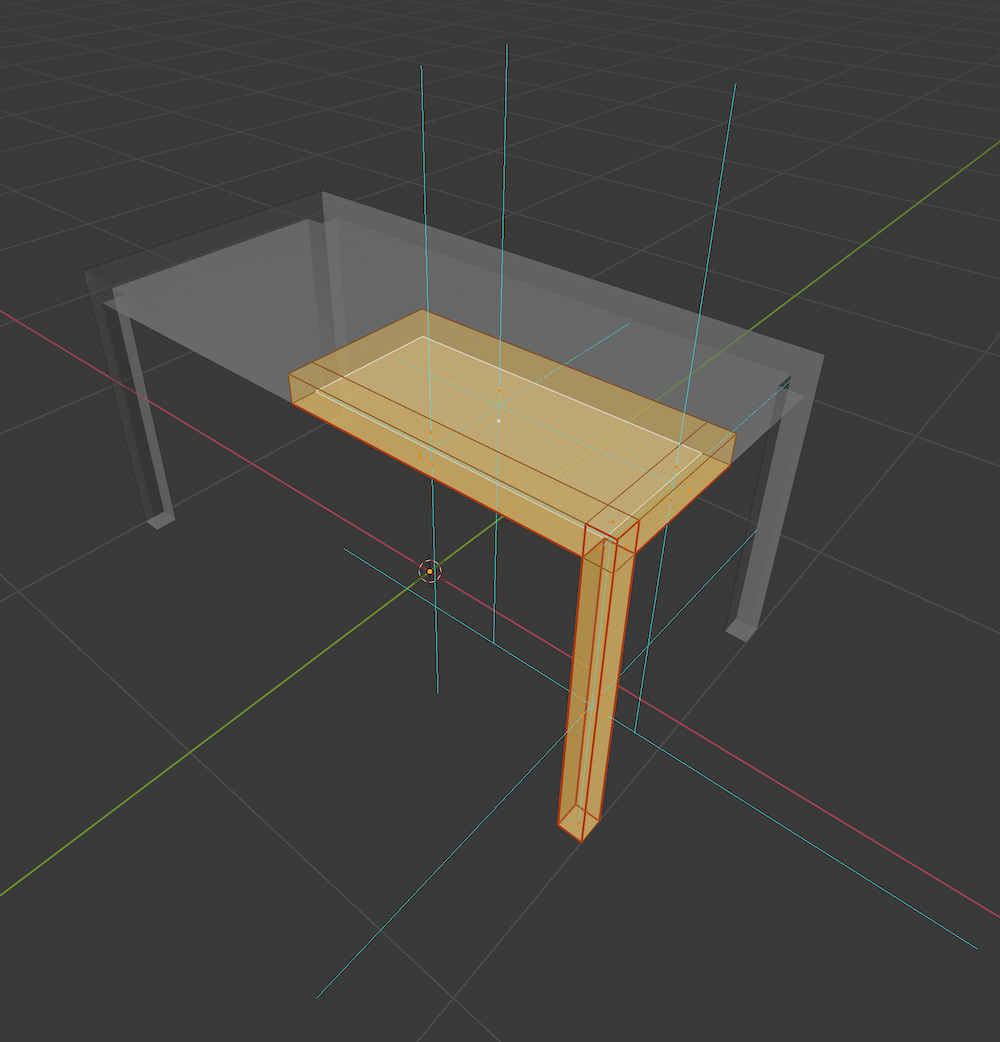
After that I'll be working on implementing the ability to train the Hitpoints discipline. I'm excited about introducing this - as it'll be the first real mechanic in the game.
I'll talk more about this in the next journal entry.
Cya next time!
- CFN
045 - November 24, 2019
Hey!
I've been doing a lot of backend work lately making a sweeping change to the gameplay server.
I'm porting from my own poorly designed entity component system to specs.
Along the way I've written a lot of new tests and handled cases that weren't handled previously - so the backend is much more ready for a real player base than before this port
I'm looking to finish this port by the end of this week - and then I'll be able to dive back into adding new gameplay mechanics.
TDD
I've been almost exclusively using test driven development for that passed couple of months now.
Rust makes this really easy because you can write unit tests in the same files as your source code - so the barrier to entry is very low.
I'm interested to see how this impacts the system over the next few years - I'm already feeling very confident about the system's resilience to bugs since virtually every line of code - but we'll see if that plays out when we have real players.
I'm already noticing the quality of my test suite evolve now that the majority of my time coding is spent figuring out what tests to write and then writing them, so I'm excited to see how this continue to evolve over the coming years.
Financials
Our financials for October 2019 were:
| item | cost / earning |
|---|---|
| revenue | + $4.99 |
| photoshop | - $10.65 |
| clubhouse | - $0.91 |
| aws | - $110.06 |
| ngrok | - $10.00 |
| adobe substance | - $19.90 |
| GitHub LFS data pack | - $5.00 |
| chinedun@akigi.com Google email | - $8.40 |
| --- | --- |
| total | - $159.93 |
Ngrok and the akigi.com email address are both things that I haven't really used too much since subscribing. But they combine for about $20 a month so not necessarily the biggest place to cut costs - but I'll think about whether I need them.
This Week
Number one priority is finishing the migration to specs and then getting started on working on user facing gameplay improvements again.
I really think that the new back-end will make it much easier to add new functionality - so I'm hoping to really pick up the pace with putting out new gameplay.
Cya next time!
- CFN
044 - October 06, 2019
Hey!
These past two weeks were filled with UI work.
We built out a first pass at the equipment interface. It still has placeholder icons for the different gear slots - but the layout works.
 A first pass at the equipment UI. Still need to update the icons.
We also introduced the UIElem trait which is one of the core centerpieces of rendering our user interface.
//! The UIElem trait

#![deny(missing_docs)]

use crate::math_2d::rectangle::Rect;
use crate::user_interface::sections::Sections;
use crate::{MsgOrClientRequest, State, UiQuads};

/// Used for designating UI elements that can be rendered onto textured quads on the screen
pub trait UIElem {
    /// Generate the textured quads for this UI element and push them into the collection of
    /// all UiQuad's
    fn render_ui_quads(&self, all_ui_quads: &mut UiQuads);

    /// Generate the text Sections for this UI element and push them into the collection of
    /// all text sections
    fn render_text(&self, all_sections: &mut Sections);

    /// The rectangle that contains this UIElem, useful for things such as click detection.
    fn rect(&self) -> &Rect;

    /// When the user clicks we test the click location against our UIElem's rectangle.
    /// If there is an overlap we call the onclick method.
    fn onclick(&self, x: i16, y: i16, state: &State) -> Option<Vec<MsgOrClientRequest>>;

    /// All of the child UIELem for this elem
    fn children(&self) -> Option<Vec<&dyn UIElem>>;

    /// Render the UI Quads and the text sections
    fn render(&self, all_ui_quads: &mut UiQuads, all_sections: &mut Sections) {
        self.render_ui_quads(all_ui_quads);
        self.render_text(all_sections);
    }
}
During the week our SSL certificate expired and I didn't notice because it was hooked up to an old email address that I no longer use.
After trying and failing to renew it with my old service - I tried out Let's Encrypt. Let's Encrypt was brilliantly easy to set up - so that's what I'll be using going forwards when I need an SSL certificate.
Unless it's for an AWS service that supports AWS Ceritificates Manager - in which case I'll use that. This week I moved a few services to use ACM for their SSL certs.
I'm working on the Durability skill in the game, specifically on the Hitpoints sub-discipline. I'm pretty excited about the mechanics that I've laid out for it so
I'm having fun as I implement it.
We'll hopefully have something to show for it in the next couple of weeks.
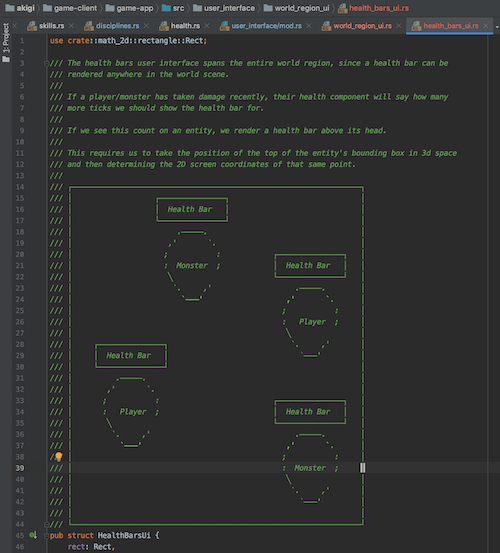 Using monodraw to comment diagrams of user interface components.
Financials
Our financials for September 2019 were:
| item | cost / earning |
|---|---|
| revenue | + $4.99 |
| photoshop | - $21.30 |
| clubhouse | - $0.91 |
| aws | - $110.06 |
| ngrok | - $10.00 |
| adobe substance | - $19.90 |
| --- | --- |
| total | - $157.18 |
We were changed twice for Photoshop this month, on the 2nd and 30th.
ClubHouse is now free - so we shouldn't see any more charges for it after last month.
This Week
This week I'll continue working on the Hitpoints system - starting first with the health bars user interface rendering.
Cya next time!
- CFN
044 - October 06, 2019
Hey!
These past two weeks were filled with UI work.
We built out a first pass at the equipment interface. It still has placeholder icons for the different gear slots - but the layout works.
A first pass at the equipment UI. Still need to update the icons.
We also introduced the UIElem trait which is one of the core centerpieces of rendering our user interface.
//! The UIElem trait

#![deny(missing_docs)]

use crate::math_2d::rectangle::Rect;
use crate::user_interface::sections::Sections;
use crate::{MsgOrClientRequest, State, UiQuads};

/// Used for designating UI elements that can be rendered onto textured quads on the screen
pub trait UIElem {
    /// Generate the textured quads for this UI element and push them into the collection of
    /// all UiQuad's
    fn render_ui_quads(&self, all_ui_quads: &mut UiQuads);

    /// Generate the text Sections for this UI element and push them into the collection of
    /// all text sections
    fn render_text(&self, all_sections: &mut Sections);

    /// The rectangle that contains this UIElem, useful for things such as click detection.
    fn rect(&self) -> &Rect;

    /// When the user clicks we test the click location against our UIElem's rectangle.
    /// If there is an overlap we call the onclick method.
    fn onclick(&self, x: i16, y: i16, state: &State) -> Option<Vec<MsgOrClientRequest>>;

    /// All of the child UIELem for this elem
    fn children(&self) -> Option<Vec<&dyn UIElem>>;

    /// Render the UI Quads and the text sections
    fn render(&self, all_ui_quads: &mut UiQuads, all_sections: &mut Sections) {
        self.render_ui_quads(all_ui_quads);
        self.render_text(all_sections);
    }
}
During the week our SSL certificate expired and I didn't notice because it was hooked up to an old email address that I no longer use.
After trying and failing to renew it with my old service - I tried out Let's Encrypt. Let's Encrypt was brilliantly easy to set up - so that's what I'll be using going forwards when I need an SSL certificate.
Unless it's for an AWS service that supports AWS Ceritificates Manager - in which case I'll use that. This week I moved a few services to use ACM for their SSL certs.
I'm working on the Durability skill in the game, specifically on the Hitpoints sub-discipline. I'm pretty excited about the mechanics that I've laid out for it so
I'm having fun as I implement it.
We'll hopefully have something to show for it in the next couple of weeks.
Using monodraw to comment diagrams of user interface components.
Financials
Our financials for September 2019 were:
| item | cost / earning |
|---|---|
| revenue | + $4.99 |
| photoshop | - $21.30 |
| clubhouse | - $0.91 |
| aws | - $110.06 |
| ngrok | - $10.00 |
| adobe substance | - $19.90 |
| --- | --- |
| total | - $157.18 |
We were changed twice for Photoshop this month, on the 2nd and 30th.
ClubHouse is now free - so we shouldn't see any more charges for it after last month.
This Week
This week I'll continue working on the Hitpoints system - starting first with the health bars user interface rendering.
Cya next time!
- CFN
043 - September 22, 2019
Hey!
This week I worked on the skills interface where you can see your level and XP in different skills and disciplines within the game.
My user interface code is still a bit young - so it took a fair amount of work to get something that even still needs some work.
 Our work in progress skill boxes. We still need to replace those black squares with icons.
This was my first user interface in the game that I built using test-driven development. It was pretty awesome - I didn't look at the game in the browser a single time while developing it. I just wrote tests and made them pass.
An interesting thing I'm seeing is that since I have full control over the layout engine for this WebGL interface I can very easily write tests such as "ensure that this "thing is fully contained by that thing". Or "ensure that this element is within 10 pixels of that element."
This made it easy to translate a drawing of the stats interface on a sheet of paper into code without needing to visualize it while I worked.
I'm excited to continue to advance the testability of the user interface.
 Some of our unit tests for our skill box.
As we create more user interfaces we'll land on the abstractions that will help make it easier and easier to build well-tested user interfaces.
For now we'll just move a bit more slowly as we figure things out and make architectural mistakes.
This Week
This week I'll finish up v1 of the skills interface and start working on the equipment interface.
Cya next time!
- CFN
043 - September 22, 2019
Hey!
This week I worked on the skills interface where you can see your level and XP in different skills and disciplines within the game.
My user interface code is still a bit young - so it took a fair amount of work to get something that even still needs some work.
Our work in progress skill boxes. We still need to replace those black squares with icons.
This was my first user interface in the game that I built using test-driven development. It was pretty awesome - I didn't look at the game in the browser a single time while developing it. I just wrote tests and made them pass.
An interesting thing I'm seeing is that since I have full control over the layout engine for this WebGL interface I can very easily write tests such as "ensure that this "thing is fully contained by that thing". Or "ensure that this element is within 10 pixels of that element."
This made it easy to translate a drawing of the stats interface on a sheet of paper into code without needing to visualize it while I worked.
I'm excited to continue to advance the testability of the user interface.
Some of our unit tests for our skill box.
As we create more user interfaces we'll land on the abstractions that will help make it easier and easier to build well-tested user interfaces.
For now we'll just move a bit more slowly as we figure things out and make architectural mistakes.
This Week
This week I'll finish up v1 of the skills interface and start working on the equipment interface.
Cya next time!
- CFN
042 - September 15, 2019
Hey!
Last week I finished modeling and rigging the capuchin mesh in Blender.

Here's how it looks in game.

I also made items transparent while you're preparing to combine them with other items - just to make it more visually clear what you're doing.
As well as other quality of life improvements such as Use Rocks instead of Use Item.
 Before clicking use item.
 After clicking use item.
Going to keep cleaning up and adding new gameplay elements. Hopefully we'll have something a bit more fun soon.
This Week
This week I'll be working on fleshing out the first quest and making sure that it can be completed by someone who has never played the game.
Which basically means adding icons and models that are more clear than our current placeholders.
After that I'll work on the stats interface.
Cya next time!
- CFN
041 September 9, 2019
Hey!
Last week I continued working on improving the 3d models in the game.
My progress stalled a bit when the weekend rolled around as we celebrated my friend's birthday.
So I'm more or less in the middle of working on a capuchin monkey model.
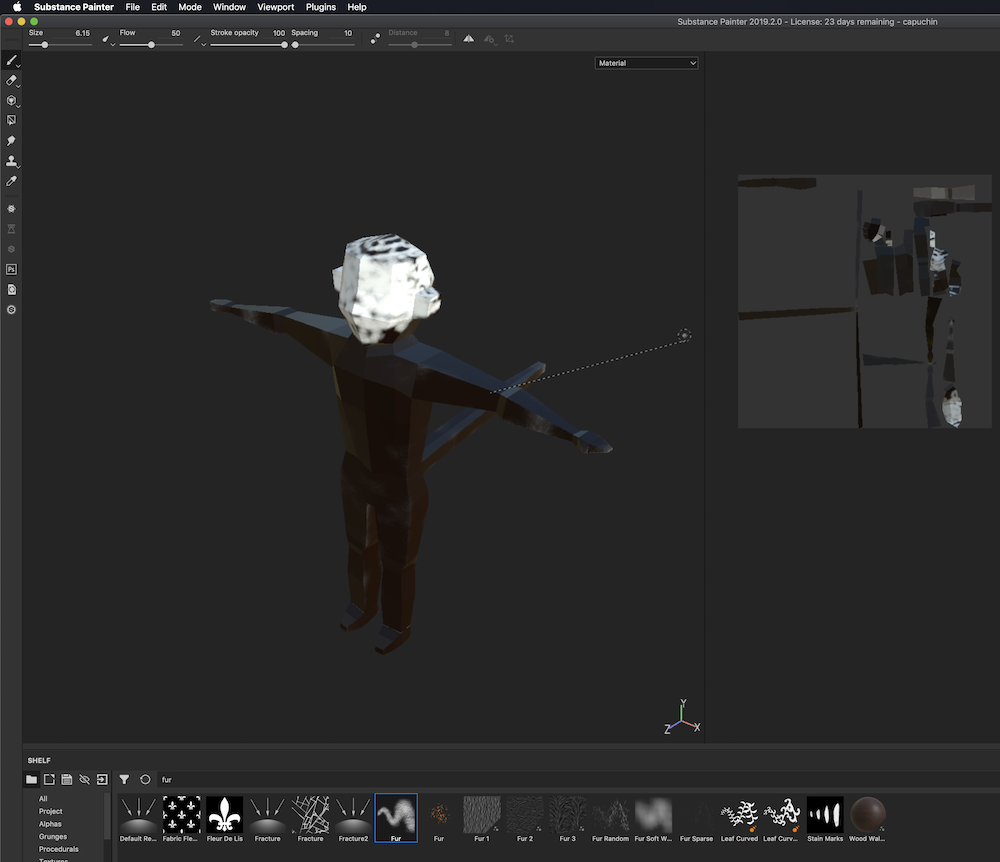 Texturing our Capuchin monkey model in Substance Painter.
Rigging our Capuchin monkey model in Blender.
This Week
Going to finish up the Capuchin mesh and then begin work on some other assets that we need.
Cya next time!
- CFN
040 - September 1, 2019
Hey!
This week we worked on the user interface. We added two icons to the side panel to let you toggle between the inventory and quest interfaces. The icons are quick and dirty - but we're following our usual approach of getting things working before focusing on making them look good.
![]() Added icons to the top right to change tabs in the right side panel.
Added icons to the top right to change tabs in the right side panel.
We also migrated from Blender v2.79 to Blender v2.80 to take advantage of all of the new usability improvements.
This mainly involved tweaking some of our add-ons to support to hew add-on API.
The new version of Blender is an improvement in every way and I'm excited to continue to learn and improve my 3d modeling.
Last week we mentioned an issue with hitting out Git LFS quota due to our CI jobs pulling from out Git LFS server. We ended up fixing this by caching our .git/lfs directory
in CI - a quick and easy fix.
Financials
Our financials for July 2019 were:
| item | cost / earning |
|---|---|
| revenue | + $4.99 |
| photoshop | - $10.65 |
| clubhouse | - $10.00 |
| aws | - $89.01 |
| ngrok | - $10.00 |
| adobe substance | - $19.95 |
| sslmate | - $149.95 |
| --- | --- |
| total | - $284.57 |
A new recurring purchase of adobe substance and a yearly renewal of our SSL certificate bumped us up this month compared to -$110.50 lost last month.
This Week
I'm focused on adding gameplay and filling out the world.
Right now I'm working on a capuchin monkey model and it's painfully clear that my 3d modeling skills just aren't where they need to be. I'm mulling over the idea of taking some time to go through a few video tutorials to build up my skills, technique and confidence so that I can more quickly produce higher quality art.
My tooling is in a good place - I can run a single command to export all of my models and armatures from Blender and generate all of my texture atlases from my .png and .psd files.
I'm getting a good grip of substance painter and can make base color, roughness, metallic and normal texture maps fairly easily.
My biggest glaring weakness right now is my Blender ability (or lake thereof). Yeah - as I type this out it sounds like a good path forward might be deliberately setting side time to practice. I'll think about this a bit more and figure out a path forwards.
Cya next time!
- CFN
039 - August 27, 2019
Hey!
Been a minute!
Right now I'm focusing on adding gameplay and improving the graphics.
Last week I upgraded the graphics engine to use physically-based rendering. I also spent just about all of Sunday trying to figure out why the game wasn't working in production - it ended up being a Rust -> WebAssembly compilation issue where passing a compiler flag to optimize for size was leading to a broken binary. I'll have to get around to opening an issue for that.
Financials
Our financials for July 2019 were:
| item | cost / earning |
|---|---|
| revenue | + $4.99 |
| photoshop | - $10.65 |
| clubhouse | - $10.00 |
| aws | - $84.84 |
| ngrok | - $10.00 |
| --- | --- |
| total | - $110.50 |
This Week
This week I'm continuing to focus on gameplay. I'm working on a quest interface, as well as adding a few more art assets into the world.
I'll also spend a few hours this weekend fixing an issue where my CI jobs all run git lfs pull even though they only need a couple of assets. This is causing me
run out of my GitHub LFS bandwidth allowance quickly. I'll modify the command to only pull the exact assets that I need to pull.
Otherwise we can't use CI since right now our LFS quote runs out after a few commits.
Cya next time!
- CFN
July 7, 2019
Hey!
I finally finished the physically based rendering tutorial - after 7 weeks!
I'll be posting it later this week on chinedufn.com.
I plan to integrate a lot of what I learned into the game engine - so I consider it all time well invested.
Financials
Our financials for June 2019 were:
| item | cost / earning |
|---|---|
| revenue | + $4.55 |
| photoshop | - $10.65 |
| clubhouse | - $10.00 |
| AWS | - $89.02 |
| ngrok | - $10.00 |
| --- | --- |
| total | - $122.95 |
Last months AWS bill was $113.79. We cut that down by $24.77 this month to $89.02 by getting rid of some unnecessary resources.
$90/month for AWS is right at the threshold where I'm considering consolidating some resources to get it down to around $30-$40 - but ultimately I think I'll focus on getting something worth paying for out rather than changing my server setup (going from ECS to EC2 for a few servers) only to have to change it all back later.
I'm adding one more ECS deployment for the payment serfer - so the bill should creep back over $100 in the next month or two.
Luckily after that there shouldn't be anything else to pay for until we have paying players and need to scale. But this sure is good incentive to hit that point more quickly.
We cancelled our Clubhouse subscription since it doesn't work well offline. In the last month we've started working offline heavily in order to focus without distraction. For now we're managing tasks using markdown files. If at some point that breaks down - we'll figure out where to go from there.
Another $4.55 ($4.99 - Stripe's cut) made this month. Let's bump that up soon!
Next month we should be adding around $20/month to our expenses since we'll be purchasing Substance Painter and Substance Designer subscriptions.
Next Week
Before integrating some new rendering techniques into the engine I'm going to take a week to finish up our continuous deployment.
The easier it is to deploy - the more I will deploy. This is critical in these early days where I want to be rapidly putting out new mechanics and art for the early players.
The last (and hardest) thing left to set up continuous deployment for is the game's websocket server, so that should take up all of this week.
Cya next time!
- CFN
038 - July 14, 2019
A fun case of Rust to Rust FFI
Hey!
This past week I worked on our continuous deployment.
I made some good progress and planning to finish things up this week.
Continuous Deployment of the Game's Web Client
The game's web client deployment consists of three files.
A .html file, a .wasm file, and a .js file.
The wasm file and JS file are generated by wasm-bindgen during our build process.
The HTML file looks like this:
<!-- HTML for Akigi Web Game Client -->

<html>
    <head>
        <title>Akigi</title>
    </head>
    <body style='margin: 0; padding: 0; width: 100%; height: 100%;'>
        <div id='akigi-web-client' style='width: 100%; height: 100%;'>
            <canvas id='akigi-game-canvas' width='900' height='560'></canvas>
        </div>
        <script src='/web_client.js'></script>
        <script>
            window.wasm_bindgen('web_client_bg.wasm').then(start)

            function start () {
                const { WebClient } = window.wasm_bindgen
                const rust = new WebClient()
                rust.start()
            }

            function downloadBytes(path, callback) {
              window.fetch(path)
                  .then(response => response.arrayBuffer())
                    .then(bytes => {
                        bytes = new Uint8Array(bytes)
                        callback(bytes)
                    })
            }
        </script>
    </body>
</html>
We have a CI job for deploying the game's web client which ends up running the following:
set -e

ak dist download-game-server --name="current-prod" -o /tmp
ak test game-server-integration --server-staticlib /tmp/libgame_server.a
ak deploy web-client --name="latest-green-master"
We first download a static library binary of the game server that is currently running in production.
We then run our integration tests against it. If they pass we know that the latest client code is compatible with the live server.
Then, if those tests passed, we deploy the web client by copying the HTML, Wasm and JS into our public-acl s3 bucket.
 Web client automatically deployed if latest integration tests pass against a staticlib of the
server that is currently in production.
Web client automatically deployed if latest integration tests pass against a staticlib of the
server that is currently in production.
Next Week
We can't automatically deploy the game server because at any point there can be players connected to it via websocket.
So we need to explicitly decide to deploy it.
I've started working on a process that will allow me to deploy the game server.
The final CLI command should end up looking something like ak deploy-game-client --shutdown-timer 30,
which would mean that the gave will get updated in 30 minutes and connected players will see a
countdown indicating this.
More on that next week!
Cya next time!
- CFN
July 7, 2019
Hey!
I finally finished the physically based rendering tutorial - after 7 weeks!
I'll be posting it later this week on chinedufn.com.
I plan to integrate a lot of what I learned into the game engine - so I consider it all time well invested.
Financials
Our financials for June 2019 were:
| item | cost / earning |
|---|---|
| revenue | + $4.55 |
| photoshop | - $10.65 |
| clubhouse | - $10.00 |
| AWS | - $89.02 |
| ngrok | - $10.00 |
| --- | --- |
| total | - $122.95 |
Last months AWS bill was $113.79. We cut that down by $24.77 this month to $89.02 by getting rid of some unnecessary resources.
$90/month for AWS is right at the threshold where I'm considering consolidating some resources to get it down to around $30-$40 - but ultimately I think I'll focus on getting something worth paying for out rather than changing my server setup (going from ECS to EC2 for a few servers) only to have to change it all back later.
I'm adding one more ECS deployment for the payment serfer - so the bill should creep back over $100 in the next month or two.
Luckily after that there shouldn't be anything else to pay for until we have paying players and need to scale. But this sure is good incentive to hit that point more quickly.
We cancelled our Clubhouse subscription since it doesn't work well offline. In the last month we've started working offline heavily in order to focus without distraction. For now we're managing tasks using markdown files. If at some point that breaks down - we'll figure out where to go from there.
Another $4.55 ($4.99 - Stripe's cut) made this month. Let's bump that up soon!
Next month we should be adding around $20/month to our expenses since we'll be purchasing Substance Painter and Substance Designer subscriptions.
Next Week
Before integrating some new rendering techniques into the engine I'm going to take a week to finish up our continuous deployment.
The easier it is to deploy - the more I will deploy. This is critical in these early days where I want to be rapidly putting out new mechanics and art for the early players.
The last (and hardest) thing left to set up continuous deployment for is the game's websocket server, so that should take up all of this week.
Cya next time!
- CFN
036 - June 9, 2019
Hey!
Still working on the physically based rendering tutorial and then incorporating what we learn there into the game.
Next Week
Cya next time!
- CFN
036 - June 9, 2019
Hey!
Still working on the physically based rendering tutorial and then incorporating what we learn there into the game.
Next Week
Cya next time!
- CFN
035 - June 2, 2019
Hey!
Still working on the physically based rendering tutorial and then incorporating what we learn there into the game.
Financials
Our financials for May 2019 were:
| item | cost / earning |
|---|---|
| revenue | + $4.99 |
| photoshop | - $10.65 |
| clubhouse | - $10.00 |
| aws | - $113.79 |
| ngrok | - $10.00 |
| --- | --- |
| total | - $122.95 |
Our AWS bill went up by $80 this month due to some new resources that we added for AWS ECS. There were some that we didn't need, so going forwards this should shrink down to $70/80 dollars per month or so.
We also got our first "paying player!" I put that in quotes because they signed up not as much to play but rather to support the game .. but hey .. it's a start!
Next Week
Get this physically based rendering blog post published and start incorporating PBR into our game engine.
Cya next time!
- CFN
033 - May 12, 2019
Hey!
As we mentioned last week, our goal for this passed week was to continue to polish the first quest in the game.
We made a lot of progress on some of the underlying code that powers quests, but we fell short on our goal of finishing up the art for the quest.
We'll have to pick back up on the art work during a future week.
 Talking to Pookie will start the first quest in the game.
Working with the database
We were previously using a Postgres installation on our local host machine for our database - which led to inevitable issues and annoyances whenever we'd change version or switch computers.
This week we moved to running Postgres from a Docker container.
We also extended the Akigi CLI (ak) (powered by StructOpt) with a new subcommand, ak db.
Here's a quick look at the new ak db interface.
$ ak db -h
ak-db 0.0.1
Chinedu Francis Nwafili <frankie.nwafili@gmail.com>
Work with our database

USAGE:
    ak db <SUBCOMMAND>

FLAGS:
    -h, --help       Prints help information
    -V, --version    Prints version information

SUBCOMMANDS:
    create-migration    CreateMigration
    help                Prints this message or the help of the given subcommand(s)
    migrate             Run migrations against one of our environments
    seed                Seed one of our databases
    start               Start a postgres database docker container
And here's an example of the ak db migrate CLI. We used to use knex for migrations, but we've migrated our local
and production database to use dbmigrate instead.
$ ak db migrate -h
ak-db-migrate 0.0.1
Chinedu Francis Nwafili <frankie.nwafili@gmail.com>
Run migrations against one of our environments

USAGE:
    ak db migrate --command <command> --env <env>

FLAGS:
    -h, --help       Prints help information
    -V, --version    Prints version information

OPTIONS:
    -c, --command <command>     [possible values: Up, Down, Redo, Revert, Status]
    -e, --env <env>             [possible values: Dev, Int, Prod]
Being able to quickly and easily start our local database, run migrations and seed data has made for a much smoother dev experience!
Persisting Items / Quests
When a player connects to the game we'll now load up their inventory and quests from the database.
When they disconnect we'll now persist their inventory and quests to the database.
Some elbow grease went into getting this set up and adding tests to our test suite since we didn't have much persistance prior to this - but now it's looking like everything is working correctly.
Next Week
Next week is our second Investment Week. We'll be automating the deploy process for the game server.
This is trickier than the previous deployment processes that we automated because they were all stateless. Our game server is stateful and at any point tens or hundreds or thousands of players can be connected via WebSocket.
We have a plan to execute on - so we just need to dive in.
I'll be traveling a bit later in the week so I'll try and get as much done as I can before then.
Cya next time!
- CFN
034 - May 26, 2019
Updates should be pretty slim for the next couple of weeks.
Working on enhancing our game engine's renderer.
Working on 3 interactive Rust + WebGL + Wasm tutorials over the next ~2 months
— C Francis Nwafili (@chinedufn) May 9, 2019
- Exporting + rendering materials from Blender
- Efficient LOD terrains
- Shadow mapping via depth textures
Will start writing the first one in ~10 days. Will post the progress as I go!
- CFN
033 - May 12, 2019
Hey!
As we mentioned last week, our goal for this passed week was to continue to polish the first quest in the game.
We made a lot of progress on some of the underlying code that powers quests, but we fell short on our goal of finishing up the art for the quest.
We'll have to pick back up on the art work during a future week.
Talking to Pookie will start the first quest in the game.
Working with the database
We were previously using a Postgres installation on our local host machine for our database - which led to inevitable issues and annoyances whenever we'd change version or switch computers.
This week we moved to running Postgres from a Docker container.
We also extended the Akigi CLI (ak) (powered by StructOpt) with a new subcommand, ak db.
Here's a quick look at the new ak db interface.
$ ak db -h
ak-db 0.0.1
Chinedu Francis Nwafili <frankie.nwafili@gmail.com>
Work with our database

USAGE:
    ak db <SUBCOMMAND>

FLAGS:
    -h, --help       Prints help information
    -V, --version    Prints version information

SUBCOMMANDS:
    create-migration    CreateMigration
    help                Prints this message or the help of the given subcommand(s)
    migrate             Run migrations against one of our environments
    seed                Seed one of our databases
    start               Start a postgres database docker container
And here's an example of the ak db migrate CLI. We used to use knex for migrations, but we've migrated our local
and production database to use dbmigrate instead.
$ ak db migrate -h
ak-db-migrate 0.0.1
Chinedu Francis Nwafili <frankie.nwafili@gmail.com>
Run migrations against one of our environments

USAGE:
    ak db migrate --command <command> --env <env>

FLAGS:
    -h, --help       Prints help information
    -V, --version    Prints version information

OPTIONS:
    -c, --command <command>     [possible values: Up, Down, Redo, Revert, Status]
    -e, --env <env>             [possible values: Dev, Int, Prod]
Being able to quickly and easily start our local database, run migrations and seed data has made for a much smoother dev experience!
Persisting Items / Quests
When a player connects to the game we'll now load up their inventory and quests from the database.
When they disconnect we'll now persist their inventory and quests to the database.
Some elbow grease went into getting this set up and adding tests to our test suite since we didn't have much persistance prior to this - but now it's looking like everything is working correctly.
Next Week
Next week is our second Investment Week. We'll be automating the deploy process for the game server.
This is trickier than the previous deployment processes that we automated because they were all stateless. Our game server is stateful and at any point tens or hundreds or thousands of players can be connected via WebSocket.
We have a plan to execute on - so we just need to dive in.
I'll be traveling a bit later in the week so I'll try and get as much done as I can before then.
Cya next time!
- CFN
032 - May 5, 2019
Hey!
Last week we were on a team trip at my job so I didn't get any work done on the game.
Financials
Our financials for April 2019 were:
| item | cost / earning |
|---|---|
| revenue | + $0 |
| photoshop | - $10.65 |
| clubhouse | - $10.00 |
| aws | - $32.12 |
| ngrok | - $10.00 |
| monitor | - $1,424.03 |
| --- | --- |
| total | - $1486.80 |
A few new items this month.
We've started using Clubhouse.io to organize / manage / visualize our upcoming work.
We also purchased a new 27 inch computer monitor since it was getting difficult to create 3D models on our 15 inch laptop screen.
The rest should look fairly usual.
Our AWS bill will be a bit higher ($100+) in May since we were using some additional resources that we didn't get charged for until early May. We should be able to bring that back down to $50-$60 per month.
Next Week
We'll continue working on adding new graphics and work on polishing up the first quest in the game.
Cya next time!
- CFN
031 - Apr 21, 2019
Hey!
Since last time we checked in I made a sweeping change to the codebase to allow for one entity to have multiple meshes.
Before the multiple mesh support refactor
Previously every mesh corresponded to one entity - but this broke down recently while we were working on an entity that needed to be rendered using multiple different meshes.
 The old
 Model enum that we've now removed.
After the multiple mesh support refactor
Now we have MeshName to represent our different meshes and IconName to represent our different icons.
With this one entity can have zero or one icons and any number of meshes. This allows us to create entity's that were previously impossible to create.
![]() We now have an
We now have an IconName enum for icons.
 We now have a
 MeshName enum for icons.
Next Week
For next week we'll create a bunch of new 3d models in Blender, some of which we'll leverage using our new multiple meshes for a single entity support.
We'll also fix some UI issues that we've run into while play-testing the first quest in the game.
Cya next time!
- CFN
031 - Apr 21, 2019
Hey!
Since last time we checked in I made a sweeping change to the codebase to allow for one entity to have multiple meshes.
Before the multiple mesh support refactor
Previously every mesh corresponded to one entity - but this broke down recently while we were working on an entity that needed to be rendered using multiple different meshes.
The old Model enum that we've now removed.
After the multiple mesh support refactor
Now we have MeshName to represent our different meshes and IconName to represent our different icons.
With this one entity can have zero or one icons and any number of meshes. This allows us to create entity's that were previously impossible to create.
![]() We now have an
We now have an IconName enum for icons.
We now have a MeshName enum for icons.
Next Week
For next week we'll create a bunch of new 3d models in Blender, some of which we'll leverage using our new multiple meshes for a single entity support.
We'll also fix some UI issues that we've run into while play-testing the first quest in the game.
Cya next time!
- CFN
030 - Apr 7, 2019
Hey!
We mentioned Last week that this week was our first Investment Week, and it went great!
Our goal for last week was to fix a problem where we'd make mistakes with our deployments here and things wouldn't work when people would try the game.
In order to do this we were to set up continuous deployment for 3 of our 4 core services.
We managed to set up CD for two of those services, our website / web application and our authentication server.
Continuous Deployment
We're using terraform to provision all of our AWS resources such as load balancers, AWS ECR (elastic container registry) repositories, IAM users, groups and policies, and many more.
The majority of the week was spent learning what these different AWS services were and understanding how to piece them together to set up continuous deployment to AWS ECS (elastic container service).
Our new setup is that on ever commit to our master branch our CircleCI workflow will run our tests, and if tests pass it will deploy our
auth server and website server to ECR, as well as deploying our WebAssembly website application to S3.
Our payment server should work largely the same way when we set up continuous deployment for it in the future.
The one that needs more thought though is our game server. We can't just simply deploy on green master builds since there will be players connected to the server.
We need a deploy process that will warn players of an upcoming server stoppage, give them time to finish what they're doing and log off, then automatically
restart the server. We'll think through this deploy process in a future Investment Week.
Financials
Our financials for March 2019 were:
| item | cost / earning |
|---|---|
| revenue | + $0 |
| aws | - $32.12 |
| ngrok | - $10.01 |
| --- | --- |
| total | $42.13 |
We didn't get charged for photoshop in March, the payments landed on Feb 28th and April 1st.
So there will likely be two photoshop charges for our April financials.
Next Week
Next week I'll be back to working on the highest priority items for my 5 Priority Weeks of my Super Cycle.
This mainly comes down to building our the first quest and making a lot of art for it.
Cya next time!
- CFN
029 - Mar 31, 2019
Hey!
Two weeks ago we introduced a new approach to our game development process that we call our Super Cycle, inspired by a process of the same name that we use for
product development at my day job.
We wanted to kick off on April 1st, so we used the last two weeks to get a head start on the cycle and just generally start feeling out the new process.
We implemented a few things in the Rust + Wasm WebGL client such as rotating towards the direction that we're walking, hunting huntable entities and even whipped up a few basic models and icons. Among other things!
(As usual - these are all first passes and will need improvement and gloss over time.)
Tomorrow begins the first day of our first Super Cycle and I'm already very excited to make some focused progress!
Super Cycles
To quickly re-cap, our Super Cycle is a 6 week process that is split into two phases.
Phase 1 I'm calling the Investment Week. This is the first week of the cycle where we decide on what we'll be doing for the next 5 weeks after this first week,
and is also time that we can spend working on things that aren't necessarily the exact thing that we need to do right this moment but will pay dividends over time.
Phase 2 I'm calling the Priority Weeks. This is the last 5 weeks of the cycle when we execute on the things that we need to be doing right now do give players a better experience.
Then we rinse and repeat.
I usually like to avoid inventing names for things and concepts when possible - but naming our phases and development process makes it a bit more fun which can be a difference maker when you're working on a multi-year project that requires consistent incremental progress regardless of the ebbs and flows of your life and focus.
Just to be clear - we'll still be releasing as frequently as possible all throughout those 6 weeks. We are in no way moving away from deploying frequently.
I'm loving the new Super Cycle process so far based on informally trying it out these last two weeks.
As I've worked on the game and its underlying tech for the last three years (way back when I was using Node.js on the backend and JS on the frontend!) I've come across lots of ideas of things to make to improve my work flow such as Percy, blender-iks-to-fks landon and lots and lots of other things.
When these ideas would come I'd usually instantly jump on them.
I found that in the last 2 weeks when ideas came I wrote them down and tucked them away - knowing that I could get to them during a future Investment Week.
Instead of instantly jumping on ideas that I'd have for investing in scaling longer term I was forced to stash them and prioritize them against other things that I could do during Investment Week.
I'm expecting this to be a massive improvement in my workflow since in the past I would let them pull me away from making progress on core gameplay.
Each time spending a 1-2 days or even sometimes 1-2 weeks of time away from delivering a great game sooner rather than later.
Granted those pull-aways would've all been shorter if I wasn't just working on the game in my spare time - but even still we want to be more deliberate about how we spend our time and never let things pull us in a new direction unless it's an intentional act of prioritization.
I will want to continue to work on these things and make these improvements to my workflow and tooling - just in a more structured and prioritized way.
The first Investment Week
Our first Investment Week has a heavy focus on further automating our deployment processes. Right now it's too easy for me to accidentally mess up a deploy since parts of the process are manual.
@chinedufn FYI the https://t.co/jwit4o1h8z links are pointing to local host - you might want to fix that for folks who would like to try it out.
— Sherif Mansour (@Kerberosmansour) March 30, 2019
At this time there is no fully automated deployment for any of our services.
I've been improving our deployment scripts here and there - but nothing is quite so seamless yet.
An example of this is that I've known of an issue in the authentication server that can crash threads when people try to sign up for over a week now. The fix is simple, but I
haven't gotten to it yet because I didn't want to go through the process of sshing into the server, pulling new code and creating a new release build.
Our CI has been red for months. I fixed it at one point but it's red again. This is mostly due to CI not really controlling anything right now. There is nothing that happens when CI is green.
Having my deployments be based on green CI will give me good reason to make sure that tests are always passing and make sure that I'm paying attention to the entire test suite, not just the tests for whatever I happen to be working on at the time.
Continuous Deployment via AWS ECS
There are four main services right now.
The authentication server, the billing/payment server, the website server and the websocket powered game server.
I'll be setting up continuous deployment of the authentication server, the billing/payment server and the website server this week after I get the test suite passing in CI. I'll be following this CircleCI tutorial on automating AWS ECS deployments.
The game server will need a much more complex deploy process since at any given time there can be thousands of active websocket connections to a game server.
I haven't begun to think through that deploy process yet. So for now it will still be a somewhat manual process until some future Investment Week when I decide to tackle it. Maybe even in the next one!
The first Priority Weeks
For the 5 Priority Weeks of this Super Cycle I'll be focusing on two overarching things.
One is being able to complete the first quest in the web client. Right now I have an integration test that completes the quest in code - but completing it in game requires UI elements, meshes and polish that do not yet exist.
 An integration test that completes the first quest in the game by pretending to be a real player.
The second is creating and rendering the equipment UI. Right now we have a basic inventory interface taking shape - and by the end of this cycle we should have something similar for player equipment.
All throughout I'll be writing new tests and features, and creating new interfaces and meshes.
I'm hoping to end this cycle with things starting to look much more like a game.
Next Week
I'll update you next week on how the first Investment Week of the first Super Cycle went!
See ya next time!
- CFN
029 - Mar 31, 2019
Hey!
Two weeks ago we introduced a new approach to our game development process that we call our Super Cycle, inspired by a process of the same name that we use for
product development at my day job.
We wanted to kick off on April 1st, so we used the last two weeks to get a head start on the cycle and just generally start feeling out the new process.
We implemented a few things in the Rust + Wasm WebGL client such as rotating towards the direction that we're walking, hunting huntable entities and even whipped up a few basic models and icons. Among other things!
(As usual - these are all first passes and will need improvement and gloss over time.)
Tomorrow begins the first day of our first Super Cycle and I'm already very excited to make some focused progress!
Super Cycles
To quickly re-cap, our Super Cycle is a 6 week process that is split into two phases.
Phase 1 I'm calling the Investment Week. This is the first week of the cycle where we decide on what we'll be doing for the next 5 weeks after this first week,
and is also time that we can spend working on things that aren't necessarily the exact thing that we need to do right this moment but will pay dividends over time.
Phase 2 I'm calling the Priority Weeks. This is the last 5 weeks of the cycle when we execute on the things that we need to be doing right now do give players a better experience.
Then we rinse and repeat.
I usually like to avoid inventing names for things and concepts when possible - but naming our phases and development process makes it a bit more fun which can be a difference maker when you're working on a multi-year project that requires consistent incremental progress regardless of the ebbs and flows of your life and focus.
Just to be clear - we'll still be releasing as frequently as possible all throughout those 6 weeks. We are in no way moving away from deploying frequently.
I'm loving the new Super Cycle process so far based on informally trying it out these last two weeks.
As I've worked on the game and its underlying tech for the last three years (way back when I was using Node.js on the backend and JS on the frontend!) I've come across lots of ideas of things to make to improve my work flow such as Percy, blender-iks-to-fks landon and lots and lots of other things.
When these ideas would come I'd usually instantly jump on them.
I found that in the last 2 weeks when ideas came I wrote them down and tucked them away - knowing that I could get to them during a future Investment Week.
Instead of instantly jumping on ideas that I'd have for investing in scaling longer term I was forced to stash them and prioritize them against other things that I could do during Investment Week.
I'm expecting this to be a massive improvement in my workflow since in the past I would let them pull me away from making progress on core gameplay.
Each time spending a 1-2 days or even sometimes 1-2 weeks of time away from delivering a great game sooner rather than later.
Granted those pull-aways would've all been shorter if I wasn't just working on the game in my spare time - but even still we want to be more deliberate about how we spend our time and never let things pull us in a new direction unless it's an intentional act of prioritization.
I will want to continue to work on these things and make these improvements to my workflow and tooling - just in a more structured and prioritized way.
The first Investment Week
Our first Investment Week has a heavy focus on further automating our deployment processes. Right now it's too easy for me to accidentally mess up a deploy since parts of the process are manual.
@chinedufn FYI the https://t.co/jwit4o1h8z links are pointing to local host - you might want to fix that for folks who would like to try it out.
— Sherif Mansour (@Kerberosmansour) March 30, 2019
At this time there is no fully automated deployment for any of our services.
I've been improving our deployment scripts here and there - but nothing is quite so seamless yet.
An example of this is that I've known of an issue in the authentication server that can crash threads when people try to sign up for over a week now. The fix is simple, but I
haven't gotten to it yet because I didn't want to go through the process of sshing into the server, pulling new code and creating a new release build.
Our CI has been red for months. I fixed it at one point but it's red again. This is mostly due to CI not really controlling anything right now. There is nothing that happens when CI is green.
Having my deployments be based on green CI will give me good reason to make sure that tests are always passing and make sure that I'm paying attention to the entire test suite, not just the tests for whatever I happen to be working on at the time.
Continuous Deployment via AWS ECS
There are four main services right now.
The authentication server, the billing/payment server, the website server and the websocket powered game server.
I'll be setting up continuous deployment of the authentication server, the billing/payment server and the website server this week after I get the test suite passing in CI. I'll be following this CircleCI tutorial on automating AWS ECS deployments.
The game server will need a much more complex deploy process since at any given time there can be thousands of active websocket connections to a game server.
I haven't begun to think through that deploy process yet. So for now it will still be a somewhat manual process until some future Investment Week when I decide to tackle it. Maybe even in the next one!
The first Priority Weeks
For the 5 Priority Weeks of this Super Cycle I'll be focusing on two overarching things.
One is being able to complete the first quest in the web client. Right now I have an integration test that completes the quest in code - but completing it in game requires UI elements, meshes and polish that do not yet exist.
An integration test that completes the first quest in the game by pretending to be a real player.
The second is creating and rendering the equipment UI. Right now we have a basic inventory interface taking shape - and by the end of this cycle we should have something similar for player equipment.
All throughout I'll be writing new tests and features, and creating new interfaces and meshes.
I'm hoping to end this cycle with things starting to look much more like a game.
Next Week
I'll update you next week on how the first Investment Week of the first Super Cycle went!
See ya next time!
- CFN
028 - Mar 17, 2019
Welcome back!
Over the last two weeks I mostly worked on things that I need for www.akigi.com.
Because I'm building my own library for building client side web apps with Rust most of my work wasn't on the Akigi website, but rather on adding feature to Percy that I needed for Akigi.
The main thing that I worked on were a procedural macro for routing - along with a few other smaller features.
The reason for this was mentioned in the last journal entry - we were working on adding the ability to sign up for a monthly membership subscription to the game from the website.
I'm most of the way there - but still have a few checklist items left before you can start paying for the game from the website.
After that I'll be turning my attention back to the gameplay and really focusing in on making something compelling that we can start putting into the hands of some real players!
A New Development Process Going Forwards
I said that I'll be focusing on gameplay - but I've said that before.
Inevitably something always comes up with my underlying tech or infrastructure that causes me to jump away from the game in order to build or fix that tech/infrastructure problem.
While I want to continue investing in my underlying tech so that long term I can build at an incredible pace, I don't want to let that constantly pull me away from building gameplay functionality.
I need a more healthy balance. I have much more tech than actual gameplay and that needs to change.
The way I'm changing that is by adopting a new development process that will force me to prioritize, plan and then produce in a much more strategic cadence.
The idea came from a process that we use at my day job called Super Cycles - which was inspired by blog posts by buffer, basecamp and
intercom about their own product development processes.
The Super Cycle
The way that my Super Cycle will look for Akigi is very similar to how we do it at my job.
I'll have a 6 week cycle - 1 week for prioritizing and planning, 5 weeks for producing, then I'll rinse and repeat.
Prioritizing/Planning Week
During the prioritizing/planning week (PP week) I'll be planning what needs to get done next. I'll also be allowed to work on pure engineering / technical infrastructure work that isn't user facing.
Things like as improving deployment scripts or our CI setup, or automating different parts of my development workflow.
Anything that invests in our ability to produce long term - but isn't necessarily an immediate problem that needs to be taken care of.
Having this dedicated week gives me the time and space to invest in tech that will increase our development speed and reduce friction - but all in a defined chunk of time so that I have to pick and choose what I invest in now vs. what can come in future planning weeks.
Produce Weeks
The next 5 weeks are produce weeks. This is when I execute on the prioritization/planning that happened during PP week and build things that will have a direct impact on players.
This will usually be things such as working on art assets, adding a new area to the game, building new things to do in the game or really anything that provides an immediate benefit to players.
This isn't to say that no engineering/technical investments will happen in this time - but if they do they'll only be ones that are absolutely necessary and are blocking other Produce work. An example of this would be deploying a server to accept payments. In order for players to be able to sign up and pay for the game I'd need to create a way for them to do so.
While doing so I might notice ways that I might refactor the deployment process for faster deploys. That would then be something that I'd note and save for a future PP week.
PP week is for prioritizing and planning as well as projects that aren't immediate wins, and the product weeks are for delivering gameplay and features that players will love.
I'm hoping that this new structure will help me focus on doing the right things at the right times, and I'm sure that as we go we'll notice little tweaks that we can make to the process to make it more and more efficient and tailored to how I work best.
Next Week
By next week I'll have the payments server working so that players can pay for the game (although there's certainly work left to make it even worth paying for).
I'll also build the first version of the equipment interface so that you can equip and dequip items in the game.
I'll be starting off the first Super Cycle on the first Sunday in April, so until then I'll continue to build features and think a bit more about how I want the cycle to look.
Cya next time!
- CFN
027 - Mar 3, 2019
Hey!
It's been two weeks and I've gotten a lot done - but sadly nothing that you can see and play with.
Fixing the texture atlas compilation process
I got a new laptop towards the end of January, and in February I noticed that by texture atlas compilation script wasn't working properly.
Had an imagemagick script to flatten PSD layers of my choosing into a PNG file but upgraded imagemagick recently and that broke down..
— C Francis Nwafili (@chinedufn) February 15, 2019
So after a couple hours of googling for existing tools decided to try my hand at writing my own exporter.
Looks doable - will open source!
It was generating all black for all of my textures, whereas it used to generate the expected colors.
# Some sort of weird issue while using
 imagemagick for my Photoshop exporting script.
After some time I started working on my own .psd file parser and ended up publishing it on GitHub at the psd crate.
# After porting my compilation process to using
 psd under the hood.
Website
I wrote a library called Percy mid 2018 so that I could use Rust to build Akigi's website.
Of course - this means that anytime I need new functionality that doesn't exist I need to go and add it.
This time around I needed to add a procedural macro for creating routes.
I've gained a bit of proc macro experience recently so this only ended up taking a weekend.
Financials
Our financials for February 2019 were:
| item | cost / earning |
|---|---|
| revenue | +$0 |
| aws | -$33.03 |
| photoshop | -$10.65 |
| --- | --- |
| total | -$43.68 |
Next Week
There are two things needed to be able to work on the game full time:
-
The game is good enough that people are playing it
-
The game is making money
In order for number 2 to even be possible, we need to implement billing/payments.
I'm going to focus on doing that this week, so that I can turn my entire focus back to making a game that's worth playing.
Cya next time!
- CFN
026 - Feb 17, 2019
Short update this week! I'll have more visuals next week!
I started the week by making it possible to mouse over the conversation text when talking to an npc and then clicking on it. That works like a charm.
Mid week I noticed that some tests were failing but I hadn't noticed because CI has been red for months ever since I did a big refactor. So I fixed some stuff and CI is now green again and I won't let that slip again.
Cleaned up the integration test for the first quest a bit and now it's much more readable. Previously the steps were inlined in one functionn but now they're split up to one function per step which in turn call their own sub functions when necessary. Much easier to maintain.
Along the path to green CI noticed that one of my tests for converting some PSDs into a texture atlas was failing. At which point I noticed that the script was no longer working properly and was just generating a black texture atlas.
Narrowed it down to imagemagick - think it's because I got a new laptop that's running a new version.
Tried to find an old version of imagemagick and couldn't. Didn't feel like building from source and permanently depending on an old version. Also tried googling for a couple hours to figure out how to export layers in later versions imagemagick as well as researching other tools but nothing that I wanted to use turned up.
So I opened up the PSD spec and started working on a crate to turn a PSD file into a data structure that I can make use of. I worked on it a bit and now have it working well right now. Going to use my free time today and tomorrow to create a little demo and then open source it.
Then I'm right back to working on the game client's gameplay and graphics.
See ya next time!
- CFN
025 - Feb 10, 2019
For the past nearly three years the focus has been on setting the technical foundation for the game, but of late we've switched to working on gameplay and things that players see and interact with.
Along that vein, one of the first things that I added this week was some basic lighting.
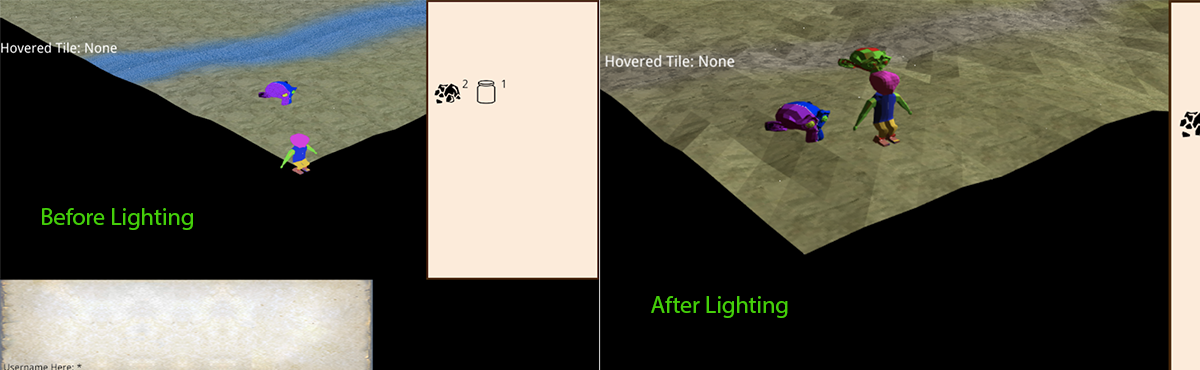 Before and after adding our basic lighting.
The depth that was added to the scene from this basic lighting was a pleasant reminder about how small graphical enhancements can make a world of a difference.
I'm still not sure about the exact visual style that I want for the game, but I keep visualizing darker tones so I'll need to experiment with and explore that direction to see if I land on something that fits what I want to communicate with the game.
Fixing Terrain Bugs
Next up I fixed an issue that was causing entities to be rendered below the terrain.
Our terrain is comprised of a grid of tiles, each tile being two triangles.
When rendering an entity we'll figure out what tile it is on, and which of the triangles within that tile that our entity is currently above.
From there we'll create a ray at the entity's (x,z) coordinates that is above the terrain and pointing downwards.
We use this ray to run the watertight ray-triangle intersection algorithm against the triangle that the entity is above in order to find out the y coordinate of the terrain at the player's current location.
Then we render the player at that y coordinate. This way as an entity moves around it is always rendered on top of the terrain.
We've had this could in place for at least a couple of months but it wasn't working. The player would just jump above or below the terrain.
I figured out that it was due to a floating point precision issue. Instead of being rendered at a height of say, 1.91 or 1.45, the height was always 1.0 or 2.0.
Remember how I said that I was casting a ray downwards. Well I was setting the origin as some really large number. So large that there wasn't enough precision in our calculation.
Simply dropping that number to a more reasonable ray origin of 99 fixed the issue. We just need an origin that is always above the terrain, and right now our highest terrain height is 1.96 units.
The terrain code had tests but they weren't as extensive as other parts of the client since they were written when I first first getting used to testing the game client. Had there been better tests this bug likely would've never happened.
All in all took about an hour to track down.
Chatting with NPCs
I then got started on the conversation panel that you see when you talk to an npc.
 Starting a conversation with an entity. You're supposed to be able to click to select a response but I haven't
added that interaction yet.
Starting a conversation with an entity. You're supposed to be able to click to select a response but I haven't
added that interaction yet.
A conversation with an npc is a graph. Each node in the graph has the text that the player or npc has spoken and then a vector of responses.
// Some of our types that power conversations with npc's
// These were written before I started more extensively commenting..
// So I'll have to circle back to explain these fields with comments..

#[derive(Deserialize, Debug, Default)]
#[serde(deny_unknown_fields)]
pub struct ConversationGraph {
    pub nodes: HashMap<u16, ConversationNode>,
    pub start_nodes: Vec<u16>,
}

// TODO: Make fields private
#[derive(Deserialize, Serialize, Debug, Default, Clone, PartialEq)]
#[serde(deny_unknown_fields)]
pub struct ConversationNode {
    pub text: String,
    pub speaker: Speaker,
    pub responses: Vec<Response>,
    #[serde(default)]
    pub weighting: u8,
    pub criteria: Option<EntCriteria>,
    /// Reaching this node advances the entity to another step in a quest
    pub quest_advance: Option<Quest>,
    /// Items that you receive when you reach this conversation node
    #[serde(default)]
    pub receive: Vec<InventItem>,
    #[serde(default)]
    pub consume: Vec<InventItem>,
}
In the gif above there is only one response, but different nodes in that conversation will have multiple responses to choose from.
That conversation is already written out, I just couldn't show it because I haven't finished adding the client side functionality to be able to click the respond and advance in a conversation.
As mentioned last week, our user interface code is still young so I'm still feeling my way into the correct abstractions to be able to add new interactive interfaces quickly.
For now I just implement exactly what I need and then if I've seen the same pattern a few times I'll abstract it. That is just to say that after we build a few more interfaces we'll have a better sense of how to quickly build new interfaces going forwards.
Centering Text
One new bit of functionality that I needed was being able to center text.
My original plan was to write a method to iterate over the glyphs that I was going to render, find the midpoint and then shift the glyphs to be centered at that midpoint midpoint, but just as I got started I remembered that there is an existing library that does this.
So I migrated from rusttype to glyph_brush. glyph_brush uses rusttype under the hood so I felt confident that it would all work fine.
I ended up just reading the glyph_brush example and then figuring out how to make use of it in our code. This went mostly smoothly minus some caching issues that ended up just being
due to glyph_brush's' default hashing algorithm having collisions on 32 bit systems. WebAssembly is 32 bit.
Tests
I'm really appreciating our tests. I've fallen into a routine where I can build out complex functionality without needing to run the game in the browser.
Then at the end I'll fire up the game and visually verify that everything works (since you can't trust fully a test until you've seen what it's testing).
Personal
I spent Saturday getting a physical and then hanging out with my sister and her husband so didn't spend as much time working on the game this weekend as usual.
Didn't finish all of the interactions so you can't actually click on the responses yet.
I'll get that working this week and continue to work on the game client. My focus right now is making it possible to finish the first quest in the game client.
We have an integration test for this quest so it definitely works on the backend, so we'll mainly need to add the user interface and graphics in order to complete it on the frontend.
This means that you'll be seeing lots more visual improvements over the coming weeks!
See ya next time!
- CFN
024 - Feb 3, 2019
Lately I've felt like I've been at peek focus and the progress has been compounding.
Sure, there's still plenty of room for me to get better at prioritizing what I work on and just generally working smarter not harder,
but that aside I'm really enjoying feeling more and more on track to turning Akigi into an awesome game.
I feel as if I'm beginning to see the light at the end of the tunnel in terms of being able to release an early version of the game and have people play it while I improve it over time.
Which is strange because if you were to pull up the game right now you wouldn't see much. Just some placeholder graphics that are hard to even make sense of.
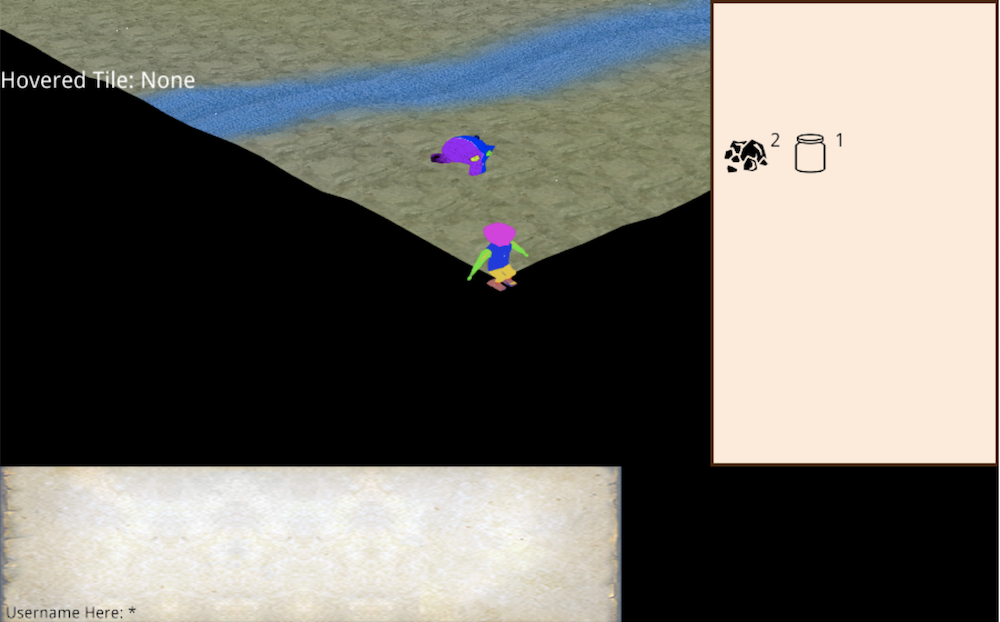 The current state of the game client.
But behind this embarrassing simplicity is years of iterating on the code and tools that make it easier for me to add gameplay, and they're finally converging to a place where I can see the power.
That isn't to say that I'm not just going to magically have a great game. I still need to do a good job of executing on game design and the feeling of the world and gameplay.
Plus, even today I have more places to enhance, improve and simplify my codebase and tooling than I can reasonably prioritize any time soon.
No, I think that this great feeling is just coming from working on gameplay feeling easier and less painful than times past.
Since Rust makes it so easy to refactor I'm finding that over time my codebase is getting easier to work in and I'm getting faster.
Instead of being slowed down by the technical debt that can accrue as you build your own game engine, I'm empowered to address it when the burden grows to great without worrying about accidentally breaking things.
Terraform
Since my last journal entry I've gotten the terraform config working and am using it in production.
My EC2 instance, subnets, VPCs, Route53 DNS records and a few other resources are all specified in my .tf files
and it's a breathe of fresh air.
I was able to delete quite a bit of documentation on setting up servers for the game in favor of configuration files and scripts.
As with everything there's more room to automate my dev-ops and deploy processes over time, but getting my infrastructure into terraform config files was one great step forwards.
Equipment
One of the next big things that I want to add into the game client is a frontend into the equipment system.
I've had the backend in place for a couple of weeks now but haven't spent as much time on the frontend as I need to.
I've started using Figma to design the front-end interface.
The code for rendering interactive interfaces in my engine is still a bit young so the next few interfaces are going to take a little longer than they should going forwards.
Even so, I'm still excited to make these enhancements and start making some progress on the interface front.
 Using Figma to design the game interface and figure out how to lay things out.
Financials
Our financials for January 2019 were:
| Item | Cost / Earning |
|---|---|
| Revenue | +$0 |
| AWS | -$30.55 |
| Photoshop | -$10.65 |
| New Laptop | -$4990.83 |
| --- | --- |
| Total | -$5032.83 |
The big expense from January was purchasing a new laptop. I bought one because:
-
My old one didn't have enough disk space so I was frequently deleting things to make space. Mainly my
targetdirectories across a few of my Rust projects. (I didn't want to deal with an external hard drive.) -
I wanted compiling Rust / my IDE experience to be faster.
Both problems are now solved. The speed is great for maintaining focus and just generally feeling less bogged down while I work.
A big expense though.. I'll need to come back to this when filing my taxes....
Next Week
A few months ago I re-factored the networking protocol for the game and that led to needing pretty much the entire codebase to change since it was previously coupled to protocol buffers (which I no longer use).
At the time I fixed almost everything, but there's still a little bit of code that I haven't fixed from that refactor.
One being the code for conversations and the integration test for the first quest in the game.
So for next week I'm going to have that quest working and add as many graphics as I can to the game in support of that quest.
If all things go smoothly you should see some graphical enhancements to the game client throughout the week and especially by next week.
I'll also continue to work on the design for the equipment frontend so that I can focus in on building that next week.
In general I'm turning a lot of attention towards the game client. My goal is to release a playable version of the game on March 10th and then start iterating in public.
See ya next time!
- CFN
023 - Jan 20, 2019
Back at it again!
Last week I worked on the equipment system that allows players (and some entities) to wear and hold things such as clothing and weapons.
I got almost all of the backend finished, but there's still work left to be done on the front end.
I also did some work on the assets / graphics side of things.
I made a human rig in Blender and made a basic walk animation. It'll certainly need to get re-done, but it's enough to get an alpha of the game live.
I also made a quick mesh for a human - again just to have something in place for an alpha release - it'll need to get re-done and polished.
After that I spent a little time optimizing my script that exports assets from Photoshop into a texture atlas and from Blender into the binary format that my game uses. I used rayon to parallelize the collapsing and exporting of my PSD layers into PNG files, but the real savings came from running a release build of my asset compiler instead of a debug build. This brought me from 15-20 seconds to a few seconds.
In the future when I revisit these asset compiler optimizations I'll implement caching so that we don't re-process assets that have already changed, but I'm not sure when I'll take a look at that.
Next Week
-
Finish my
terraformsetup so that my infrastructure is fully in source control -
Build out the equipment frontend so that players can equip and dequip items.
-
Introducing lighting to improve the look and feel
See ya next time!
- CFN
022 - Jan 13, 2019
Hey!
I missed last weeks dev journal post, but I was finally able to get my WebGL Water Tutorial published and get back into working on Akigi.
The first order of business this week was migrating from my own hand written web bindings in my Rust code to instead using web_sys.
When I first started writing the Rust web client for the game web_sys didn't event exist, but nowadays it's very robust.
I more or less ended up using my water tutorial as a guide since it has working web_sys code and then fumbled around
for a few hours fixing compile time errors until everything worked again.
After porting to web_sys I spent some time improving my dev ops. As the sole developer on Akigi it's important for
all of my processes to be as automated as possible so incremental improvements now will pay off in spades long term.
I started using terraform to create configuration files for managing my infrastructure.
The immediate benefit here is that since I've ported almost all of my old manual process for setting up new AWS resources into configuration files that terraform uses to automatically provision and updated my infrastructure I can now add and modify resources very easily.
This was previously a point of friction that would make me put off things like spinning up the server application for processing payments.
 Me going through the Terraform tutorial
Terraform was very easy to learn and get started with and, while my infrastructure is currently on AWS, it makes it possible to be multi-cloud in the future since it isn't coupled to a single provider.
I also wrote a quit script to deploy the game assets to s3. I was previously drag and dropping them and would often forget to do this when I pushed up a new version of the game.
There's still much more room for improvement on the dev ops side... But we'll continue to approach these enhancements incrementally over time.
Next Week
With those code and process improvements out of the way I've started diving into working on things that you can actually see!
Next week I'll be working on the equipment system and making it possible to render multiple pieces of equipment for a single player.
By the end of the week I'll have a human rig animating a few placeholder models as well as the equipment systems in place on the front-end and the back-end.
This means that the game world will finally have something that resembles a character. It'll be ugly and have poor texturing, but that I can clean up over the rest of this month.
See ya next time!
- CFN
021 - December 23, 2018
Still working on the water rendering tutorial. Just polishing up the art for it. It'll be live by next week.
See ya next time!
- CFN
021 - December 23, 2018
Still working on the water rendering tutorial. Just polishing up the art for it. It'll be live by next week.
See ya next time!
- CFN
020 - December 16, 2018
Hey!
This past week I was supposed to work on rendering water in the game.
I've made quite a bit of progress, but there's still some work left to do.
 Water renderer is mostly working, just need to soften up the water's edges using a depth texture.
We still need to make sure that we're setting the water's transparency based on the depth of the water. This will help make water near the shore more transparent than areas of the water that are deeper.
I'm planning to write a tutorial on everything that I learned about rendering water, so realistically it should take a little over another week before we see any water in the game.
Regardless, a lot of the techniques that we're learning will help us in all of our graphics implementations going forwards, so cheers to progress!
Next Week
I'm going to continue working on the water renderer, write up the tutorial and start getting it integrated into the game.
See ya next time!
- CFN
019 - Dec 09, 2018
Hey!
This past week I was supposed to begin working on rendering water in the game.
I've never written a water renderer before so I've had to do a bit of Googling to figure out how it should work.
After I felt like I had a firm grasp of the concepts I began working on creaing my own water rendering tutorial.
When learning new graphics programming concepts I find it helpful to write a tutorial on the topic.
This gives me a greenfield fresh application to write without worrying about any other surrounding code, as well as the opportunity to really solidify my understanding by having to explain it to others.
So far I have a blue quad that will eventually become water, and a camera controlled by the mouse.
 This blue quad will eventually become water.
I also started working on a scene in Blender that will be included in the tutorial. Since water is reflective we want to render other things in order to demonstrate that.
 Started working on a scene in Blender to render the water onto. This will allow us
to demonstrate reflection and refraction.
Started working on a scene in Blender to render the water onto. This will allow us
to demonstrate reflection and refraction.
Next Week
I'm going to continue working on the tutorial and should have something in place by the end of the week. After that I'll begin integrating the water renderer into the game!
See ya next time!
- CFN
018 - Dec 2, 2018
This past week I was supposed to plan out everything for the game's release.
Made some progress but there's still a bit left. I'm going to pause here though since I have a good roadmap in front of me and am getting a little tired of planning.
This week I'll be working on rendering water in the game.
I haven't written a water renderer before so this might take more than just this upcoming week since I'll need to do some research.
Regardless, next week I'll show you the progress on the water renderer!
Financials
Our net loss for the month of November was $41.12.
| Item | Cost |
|---|---|
| Revenue | +$0 |
| Photoshop | -10.65 |
| AWS | -30.47 |
See ya next time!
- CFN
017 - November 25, 2018
This past week I was supposed to work on a billing server so that players can pay for the game.
I used Rocket, stripe and stripe-rs to get it working and every wrote a couple of integration tests!
I'm now turning my entire focus towards planning out the remaining work left to finish and polish the first release of the game. The goal is to have a concrete, detailed action plan and then stay heads down on bringing it into fruition.
I wanted to get that finished today but started to feel a bit sluggish over the weekend, so I'll spend all of this week finishing up my plan and by next week I'll have a very clear sense and timeline for what's left for launch.
See ya next time!
- CFN
016 - November 18, 2018
This past week I was supposed to continue working on the combat system and have something working that you could see.
Fortunately we were able to get the basic systems in place!
 Engaging in combat with another entity.
Combat Backend
Combat between two entities ends up being powered by a few different systems.
The CombatSystem is responsible for determining whether or not an entity is allowed
to attack another entity, and if it is setting the necessary state to indicate that they
are in combat.
The DamageSystem is, unsurprisingly, called upon when we want to deal damage to an entity.
The SpawnSystem, which originally powered spawning different entities, is now also used to
begin the respawning process when an entity runs out of health.
And then finally the MovementSystem is called upon when you're out of range of the entity
that you are targeting.
We implemented a new method in the MovementSystem that allows you to find a path that
is between a certain distance away and near some position, which will be useful when we
want certain attacks to only work within certain distance ranges. Such as a ranged attack
that requires you to be at least 2 tiles away but no greater than 10 tiles away.
Combat Frontend
We didn't have to do very much to get the frontend working, which felt great because it showed that we're starting to have the foundational pieces in place that make it easier and easier to add new functionality.
We made it so that when you click on an entity with the Attackable there will be an option in
the interaction menu to attack that entity.
 Clicking on an attackable entity shows an
 Attack option.
We also made it so that when an entity takes damage we'll temporarily show a health bar above their head, so that you can more clearly see how much health they have remaining before you've won the battle.
 After taking damage we'll temporarily show a health bar.
As with most of the other frontend work thus far, I'm using placeholder graphics as I get things into place. When we're closer to release we'll need to do several passes over these graphics to get them more production ready.. But for now having just enough visually to see things work is fine.
I also started working on a server to allow players to sign up for a monthly subscription for the game. Since the game needs to make money in order for me to be able to work on it more, it makes sense to start getting a billing backend in place.
Next Week
By next week I'll have the billing server live and deployed and it will be possible to pay for the game. Granted, we don't even have production quality graphics or gameplay in place yet so we're a bit of a way from the game actually being worth paying for.
However, I'm hoping that making it possible to sell the game will help me stay focused on the things that are necessary for release (and thus revenue.. and thus more time to continue working on the game) vs. things that are important but not mandatory and can be improved after release.
We want to release quickly and iterate on and improve the game.
We'll also plan out the first city in the game so that we can start getting it into place.
Now that many of our backend and frontend modules are in place it should hopefully be easy to continue to extend them to support more interesting gameplay.
Building the first city and all of the things to do in it will put these systems to the test and we'll extend and improve them as we go.
See ya next time!
- CFN
015 - November 11, 2018
This past week I was supposed to get the combat system in place.
I made a good bit of progress on the backend implementation, but nothing that would be visible to you.
Things such as building out a CombatSystem DamageSystem and SpawnSystem to power the different elements
of combat.
I'll need a bit more time to finish up the backend and get the frontend in place.
Next Week
I have a vacation coming up next week so I'll have some larger chunks of time to make progress on Akigi.
By next week I'll have new things for you to see. Until then take care!
See ya next time!
- CFN
014 - November 4, 2018
This past week I was supposed to get the inventory system working and rendering with some placeholder images.
I was a bit sick during the week but had a great Saturday morning and by Saturday at around 11:15am I had the inventory back-end and front-end in place.
 Rendering an inventory with a couple of items. Clicking on an item pulls up a menu to interact with the item.
Working on this feature marked a couple of milestones in terms of coding practices for both the game back-end and front-end.
On the back-end I've started using the failure crate to better create and handle errors within our different methods.
For example, when an entity attempts to pickup an item, we'll first check to see if it has an inventory.
If not, we'll log an error and return an InventoryError::NoInventory failure.
 Making use of the
 failure crate
On the front-end I've started to use test-driven development for all of the functionality implementation.
I've been using TDD on the back-end for some time, but not as much on the front-end since I was just getting used to writing and structuring my Rust + WebAssembly code and didn't have the mental bandwidth to worry about tests.
Now that I'm pretty comfortable with Rust on the front-end I've begun to write tests for everything that I'm working on.
It's great because I don't need to refresh the browser. I built just about the entire inventory front-end using TDD and went days without needing to check on it in a browser.
I actually have a lot of great things to say about unit testing in Rust, but that's another subject.
The Inventory System
On the back-end we have an InventorySystem and Inventory component that power all of our inventory logic and data.
For example, we have methods for picking up items, dropping items, and combining items in order to create new items.
 Clicking on an item that can be picked up. Clicking "Pickup" will send a message to the backend.
When this message gets processed the
Clicking on an item that can be picked up. Clicking "Pickup" will send a message to the backend.
When this message gets processed the InventorySystem will make the player pick up the entity.
Future Tooling Thoughts
While working on the inventory I started thinking about how I'll be making and storing the icons for the different items in the game.
As a one person team, automation is critical. The more that I can delegate work to my tools instead of me needing to do it manually, the more possible it will be for me to release and grow the game by myself.
The method that came to mind for my icons is having an automated process that iterates over my meshes in Blender, positions a camera to look at the mesh, renders an image of the mesh and then includes that rendered image in our texture atlas.
In theory it sounds like it should give me free access to icons for any game entity without needing to do extra work whenever I make a new entity.
In practice I'm imagining that it'll take a few iterations and edge cases before it works smoothly.
For example, for an animated model I might want the screenshot to come at a certain keyframe and not just at the bind pose.
Or even for a static model I might want the camera to be at a specific angle.
For a system like this I'd start by ignoring those concerns, and then if they actually came up I'd address them when I needed to.
It'd probably just boil down to being able to override my default icon rendering process using some easy to configure settings in a settings file.
Then on a case by case basis I could override the rendering settings for any model that I wanted to.
This is just brainstorming of course, I'd wait until I actually needed something like this before ever implementing it.
Yeah, none of this is a concern at the moment - we can revisit this after we've started adding real (non-placeholder) meshes to the game and have a much better sense of how and where we're making use of our models.
Financials
Our net loss for the month of October was $40.38. Just our usual Photoshop and AWS expenses this month.
Still earning $0 in revenue per month, but hopefully that'll change once we get the game launched!
| Item | Cost |
|---|---|
| Revenue | +$0 |
| Photoshop | -10.65 |
| AWS | -29.73 |
Next Week
By next week I'll implement the first piece of the combat system, melee. Specifically you'll be able to use the boxing style against other entities.
See ya next time!
- CFN
013 - October 28, 2018
This past week I was supposed to work on the inventory system and plan out the payment system that will allow people to pay for the game.
I'm made almost no progress this week. Just about every day I had some work or friend event to attend.
A bit disappointing.. but I'll try to make up for it by having a very focused week this week.
This has been a few weeks straight of accomplishing less than I had expected due to external distractions, which suggests that I need to figure out how to re-focus and stay on track.
I have the designs and plans for the inventory system - so by next week I'll make sure to have it all working.
 The sketch file where I work on the game designs before I implement them.
See ya next time... hopefully with much more progress!
- CFN
013 - October 28, 2018
This past week I was supposed to work on the inventory system and plan out the payment system that will allow people to pay for the game.
I'm made almost no progress this week. Just about every day I had some work or friend event to attend.
A bit disappointing.. but I'll try to make up for it by having a very focused week this week.
This has been a few weeks straight of accomplishing less than I had expected due to external distractions, which suggests that I need to figure out how to re-focus and stay on track.
I have the designs and plans for the inventory system - so by next week I'll make sure to have it all working.
The sketch file where I work on the game designs before I implement them.
See ya next time... hopefully with much more progress!
- CFN
012 - October 21, 2018
This past week I was supposed to work on client side interpolation as well as plan out the monthly subscription system so that people can pay for the game when it's released.
I spent Thursday - Sunday at the Rust Belt Rust conference and spent the few days
before that working on Percy since I was speaking about it at the conference,
so I actually didn't spend much time working on Akigi this week.
However - I was able to get the client side interpolation working on the plane ride back to the city.
 Interpolate the client's position as it moves in between tiles.
The vertical jerking is a bug in our terrain height calculation.
I'll fix that..
Interpolate the client's position as it moves in between tiles.
The vertical jerking is a bug in our terrain height calculation.
I'll fix that..
I'm pretty tired from this weekend so I'll be short here.
Basically - our server tells us where an entity is in tile coordinates such as (0, 0) or (0, 1) for the bottom left
corner tile and the tile right above it respectively.
On the client side we keep track of the 3d world coordinates that we're rendering the model at - such as (0.0, 0.0, 0.0).
If we see that the tile position of the entity is at a different location than our world coordinates, we'll interpolate towards it.
// Real code snippet
impl State {
    fn update_local_entities(&mut self, dt: f32) {
        for (entity_id, server_entity) in self.server_state.iter_entities() {
            let local_entity = self.local_state.entities_mut().get_mut(entity_id).unwrap();

            let tile_pos = server_entity.get_pos().unwrap();
            let tile_pos = (tile_pos.x as f32, -1.0 * tile_pos.y as f32);

            let mut world_pos = local_entity.pos_mut();

            // This entity is already in the proper position. Don't update its position.
            if tile_pos.0 == world_pos[0] && tile_pos.1 == world_pos[2] {
                continue;
            }

            let speed = (1.0 / GAME_TICK_DURATION as f32) * dt;

            // TODO: This code is very similar to the block below - normalize them
            if (world_pos[0].abs() - tile_pos.0.abs()).abs() < speed {
                world_pos[0] = tile_pos.0;
            } else if world_pos[0] < tile_pos.0 {
                // Increase local position
                world_pos[0] += speed;
            } else {
                // Decrease local position
                world_pos[0] -= speed;
            }

            if (world_pos[2].abs() - tile_pos.1.abs()).abs() < speed {
                world_pos[2] = tile_pos.1;
            } else if world_pos[2] < tile_pos.1 {
                // Increase local position
                world_pos[2] += speed;
            } else {
                // Decrease local position
                world_pos[2] -= speed;
            }
        }
    }
}
So if the tile position is (0, 1) we'll slowly interpolate the client position towards (0.0, Y, -1.0).
Note that Y is a variable that depends on the height of the terrain at a given point.
Also note that the z coordinate is negative. In OpenGL negative z is going into the page, but our tile coordinates only use positive numbers so we just flip the sign here.
Next Week
By next week I'll plan out the payment system (likely using Stripe) and build out the backend and frontend for the inventory system that will hold your items.
See ya next time!
- CFN
011 - October 14, 2018
This past week I was supposed to work on the akigi.com website for the game.
A day or two into the week I completely ditched that goal. I quickly realized that "working on the website" wasn't a definitive clear task.
I had no real end goal or target to aim towards and that's always a recipe for disaster.
It was a poor goal for the week and I'm glad that I was lucky enough to sense this before burning much time.
Instead, I switched to a goal of implementing movement. And we got that working!
 Click to move to another tile.
I first started by working on the backend. In the client request handler I added a new handler for movement.
When a player says that they want to move to a certain location we'll process that and if it's a valid location we'll set the player on a path in that direction.
 Handling clients requesting to move to a location.
This is generally how much of our future functionality will be handled. A player says that they want to do something and then we handle that request and change server state accordingly.
After getting the backend in place I started to work on the client side of things. A player needs to be able to
click on a tile and then click "Move Here" in order to tell the server that they want to move.
 Move here interaction.
This led to me refactoring and enhancing my terrain implementation to more easily retrieve information about our terrain tiles so that we could do collision detection.
I added a few new utility functions including an implementation of watertight ray triangle intersection, a function to determine the ray that the player's mouse is casting into the scene and various other bits to help us know which tile is being moused over.
 Utility function to give us all of the tiles between two points to reducer the number of tiles that we need
to do mouse ray collision detection against.
Utility function to give us all of the tiles between two points to reducer the number of tiles that we need
to do mouse ray collision detection against.
Throughout the client side implementation I ran into several bugs where my tests were passing but the moused over tile detection wasn't working properly when I tried it in game.
I eventually started rendering some runtime debug information and was then able to quickly see that my unit tests were flawed and I was expecting off by one information in some places.
 Rendering information about the hovered over tile helped me to eventually figure out why things weren't working and fix it.
My big takeaway from the weekend was that I need to do a much better job of having runtime diagnostic information in place so that I can pick up on things that my unit and integration tests might not be showing me.
Next Week
I'll be speaking at a Rust conference this weekend to speak about Percy so I'm not expecting to get much work done on the game.
By next week I'll implement client side interpolation of our entities' positions and plan out our monthly membership subscription implementation so that people can pay for the game after we release it.
See ya next time!
- CFN
010 - October 7, 2018
Hey!
This past week I was supposed to implement the first version of the public chat system and continue planning out the remaining tasks for releasing the game.
This was my second week in a row of spending much less time on the game than I'd like. I moved on Monday and spent the next couple of days getting my things in order.
I got back to working on the game on Thursday and tried my best to make up for lost time.
 Chat that you enter appears over your characters head for all to see.
When a player types in a chat message and presses enter we'll send that up to the server. Other players will see your message above your head for a couple of seconds before it disappears. Conceptually simple, so the main work was to just get some basic systems in place to cleanly power features like this.
 A function to get screen coordinates from world coordinates so that I can render
the 2D text right above the 3D character's head.
A function to get screen coordinates from world coordinates so that I can render
the 2D text right above the 3D character's head.
Financials
Our net loss for the month of September was $240.84! Probably one of my largest losses yet due to two annual subscriptions that I started.
| Item | Cost |
|---|---|
| Revenue | +$0 |
| AWS | -30.89 |
| Ngrok | -$60.00 |
| SSLMate | -$149.95 |
Two big yearly payments for this month. One for $60 for ngrok which we're using to make it easier to test the game on
mobile devices. The other is $149.95 for a wildcard SSL certificate. I de-activated the 5 or 6 SSL certificates that
I had in favor of this yearly one. Just less to worry about whenever I add new subdomains that need SSL (which seems to be
happening every couple of months..)
We have a monthly photoshop cost of $10.65 but that didn't land until October 1st so that'll be reflected in next
month's report.
Next Week
I'll be traveling to go speak at a Rust conference in a couple of weeks about my young but progressing Rust front-end web library Percy.
So this means that this week is a good opportunity to work on the akigi.com website which is powered
by Percy. I'll be mapping out on paper how I want it to look and then working on the site.
For some places where I'll want to highlight images of the game I'll leave a placeholder image in lieu of adding a more polished screenshot when I make some progress on the graphics.
I'll also continue working on planning out the remaining work for releasing the game.
See ya next time!
- CFN
009 - September 30, 2018
Hey!
This past week I was supposed to implement terrain rendering
and make more progress on planning out everything that's left to do before the initial release of Akigi.
I was off my routine a bit since I was at my job's team trip for most of the week, but luckily I still managed to make some progress.
 We render our terrain using a heightmap and multi-texturing it with
a blendmap.
We render our terrain using a heightmap and multi-texturing it with
a blendmap.
Our terrain is a grid of triangles with the y dimension for each vertex determined
by sampling from a height map image.
When we render the terrain we sample from a blend map and use the sampled blend map color to determine the weightings of four different ground textures for that fragment (currently grass, stone, water and dirt but those are placeholders).
When we render entities such as players we ask the Terrain struct for the height at
the location of the entity and use that to determine the entity's y coordinate in the world.
This ensures sure that an entity is always rendered just on top of the terrain even though our terrain has varying heights.
I didn't get much planning done during the week due to travels, but I ended up making up for this on Saturday and Sunday. Our release planning is progressing nicely and I have a much clearer sense of the remaining work.
 When I'm finished planning a task I give it a pink "Fully Planned" label.
At our current pace I'm expecting to be done planning in mid October and then ready for release around mid December.
Right now these are estimates based on the planning that I've done so far.
When I'm done planning out my release tasks I'll have a much more concrete sense of the exact release date.
On Saturday I took a little time to smooth out some of the deployment process. I now have a script to automatically deploy the game's web client. Needing
to manually run commands and drag and drop files into AWS S3 was becoming a bit of a hassle since I deploy once a week right now.
I also purchased a wildcard SSL certificate for *.akigi.com, replacing my old individual certificates.
Next Week
Next week I'll continue planning out the remaining items in my release checklist. It feels like we're roughly 1/3rd of the way through planning out our release tasks so if we can get it to 50% by next week that will be wonderful.
I'll also implement the pieces of the chat system that I want in place for release - namely being able to enter chat text on desktop and have it appear above the players head.
I'm going to hold off on implementing chat on mobile devices and displaying recent messages in a chat box until after release.
See ya next time!
- CFN
009 - September 30, 2018
Hey!
This past week I was supposed to implement terrain rendering
and make more progress on planning out everything that's left to do before the initial release of Akigi.
I was off my routine a bit since I was at my job's team trip for most of the week, but luckily I still managed to make some progress.
We render our terrain using a heightmap and multi-texturing it with
a blendmap.
Our terrain is a grid of triangles with the y dimension for each vertex determined
by sampling from a height map image.
When we render the terrain we sample from a blend map and use the sampled blend map color to determine the weightings of four different ground textures for that fragment (currently grass, stone, water and dirt but those are placeholders).
When we render entities such as players we ask the Terrain struct for the height at
the location of the entity and use that to determine the entity's y coordinate in the world.
This ensures sure that an entity is always rendered just on top of the terrain even though our terrain has varying heights.
I didn't get much planning done during the week due to travels, but I ended up making up for this on Saturday and Sunday. Our release planning is progressing nicely and I have a much clearer sense of the remaining work.
When I'm finished planning a task I give it a pink "Fully Planned" label.
At our current pace I'm expecting to be done planning in mid October and then ready for release around mid December.
Right now these are estimates based on the planning that I've done so far.
When I'm done planning out my release tasks I'll have a much more concrete sense of the exact release date.
On Saturday I took a little time to smooth out some of the deployment process. I now have a script to automatically deploy the game's web client. Needing
to manually run commands and drag and drop files into AWS S3 was becoming a bit of a hassle since I deploy once a week right now.
I also purchased a wildcard SSL certificate for *.akigi.com, replacing my old individual certificates.
Next Week
Next week I'll continue planning out the remaining items in my release checklist. It feels like we're roughly 1/3rd of the way through planning out our release tasks so if we can get it to 50% by next week that will be wonderful.
I'll also implement the pieces of the chat system that I want in place for release - namely being able to enter chat text on desktop and have it appear above the players head.
I'm going to hold off on implementing chat on mobile devices and displaying recent messages in a chat box until after release.
See ya next time!
- CFN
008 - September 23, 2018
Hey!
This past week I was supposed to start making progress on planning out
everything that I need to do in order to put out the first release of Akigi.
I was also supposed to implement terrain rendering.
I fell very short on my goals this week.
When deciding on what I wanted to get done I completely forgot that we were taking a team trip to Oklahoma at my job.
I arrived here on Friday and won't be back home until this coming Friday.
Travels put a bit of a damper on my progress and I ended up doing less release planning than I had hoped to. I didn't start on the terrain renderer until Sunday and I haven't finished.
Going forwards I'll need to be a better job of paying attention to how much time I'll have available in throughout the week while I'm deciding on what I want to get done.
My process for release planning has been to keep a list of things that I need to get done in a Trello board, plan them out on paper, then type out an implementation checklist onto the relevant Trello card.
 Working on planning out everything for launch.
When a card if fully planned it gets a pink Fully Planned label so that I can better see how much planning I have left.
 Each card has a planned out checklist for how to complete it.
Depending on the scope of the task I'm finding that it can take anywhere from ten minutes to two+ hours to fully plan a card.
I'm noticing that I start to slow down a bit mentally when planning through one of the larger tasks, so I'll need to do a better job of breaking tasks down into smaller bite sized tasks that I can more easily hold in my head as I plan.
Next Week
I'll be in Oklahoma until Friday and am not expecting to get much done. This week I'll continue planning out my release checklist and finish the terrain rendering.
Next week we'll be backed to regularly scheduled programming and I should be able to make much more progress.
See ya next time!
- CFN
007 - September 16, 2018
Hey!
This past week I was supposed to implement WebGL text rendering and get skeletal animation working. I've implemented skeletal animation systems enough times that I felt like I had a good sense of how long it would take me, but since I've never implemented text rendering before the timing on that was a bit of an unknown.
Thankfully, we were able to get both text rendering and skeletal animation in place!
 Some text rendering and a simple skeletal animation.
Rendering Text
Before I started this week I knew pretty much nothing about rendering text, so the first thing that I needed to do was look up some references.
I found an example in Rust and also read a few articles about the general concepts and then got started on getting it working in my WebGL application.
I ran into some early stumbling blocks, mainly due to me misunderstanding how things worked. Naturally when you're doing something for the first time you get stuck a bunch, so it took me a couple of sit downs before and after my day job before I got things working.
On Friday at 7:50am the text renderer was in place and I could render whatever text I wanted, wherever I wanted in any font that I wanted. Neat!
Along the way I broke my texture atlas support, but on Friday at 11:05pm I got it working again.
I was previously using my own adapted version of a texture atlas bash script that I found online. You can probably imagine that a bash texture atlas script was difficult to tweak. On friday I migrated to texture_packer and things are looking good!
On Saturday afternoon I started working on the skeletal animation and got it working around 7:40PM. I'm updated my asset build script to export all armatures from Blender and now when rendering a mesh I'll look up the associated armature and make sure that the correct armature data buffer is being used.
Next Week
I was talking about the game with a friend on Saturday and realized that the number one blocker to me having more time to work on it (I really enjoy working on it so I want to work on it more!) is releasing it and just enough players to support full time development.
Without having real players I won't know if it's something that only I find compelling or if others do too.
Since I'm a one person team Akigi doesn't need millions of players to be financially viable, just a couple thousand players paying monthly would be enough to work on it full time.
I like that because it means that I don't need to chase a fad or make something watered down. I can work on what I think is cool and just need a handful of other people to think that it's cool too.
So the number one thing that I need to do by next week if have a list of exactly what I need to get done in order to release.
It can be easy for things that aren't actually necessary to sneak onto a list like that, so my mentality will be to cut it down and cut it down until I can't possible cut anything out.
I'll also set a hard deadline while I'm working on this list to make it easier prioritize and cut things out that aren't 100% necessary.
After this I'll plan out what I need to do for every item on the list.
All of this planning will take me some time, but I'm certain that the time will quickly make up for itself since I'll having a more clear focus on exactly what to be working on.
Cool things that don't make it into the initial release can get worked on post release.
The goal isn't to decrease the scope of the game long term, just to decrease the scope of what's necessary to launch it and then work on the rest post launch.
Aside from this, I'll also be adding a height-mapped terrain support into the game in preparation for working on the first town.
See ya next time!
- CFN
006 - September 9, 2018
Hey!
This past week I was supposed to update my blender-exporter and renderer to support textured meshes as well as add a placeholder 2D UI element that I'd render using WebGL.
For most of the week the wasm32-unknown-unknown target that lets you compile Rust code to WebAssembly was broken on MacOS which slowed me down a bit because I couldn't check to make sure that my textures
were rendering properly.
On Monday I realized that I could use a docker image target wasm32-unknown-unknown on linux so after fiddling around a bit I was able to compile to WebAssembly.
By Thursday morning I was rendering to textures in my mesh visualizer program, and around 1:30am on Saturday I had my game serving a texture atlas that I was using when rendering meshes.
I have the process fairly automated. I save my meshes in Blender and my textures as PSDs and my build script automatically generates a binary with all of my meshes and a texture atlas with all of my textures. The meshes get de-serialized into a data structure that points to the associated texture's coordinates within the larger texture atlas so as I add or change textures and meshes it all just works.
On Saturday morning around 11:40am I got off the phone catching up with my mom and got started on some work. I needed to help my friend uptown around 4:15pm so between lifting, showering and getting ready I had about an hour and a half of the afternoon to make progress. I found a tutorial on rendering 2D sprites which was exactly what I needed to render 2D UI elements.
That first moment that I was able to log into the game on mobile and interact with it and all I needed was a URL was powerful for me. While there isn't much going on just yet, I had a strong feeling that being able to access the game on the web without installing anything and being able to just dive right in would be something special. I'm excited!
On Sunday at 2:38am I had a placeholder "menu" (empty white 2D untextured rectangle) showing up on click and disappearing when I moused out of it. All that was left was to update my touch controls to be able to interact with both the camera and this menu.
 Clicking shows the menu (haven't added options to it yet) and mousing out of it dismisses it.
On Sunday morning I realized that I'd need to be able to access the game on a mobile device locally while I worked on it so that I could get a good sense of how it felt in mobile browsers.
I signed up for Pro ngrok plan ($10/mo) and set up ngrok subdomains for my authentication, asset, game website and WebSocket servers and was able to access localhost from
another device very easily.
 Your first finger shows the menu, your second finger controls the camera.
Side note - I never knew you could plug your iOS device into your laptop and view the console. I had a rendering issue when I first accessed the game from my iPad but by viewing the web inspector I was able to find the issue and fix it within minutes.
Next Week
This week was a first for me since I'd never written re-usable 2D rendering functionality within a WebGL pipeline. In the past I had just used HTML and CSS on top of my WebGL canvas.
Next week will have another first - rendering text with WebGL. I'm going to try using rusttype since it has a few examples that I think I can adapt.
I'll also get vertex skinning / skeletal animation working in the game. I'll make a placeholder skeleton, mesh and animation and render this animation in the game.
Since I haven't rendered text before I'm not sure what stumbling blocks I'll run into.. so I'll just commit to these two things this week. Let's see where this goes.
See ya next time!
- CFN
005 - September 2, 2018
Hey!
This past week I was supposed to automate more or my mesh and texture build pipelines and add texture support to our client renderer. I knew that my sister's wedding would be during the weekend so I tried to make sure to underload my work for the week.
By Tuesday I had my placeholder meshes being automatically packed into a serialized hashmap of models and served to the client. I was successfully rendering the correct meshes for the correct entities by reading from this hashmap. Good early momentum!
But after early wins came some early losses. My version of photoshop that I.. uh.. found a few years ago stopped working right as I was about to create some placeholder textures. I spent a couple of hours trying to create some textures in Procreate (an iPad app) and eventually figured out a good system.
Even so, It was clear that photoshop + a mouse was mostly superior
to Procreate + apple pencil, so I ended up buying the cheapest Photoshop plan for about $10.65/mo after taxes.
Going forwards my texturing workflow will be mostly based on Photoshop but I might use my iPad if I'm on the go or trying to hand draw bits of the texture using the Apple Pencil.
I spent Wednesday and some of Thursday working on automating the texture bits of my asset pipeline. Our textures are Photoshop PSD's with a different layer for different parts of a texture such as the hat, legs, arms or gloves of a model.
 Each piece of the (placeholder) texture has its own layer in Photoshop
Our build script takes all of these layers and merges them into a .png file. We then take all of these .pngs and combine them into a texture atlas. In the future
we'll need more than one texture atlas, but one works for now.
In the future we'll also want to dynamically determine our texture png size based on the dimensions of
the model that is using it. So tiny models would have proportionally tiny pngs.
 Convert PSD files into PNG files
This all worked great and by Thursday afternoon I had an automatically generated texture atlas that I was serving to the client.
Thursday evening and all of Friday I had wedding things for my big sis, but then Saturday afternoon I was able to get back to work. I made progress adding uv support
to my blender-exporter library and quickly had an integration test and implementation for exporting my uvs from Blender.
I then wanted to update my mesh-visualizer that I use to visualize my test meshes to verify that my exported uv's looked correct (a last bit of certainty even though it is heavily tested.)
Unfortunately I upgraded to the latest nightly Rust and started
having issues with the wasm32-unknown-unknown target that powers by WebAssembly builds.
I spent Saturday night and a good bit of Sunday morning trying to fix my issues but with no dice.
Eventually I decided to just wait a few days until (hopefully) the latest nightly works again. This is certainly a trade-off of working with bleeding edge tech. For now I'm only targeting WebGL so short of wipping up a quick desktop OpenGL visualizer I'm stuck waiting for a fix. No worries though, I'll just design next week's goals around this. In the meantime I can just continue TDDing my work so that by the time I need to manually look at the visuals they'll be easy to change / refactor if they didn't work as expected.
--
So I didn't finished getting my textures rendering in the web client this week and I'll have to just have this carry over into next week.
Next Week
I'm anticipating my wasm32-unknown-unknown target being broken until mid week so I'll factor that into my goals for the week.
Next week I will finishing updating blender-exporter to add support for uvs, start rendering textured models in the game client and add a WebGL UI menu that appears when
you click or tap and disappears when you mouse away or tap again.
I haven't made UI elements with WebGL before since I previously always used HTML + CSS for the game's UI so this will definitely take more time than it would if I were more experienced. Monday is labor day giving me some extra time this week.
Financials
Our financials for the month of August were:
- Revenue +$0
- AWS -$30.89
- SSLMate -$15.95
- Photoshop -$10.65
For a grand total of -$57.49
 AWS spend for August 2018
See ya next time!
- CFN
001 - Aug 5, 2018
Hey!
Last week I worked on the www.akigi.com website, as well as creating the devjournal.akigi.com website.
For the Akigi main website I’m using Percy, my work-in-progress toolkit for building web front-ends with Rust.
The Akigi main website is using placeholder images and doesn’t have all of the copy and information and pages that it will need, but getting something live is a good first step and I can iterate from there.
This week I’m going to work on getting an early version of the game live and “playable” on the Akigi website. I put “playable” in quotation marks because I’m going to port the game’s WebGL web client to Rust so I can’t imagine that in one week I’ll have too much more than a blank canvas.
I want the game live so that people can check it out and give feedback all throughout the development process up until release.
I’m porting game’s web client to Rust because after porting the back end to Rust in January 2018 (from JavaScript) I felt much more productive in the codebase and I hope to see the same gains on the client side.
Business & Financials
The first post of every month will include a business & financials update.
I July 2018 Akigi earned $0 in revenue.
As for expenses, I’m not sure.
I’m charging things to a couple different cards that I also use for my personal life so expenses are littered around by card statement. If I had to estimate I would say that I spend less than $50/mo on the game - mostly on Amazon Web Services.
I’ll get all of the expenses onto one dedicated card for easier tracking and reporting and come back with a more detailed breakdown next month.
See ya next time!
- CFN
004 - Aug 26, 2018
Hey!
This past week I was supposed to
-
Have the backend serialize client state, send it down to the client and have the client deserialize those state updates.
-
Render placeholder meshes at the locations of all of the entities in state.
-
Add arrow key and touch controls for making the camera orbit your character.
Getting the state updates serializing/deserializing was pretty straightforwards.
I used serde and bincode to send down the binary data over WebSocket.
 The server and client crates both depend on a
 client-server-common crate with, among other things,
this ClientWorldState struct.
Last week I was using the cgmath crate for my linear algebra but I wanted to move to nalgebra,
mostly because it has really good documentation.
(Side note I discovered nalgebra through GitHub's new recommendations on their homepage so thanks GitHub!)
Porting my math over to nalgebra took under an hour, the examples and documentation were top notch.
After that rendering my placeholder meshes was easy since, again, a lot of this is stuff that I already had working in my JavaScript client and I'm pretty much just re-doing in Rust now that I've fully committed to using the language / ecosystem for Akigi.
Luckily, getting the camera to orbit was also straightforwards since I've done it a bunch of times in other demos / apps, so that came together quickly as well.
 Making sure that the camera controls work on mobile when you touch and drag the screen.
Side Tasks
I knew that I'd be spending Saturday with a family friend and that I would be tired on Sunday from going out with some friends on Saturday night so I short loaded my work for the week. I ended up finishing what I set out to finish on Friday at 5:30am, giving me a couple extra hours to knock off some side tasks.
With that time I migrated from CircleCI 1 to CircleCI 2 and set up a weekly job to deploy the latest dev journal chapter so that I can stop dragging and dropping the files into s3.
It was fun setting up the IAM credentials. Gave my CircleCI just enough access to deploy to my s3 bucket and invalidate my cloudfront distribution. In the past I never really dove into fine grained permissions.
The AWS policy generator was really useful! A friend of mine named Will has engrained in me long ago that I should be careful to not give third party services access to stuff that they shouldn't have access to.
I also got a head start on planning out some of the things that I'll need to implement soon, namely some of the UI and knowing where the player's mouse / finger is clicking on in the 3D world.
Next Week
My sister's wedding is on Friday so I won't be getting much too done from Thursday - Saturday I don't think.
By next week I'll create three more placeholder models and make sure that we render the correct model for the correct entity based on the entity's model component.
I'll also add texture support to my renderer. I'll give each of the placeholder models a placeholder texture and make sure that the correct model is rendering the correct texture.
Doing all of this will "require" some enhancements to my automated asset build process, namely:
-
Exporting all of my PSD texture files into PNGs using
imagemagick -
Combining those PNGs into one texture atlas (in the future multiple, but one is fine for now)
-
Serializing a HashMap of all of my meshes into a binary array (in the distant post-launch future multiple binary arrays at multiple levels of detail, but one is fine for now)
-
Downloading these assets on the client side and using the right one at the right time
"Require" is a bit of an overstatement here. I can get definitely things working with less automation. But one important thing for me is that since I'm a complete noob to art I need it to be as easy as possible to make tiny improvements.
I can't spend many focused hours working on art like I can on code / technical problems, at least not yet. So low friction to rapid iteration is mission critical for me.
I've already built these exporting / preparing tools in isolation, so this week will come down to stitching them together and making sure that the front-end is rendering everything properly.
I'll spend the rest of today planning it all out and try to blaze through most of it before the wedding weekend and finish up the remainder late Saturday and on Sunday.
I'll also need to prepare the financial update for next week (every first dev journal of the month includes a financial update), so I'll need to figure out what I'm spending money on.
I originally thought that I'd just move everything to a seperate business card but that would be a hassle and I'll wait until I've done a few financial updates before worrying about making it easier.
See ya next time!
- CFN
003 - Aug 19, 2018
Hey!
This past week I was supposed to make some changes to our networking code and get a 3d model rendering.
I also started to notice how much of a positive impact keeping this journal has had on my development process. More on that at the bottom.
Networking
Since we've moved away from JavaScript and we're instead using Rust + WebAssembly for our web client we no longer needed to use protocol buffers and we can instead just serialize a client's known world state on the server side and then deserialize it on the client side.
This meant moving away from .proto definitions and instead using serde
with bincode for serialization/deserialization of plain old Rust structs / enums.
Most of the Components in our Entity Component System were unfortunately quite a bit coupled to structs that were
generated by rust-protobuf, so I needed to do quite a bit of refactoring in order to remove the rust-protobuf dependency.

I must have spent around 10 hours fixing compile-time error after compile-time error and there is still some work left.
By Friday 8:30 AM I had made a ton of progress but realized I wouldn't finish in time for this week's dev journal entry if I was going to also get a 3D model rendering.
But also realized I didn't need to finish.. A lot of this backend code gameplay functionality that doesn't matter right now because there is no frontend client to make use of it.
Fortunately we have a solid number of unit / integration tests in place so I'll comment the code back in and get it working little by little over the coming weeks.
For what it's worth I'm very glad that I got pretty far here because while trying to change basically every data structure that the game server uses I went over a few failed iterations before I landed on something that felt like it fit.
If I had switched away from protocol buffers without trying to make changes across the codebase and instead commented everything out immediately I would've landed on one of my earlier terrible data organization / access approaches not realizing that it would become my nightmare in a couple of weeks.
Rendering a Model
Earlier today I got a 3D model rendering in the Rust WebGL game client! You can see for yourself on www.akigi.com!
 Successful rendering!
 The blender File
A month or two ago I wrote a Rust + WebAssembly + WebGL demo for rendering blender models, along with an exporter for exporting Blender meshes and armatures - so my work here mainly boiled down to copy pasting from that demo and leveraging my open source exporter.
Lessons learned from keeping a journal so far
Knowing that I need to have this journal entry up for you every Sunday evening has turned my prioritization up to a level I've never known possible.
I'm loving keeping a dev journal and more generally having a weekly deadline for something that people can see / play with. It's forcing me to not be able to spend time digging into technical things that don't matter right now and instead re-focus on gameplay and stuff that players care about.
This is useful for me because I have a tendency to get absorbed in the technical aspects of building a game and by the time I look up I've done more than was needed and still haven't shipped anything.
For example, I didn't optimize the WebAssembly builds or compress them so I'm basically serving a 2Mb non --release wasm module in production
right now (that should be much, much, much smaller when I run it through wasm-opt and use a --release build).
I was just racing to get something live. Sure it would've been an extra hour or so tops to make sure that release builds are much tinier, but the amount of opportunities that I've had this week to spend an extra hour on something that wasn't a blocker must be at least a dozen or two.
I think it comes down to when you're working alone easily to justify things in your mind or just brush them over, but when you have to explain it to others (you!) it becomes very clear when you're wasting time. A lot of things that I might've dove into and tried to solve are becoming TODOs and I'm sure that I'm going to get an alpha out more quickly because of it.
Here's me writing a TODO instead of spending 30 minutes doing something that I just don't need to do right now:
 Leaving a TODO to save that extra 30 minutes of unnecessary exploration.
Actually as I type this I'm realizing I might not even need this.. maybe I can set a header for cloudfront & the browser to take care of this for me. Anyways - a future problem.
Next Week
By next week I'll start sending down real state updates to the client and rendering placeholder meshes at the locations of all of the entities that are in game state. I won't worry about delta encoding state updates for now - that can come when there is an actual game to play...
I'll also add arrow key controls (desktop) and touch controls (mobile / tablet) for making the camera orbit your character.
See ya next time!
- CFN
002 - Aug 12, 2018
Hey!
Last week I was supposed to get the game deployed so that you could "play" it.
"Play" in quotes because you could technically log into the game, but there would just be a blank canvas.
We got this task done! I hooked up Google and Facebook login via OAuth and you can now login to the game and see a blank black game screen.
This week I'll be working on being able to actually render 3D models in the game. This functionality used to exist, but
since I've moved from JavaScript to Rust I need to re-implement a lot of the client functionality. The hope is that this
minor setback pays off in long term productivity and codebase maintainability.
I already have an open source blender exporter to export the model data
from Blender, so I'll just leverage that in my game's codebase. Shouldn't be too wild.
I'll also be tweaking the game's networking code a bit. Now that I'm using Rust instead of JavaScript on the client side, I
don't need to use protocol buffers anymore. I can just serialize player state updates on the server side using serde, send
them down the wire and then deserialize them on the client side.
This will remove my protobuf and rust-protobuf dependencies meaning that we no longer need some separate specification and toolkit to power our networking protocol.
So far these journal entries haven't been very visual, but hopefully as we start getting things into the new client I'll have pictures and/or videos to share.
But, as always, you can always check out the latest progress on the Akigi website!
See ya next time!
- CFN
001 - Aug 5, 2018
Hey!
Last week I worked on the www.akigi.com website, as well as creating the devjournal.akigi.com website.
For the Akigi main website I’m using Percy, my work-in-progress toolkit for building web front-ends with Rust.
The Akigi main website is using placeholder images and doesn’t have all of the copy and information and pages that it will need, but getting something live is a good first step and I can iterate from there.
This week I’m going to work on getting an early version of the game live and “playable” on the Akigi website. I put “playable” in quotation marks because I’m going to port the game’s WebGL web client to Rust so I can’t imagine that in one week I’ll have too much more than a blank canvas.
I want the game live so that people can check it out and give feedback all throughout the development process up until release.
I’m porting game’s web client to Rust because after porting the back end to Rust in January 2018 (from JavaScript) I felt much more productive in the codebase and I hope to see the same gains on the client side.
Business & Financials
The first post of every month will include a business & financials update.
I July 2018 Akigi earned $0 in revenue.
As for expenses, I’m not sure.
I’m charging things to a couple different cards that I also use for my personal life so expenses are littered around by card statement. If I had to estimate I would say that I spend less than $50/mo on the game - mostly on Amazon Web Services.
I’ll get all of the expenses onto one dedicated card for easier tracking and reporting and come back with a more detailed breakdown next month.
See ya next time!
- CFN